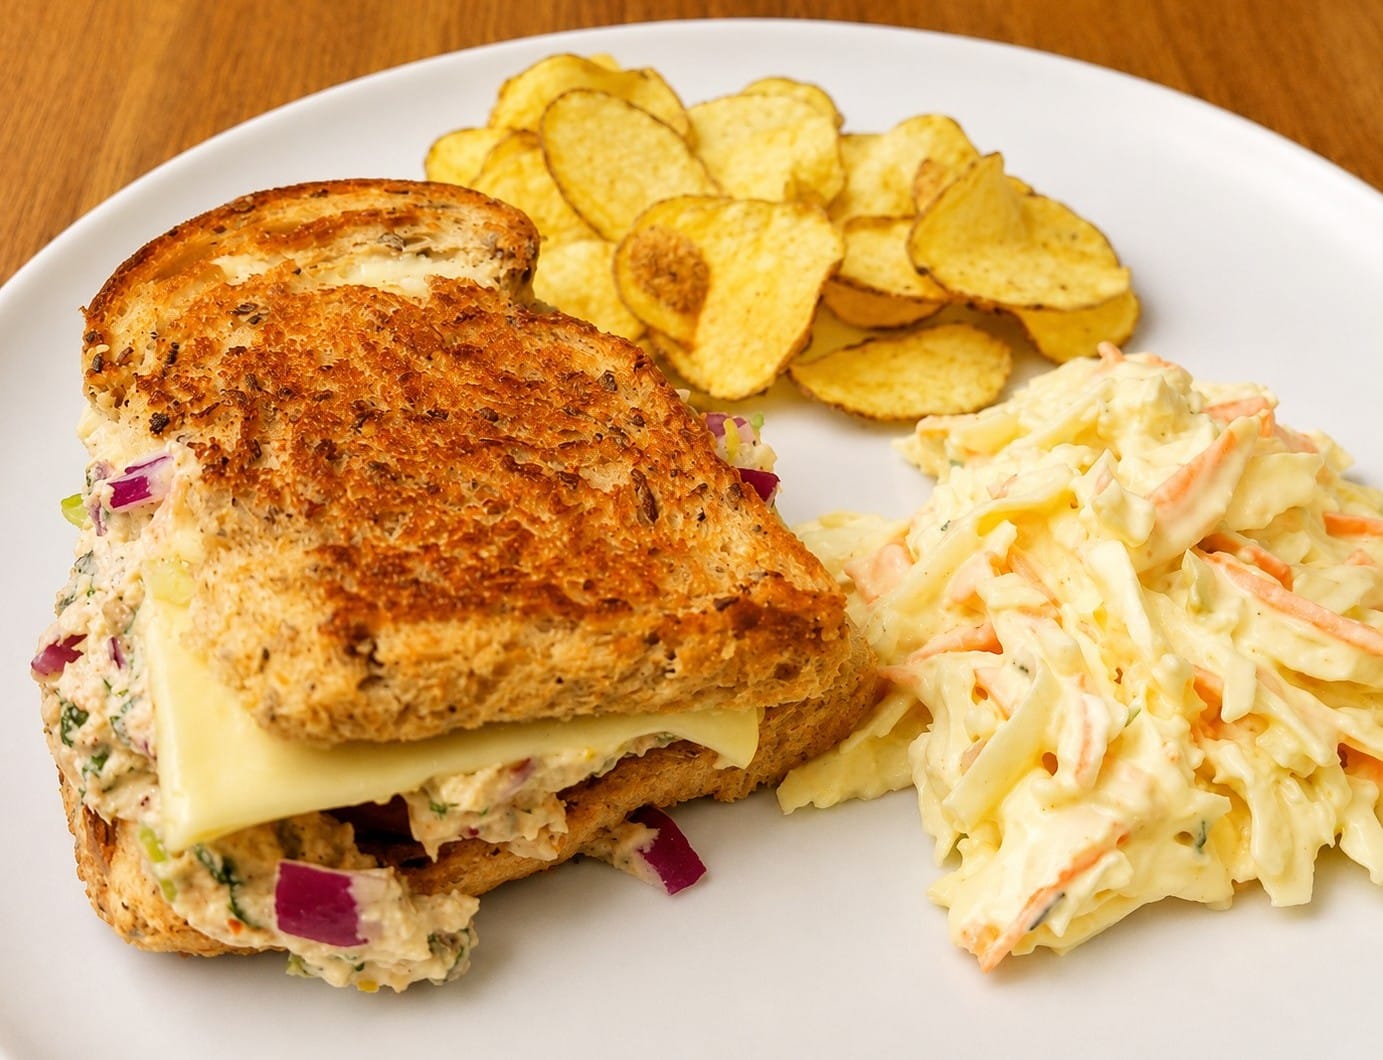
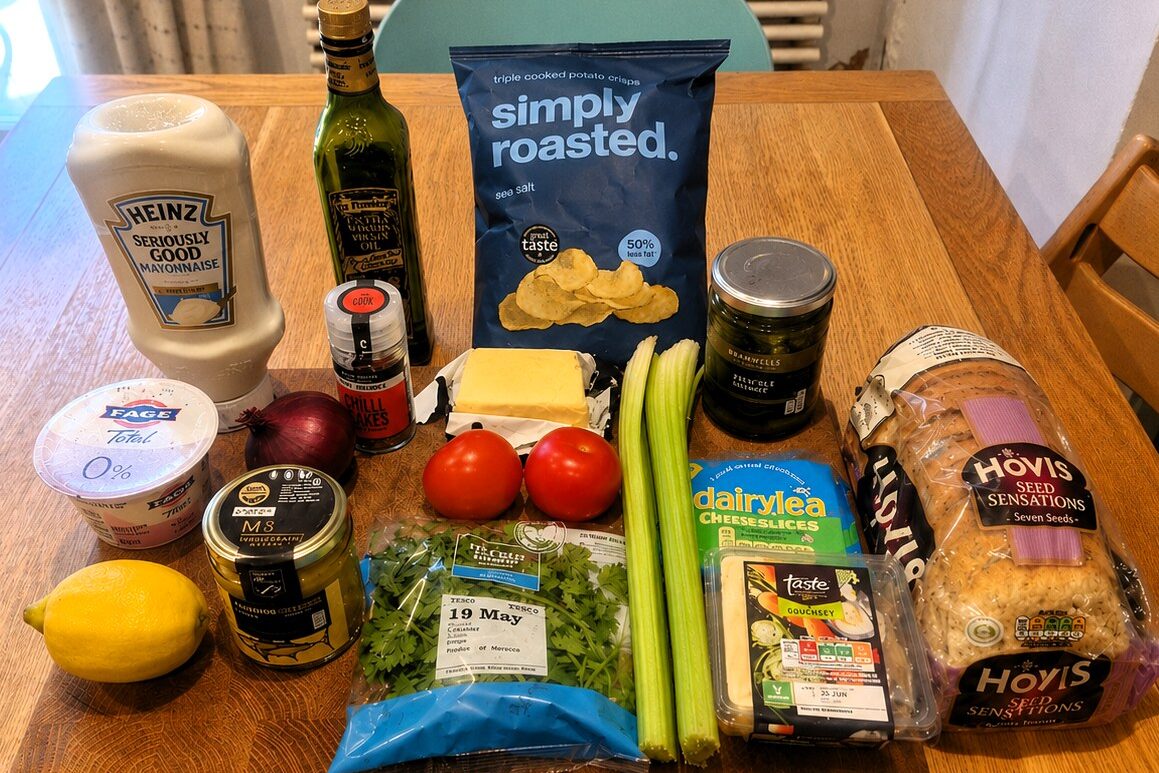
The secret to our best tuna melt? Emily’s special tuna mix – see our Sandwich Dinner post – plus the combination of mature cheddar, and (shock horror) a melting cheese slice! We love the flavour cheddar brings, but you just don’t get the ooze without the slice… And this is after all a Simple Supper so we’re happy to cut corners, and save both time and cost.
A tuna melt is at heart just a grilled cheese sandwich with some tuna on it. In fact the origin story suggests it was invented in South Carolina in the 1960s when a chef accidently dropped some tuna salad on a portion of grilled cheese. But we like to jazz the tuna up a bit. Some combination of mayonnaise, celery, red onions & dill pickles would be traditional in a tuna salad, but we also like to add a touch of spice and some lemon, plus yoghurt to lighten it. We also add some sliced tomato on top. It’s a combination that really works!
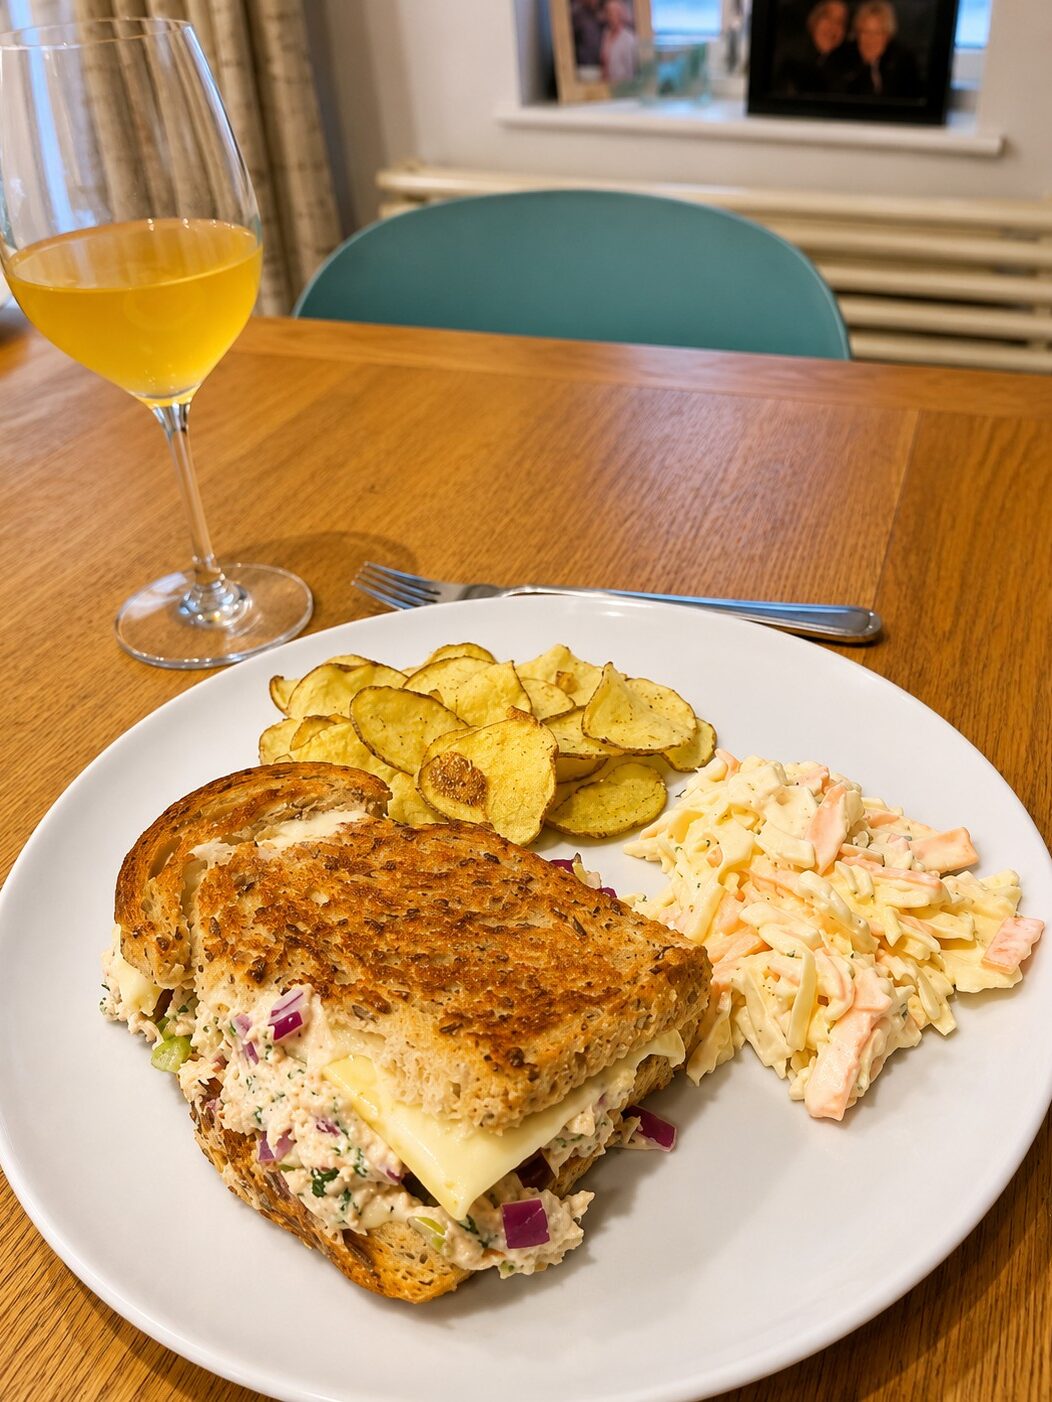
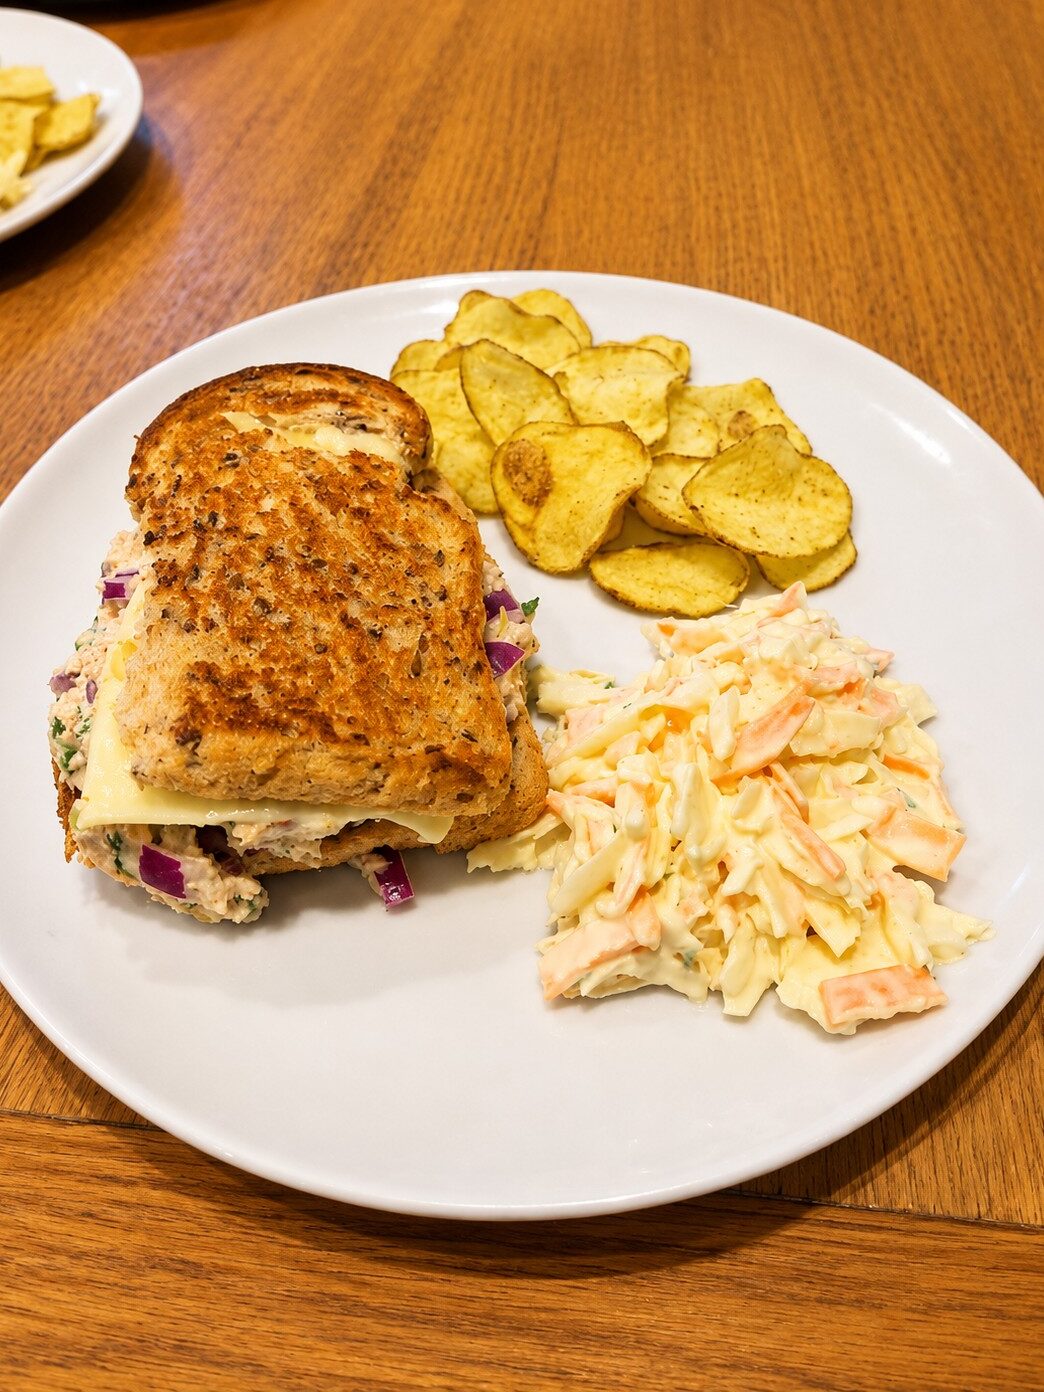
Today, for our simple supper, we served our tuna melt with some ready-made coleslaw and some potato crisps. It’s quite a rich sandwich (we find it a bit much for lunch) so you don’t need very much to complement it; the crisps and coleslaw just add some contrast.
We pan-fry the sandwich rather than grill it, as we find this gives the best, crispest and most luscious result. But it is a bit trickier to do, as the sandwich can stick or break. Alternatively you can put it under the grill – which is easier and will still give a great result. Or use a sandwich maker, if you have one.
You can make the tuna mix ahead – it will keep quite happily in the fridge, certainly for a few hours, and up to two to three days.
The quantities below will make two generously filled sandwiches, with a little filling left over for another day.
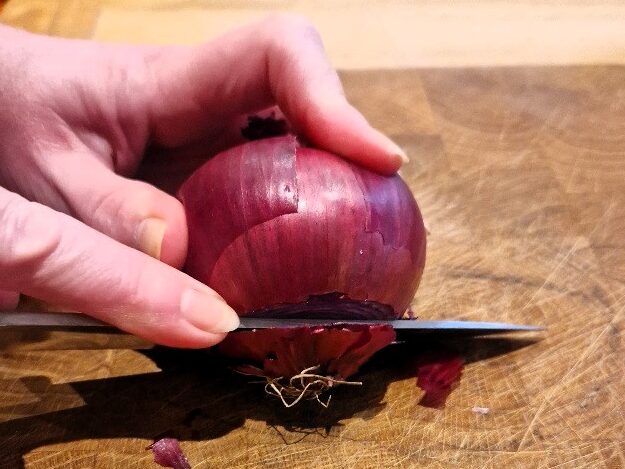
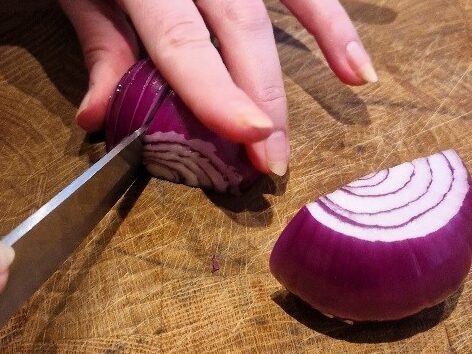
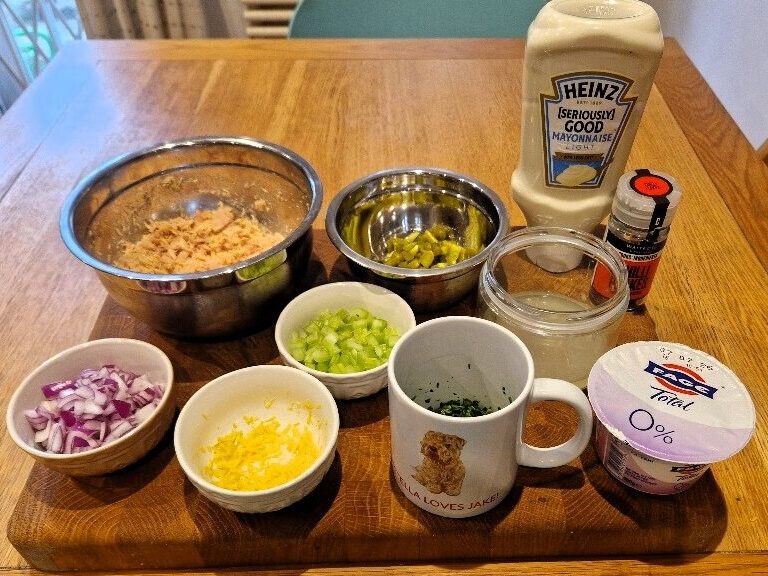
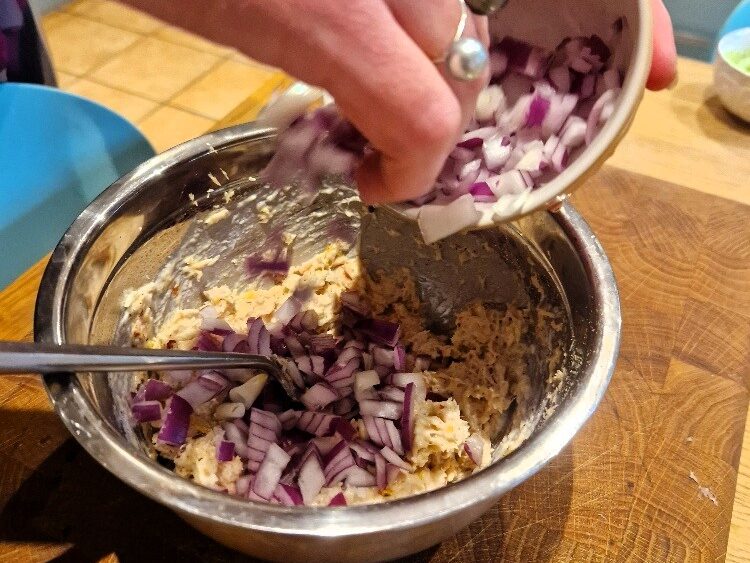
Start by peeling and finely chopping a small red onion. See our onion Tip. A little onion goes a long way – if your onion is medium to large you’ll only need half (if that), and it does need to be chopped really fine.

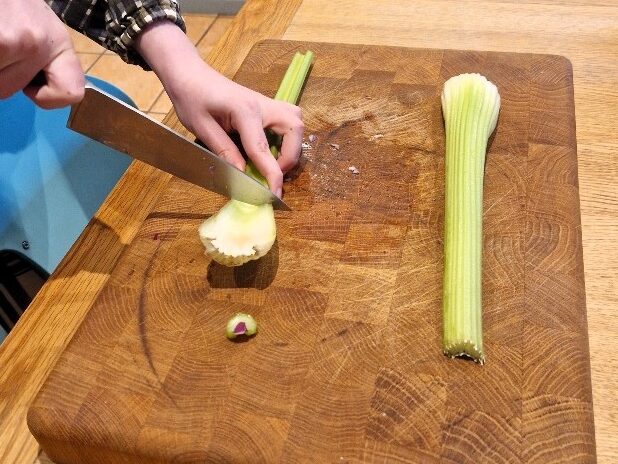
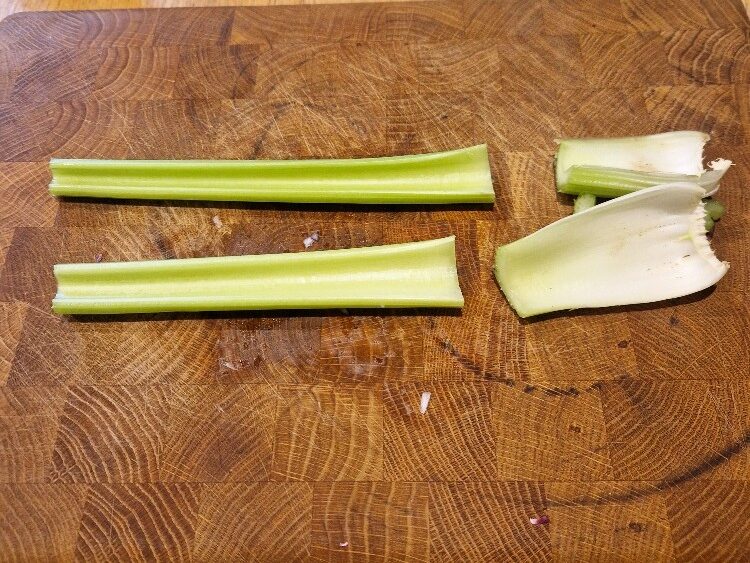
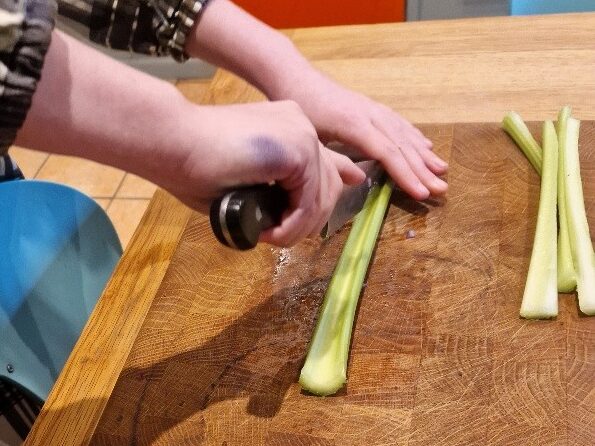
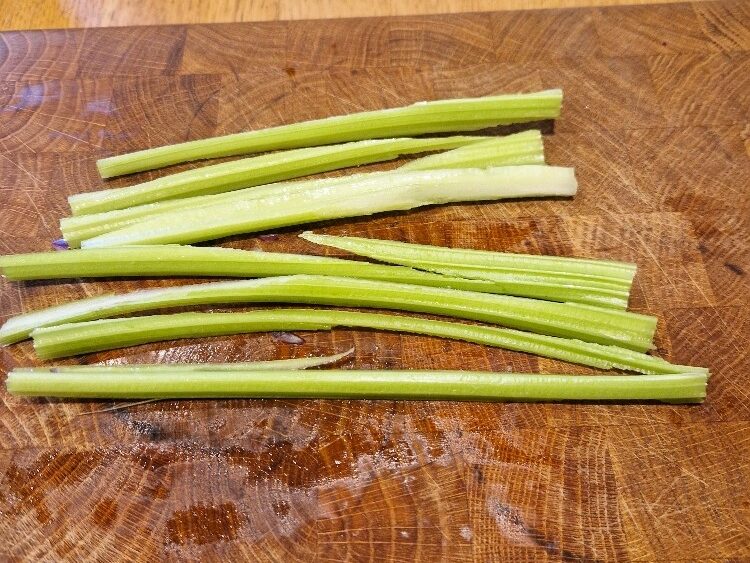
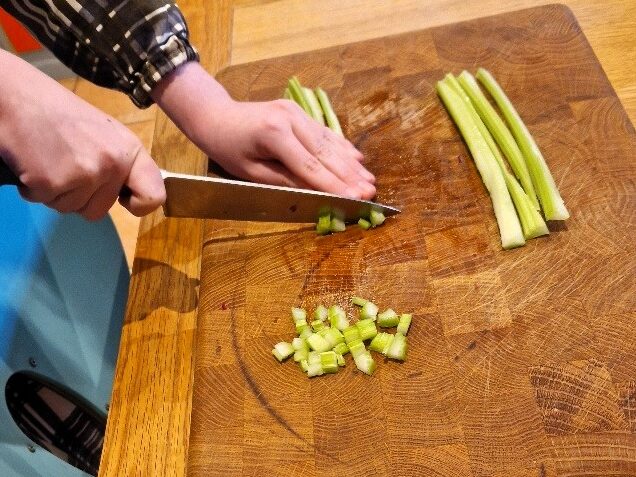
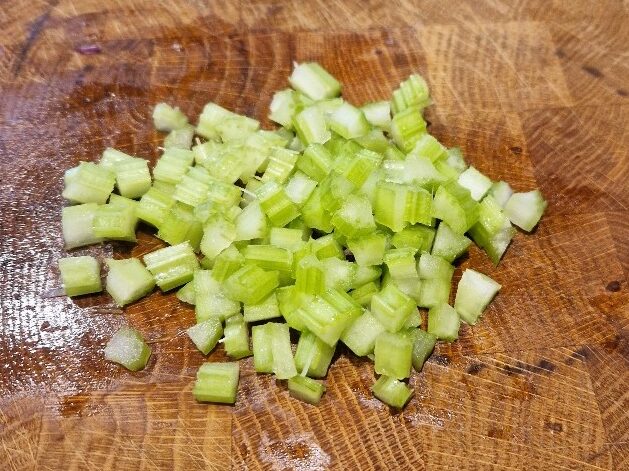
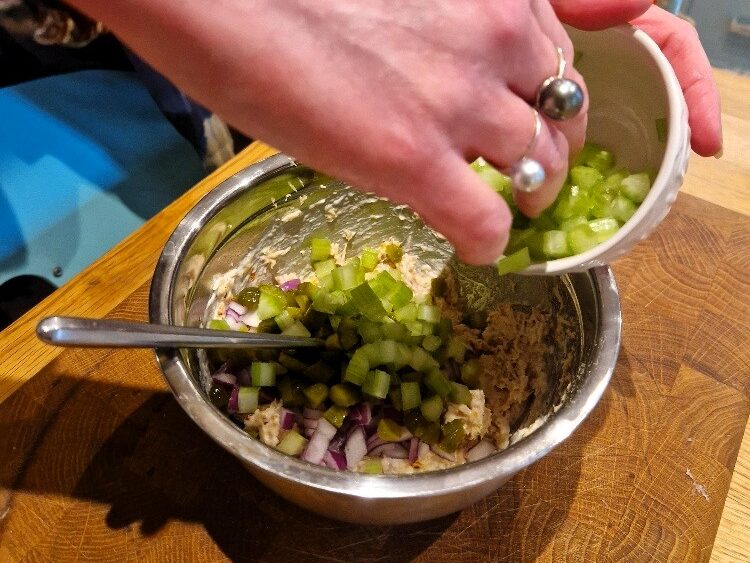
Next top & tail then chop a few stalks of celery. Again, you want it quite fine. Slice each stalk into thin batons, then chop finely along the length. We had quite large stalks today, so two were more than enough.
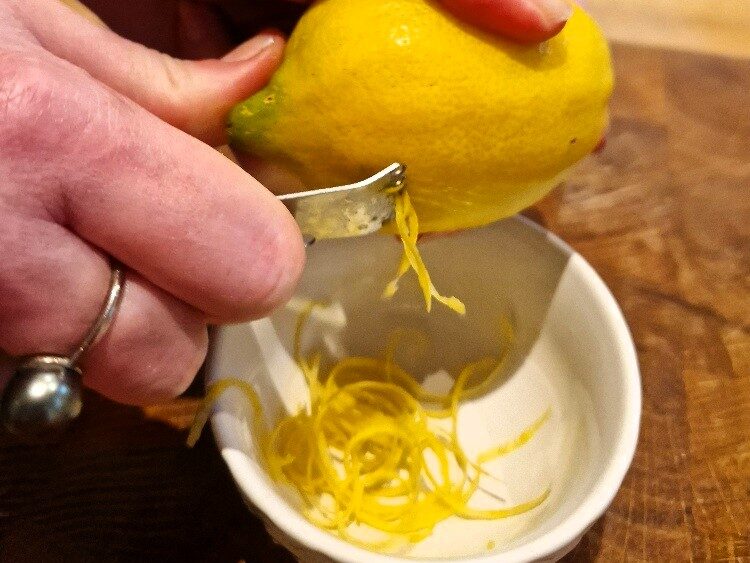
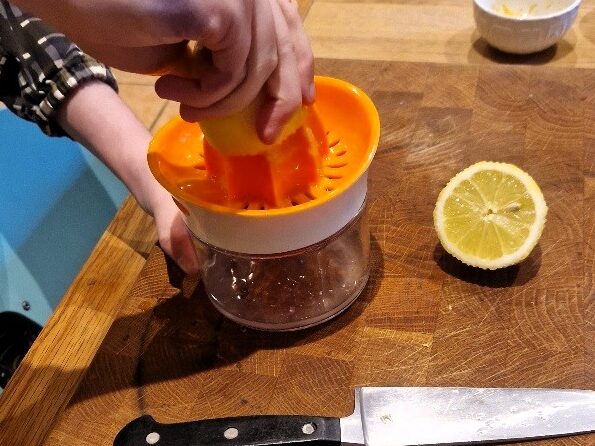
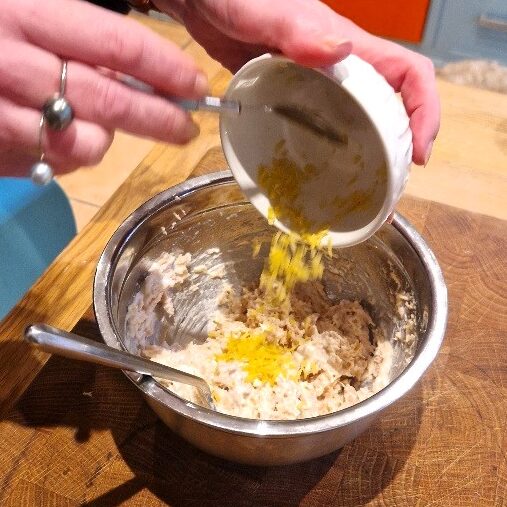
Now zest & juice an unwaxed lemon, and cut the zest finer. See our lemon Tip.

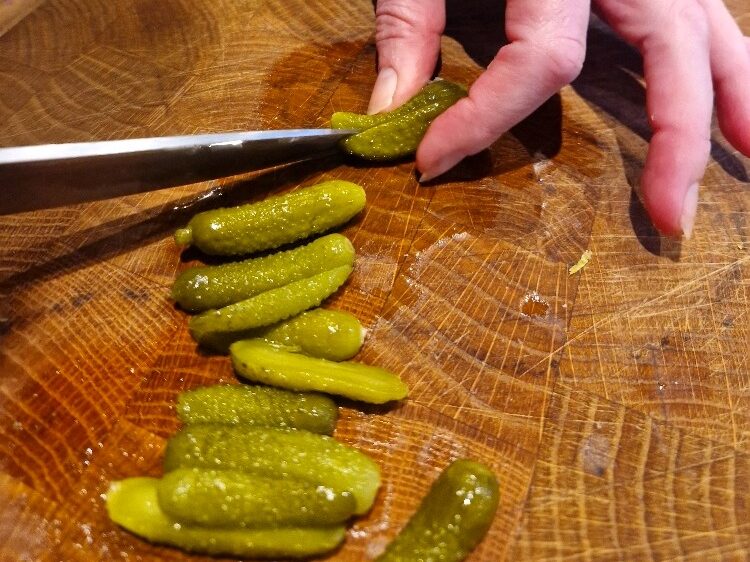
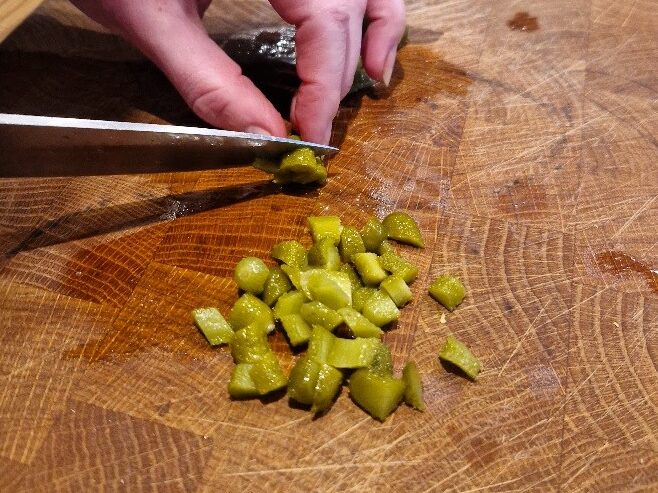
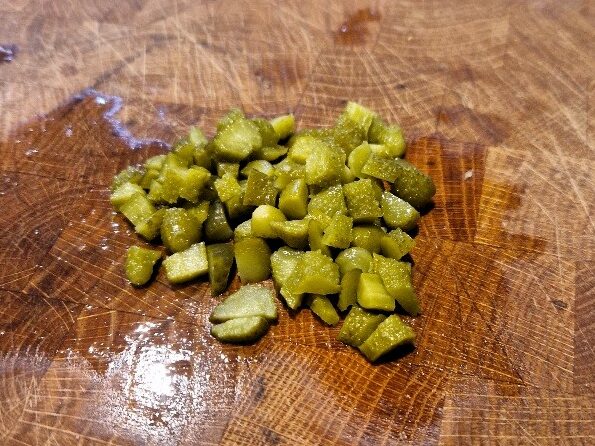
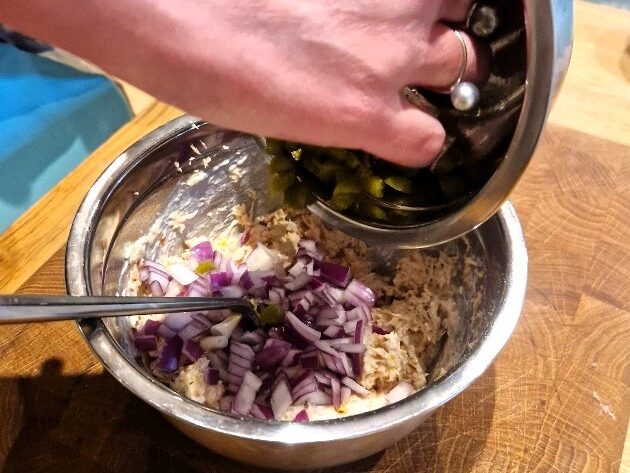
Chop a handful of gherkins – today we used small cornichons, but any dill pickle you like is fine. Again you want these chopped quite small.
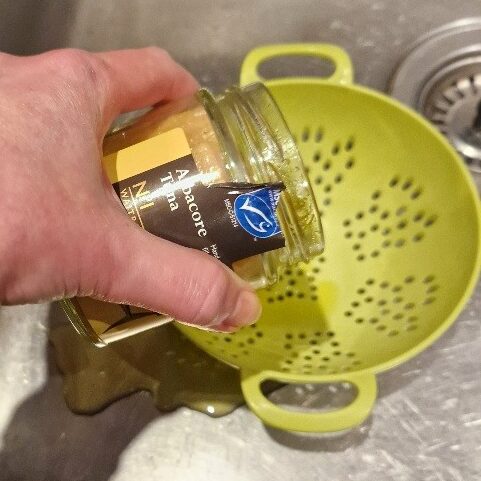
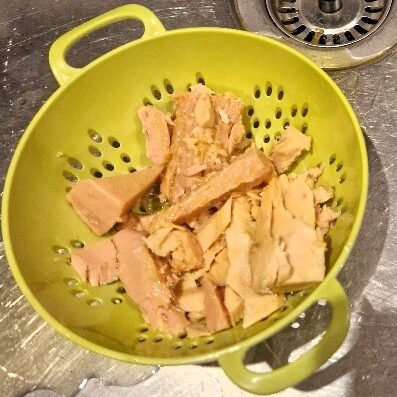
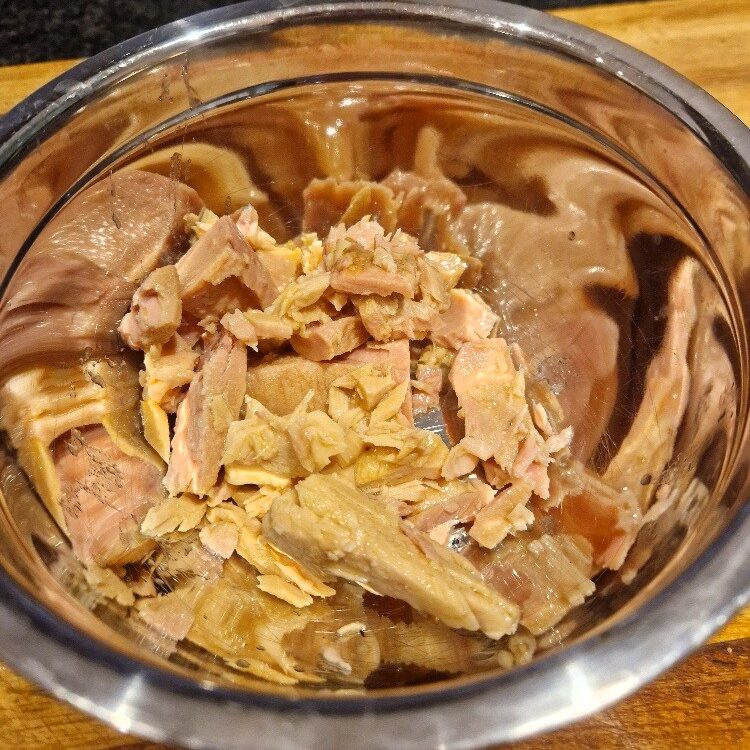
Drain one can or jar of tuna in a sieve or small colander. Today we used a good quality tuna in olive oil as we had one spare in our store cupboard. But this recipe is quite strong in flavour, so any reasonable quality tuna will do just fine. We tend to use tuna in oil or spring water, however, rather than brine (which is too salty). Steaks are also nicer then chunks, but this recipe is quite forgiving, so just use whatever is good value. Place the drained tuna in a bowl large enough to prepare all of the filling.
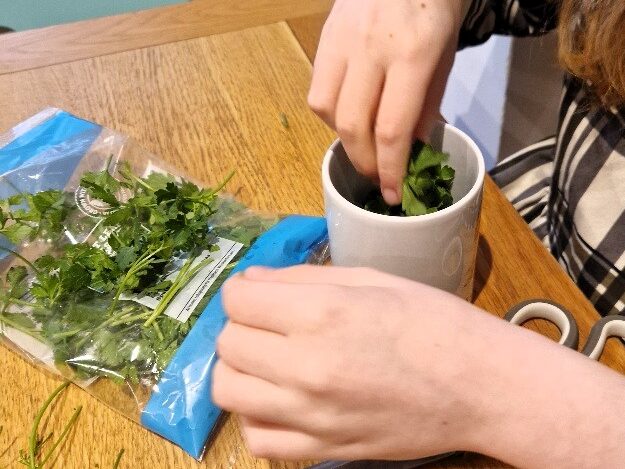
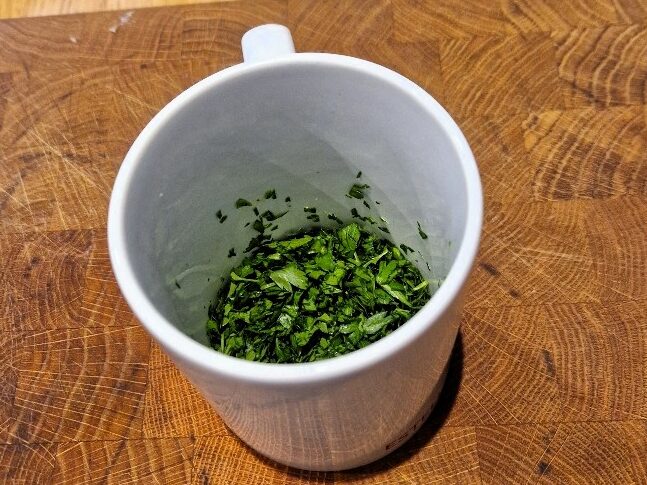
Chop some parsley; we used about half a small pack. See our herb Tip.

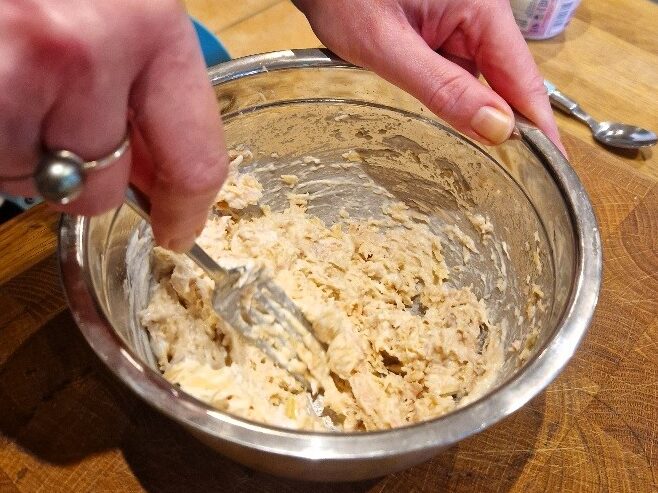
Mash the tuna well with a fork. Your mise en place is ready!

Jake sticks his nose in
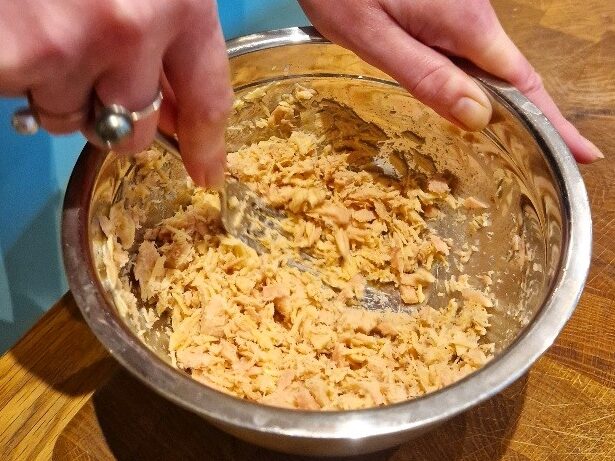
Mash the tuna really well, until there are no lumps. This will help to incorporate the other filling items evenly, plus give an easier texture to spread into your tuna melt sandwich.
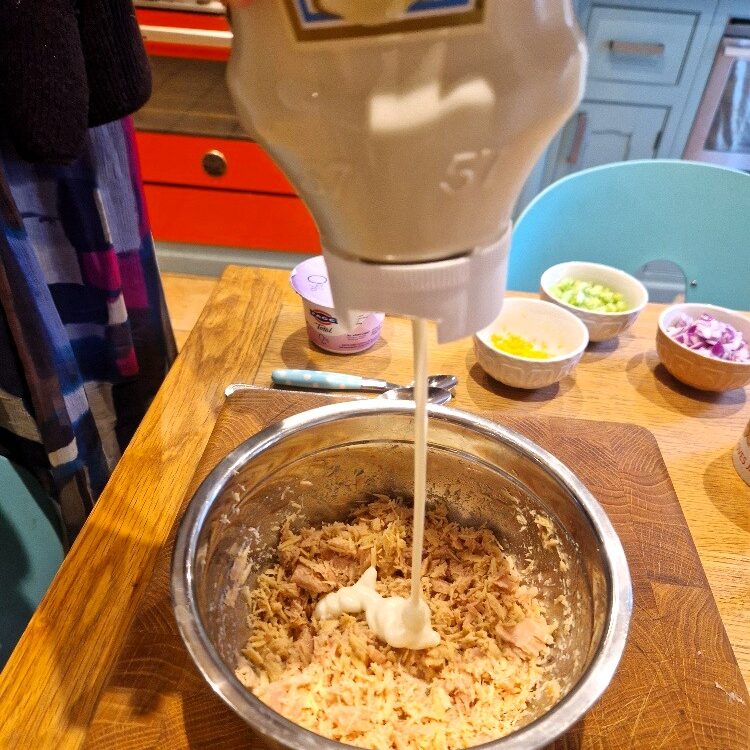
You can now finish the filling for your tuna melt. The mixture can be loosened with either mayonnaise (which is traditional) or a thick natural yoghurt (which makes it sharper and lighter). We like a lighter filling – the sandwich is already rich from the cheese – so we use either yoghurt alone, or a combination of yoghurt and mayo.
Today we wanted a nice, light filling with the sharpness of the yoghurt, but with a little creaminess and tang from the mayonnaise, so we did half-and-half. We used a 0% Greek yoghurt and a reduced fat mayonnaise to still keep some lightness.
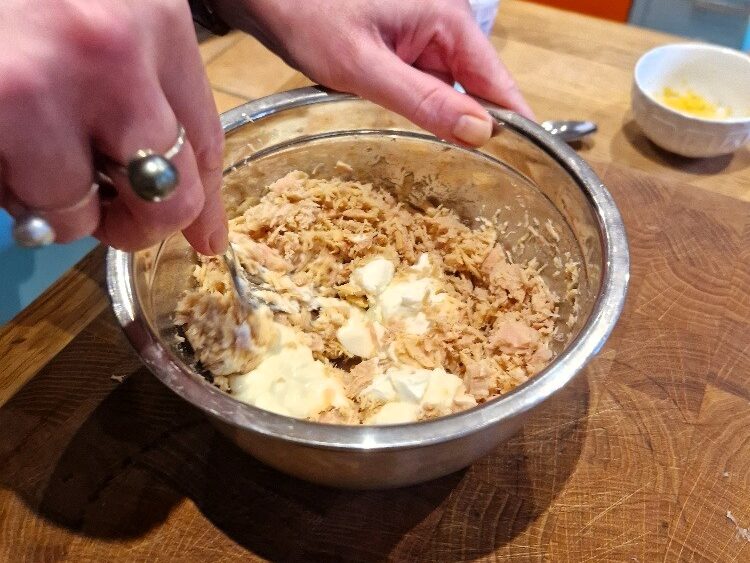
Add a little of the lemon juice to the tuna, plus about a heaped tablespoon each of the yoghurt and mayonnaise. Stir well to combine.


Jake sticks his nose in
When making this mix, it is better to add less of everything at first, then taste and add more if you need. You can always add more mayo, yoghurt, lemon or flavouring later – but, as we always say, you can’t take it away! Trust your eye and your tastebuds.
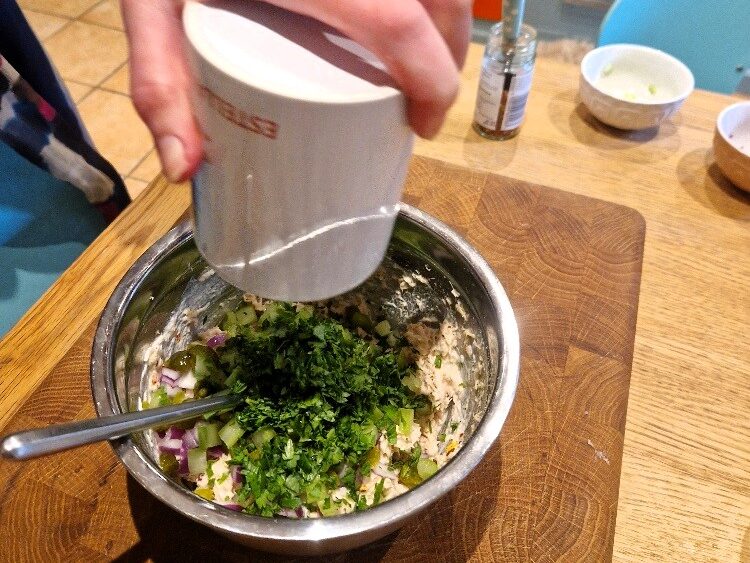
Now add the lemon zest, and, if liked, some chilli. We sometimes use hot sauce in our tuna mix (as we did in Sandwich Dinner) and sometimes fresh chilli. But today we fancied chilli flakes, which give a subtle and less sharp heat. We started with one small teaspoon of these. Taste, then season with black pepper and salt, if needed. Today we added a good grind of pepper, and just a few salt crystals to bring out the flavour.
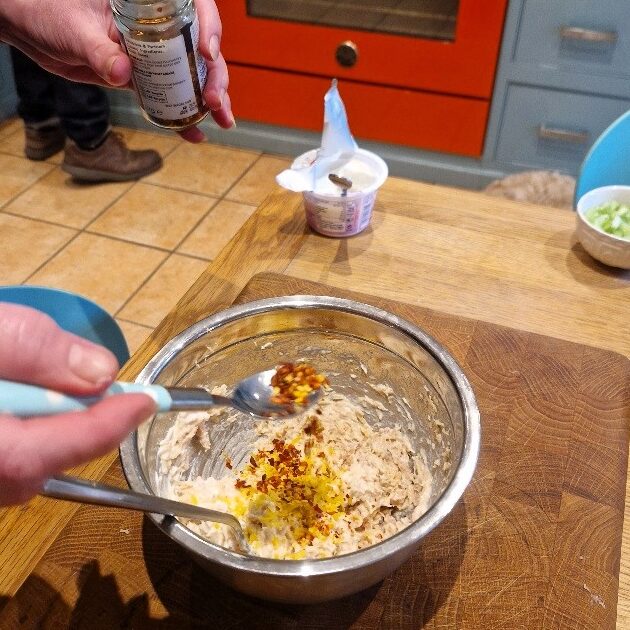

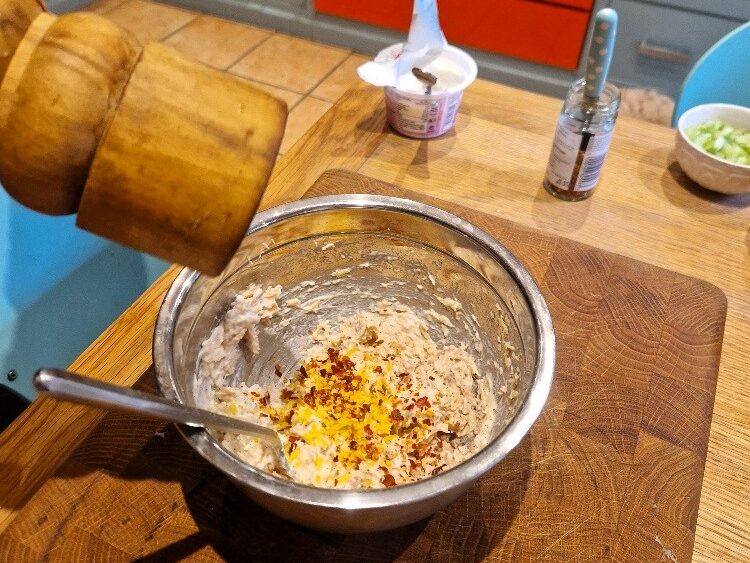
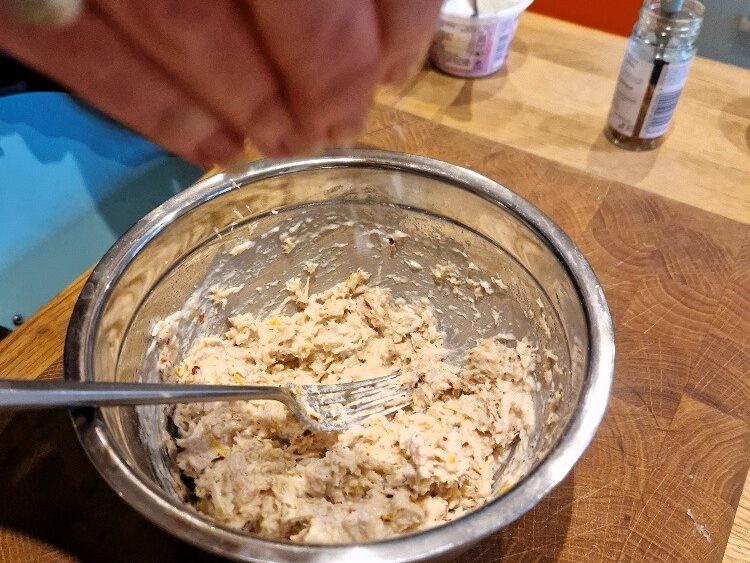

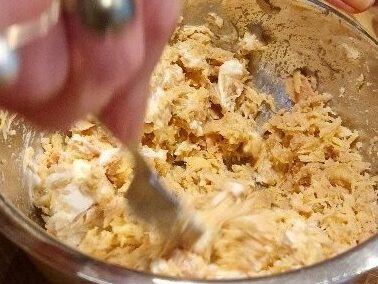
Taste again and adjust any of the flavourings, or the texture, if needed, bearing in mind it will change again when you add the rest of the filling items.
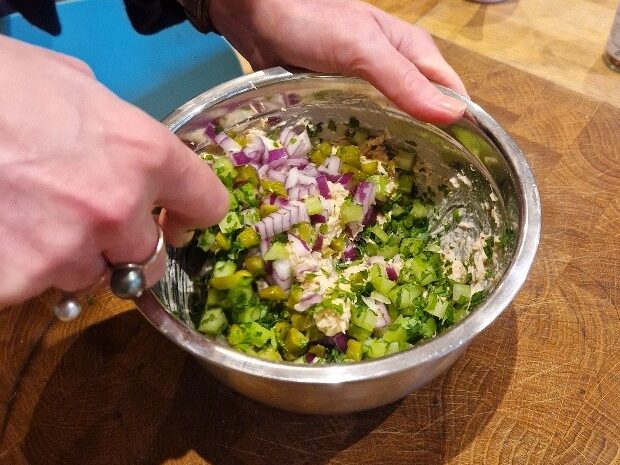
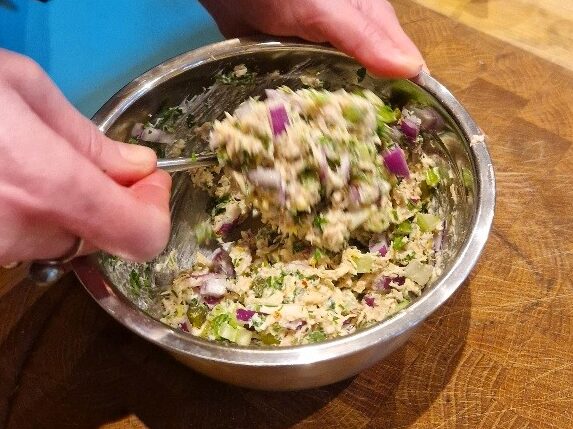
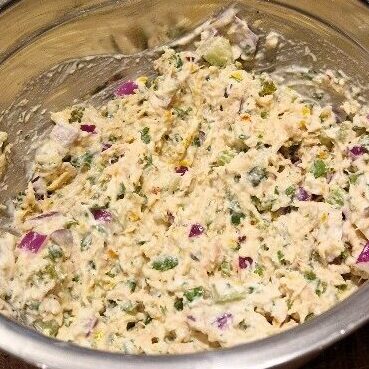
Add some red onion, celery & gherkin – start with a little, you can always add more – plus the parsley. Stir well; taste again; then make any final additions of flavourings & ingredients until you have a vibrant, zingy filling with a textured, but still spreadable, consistency.
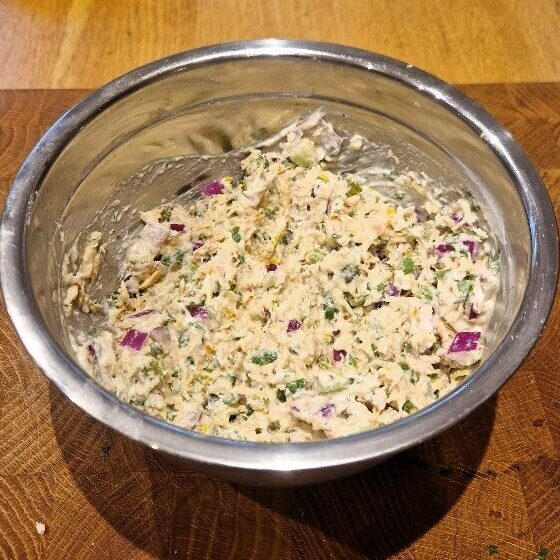
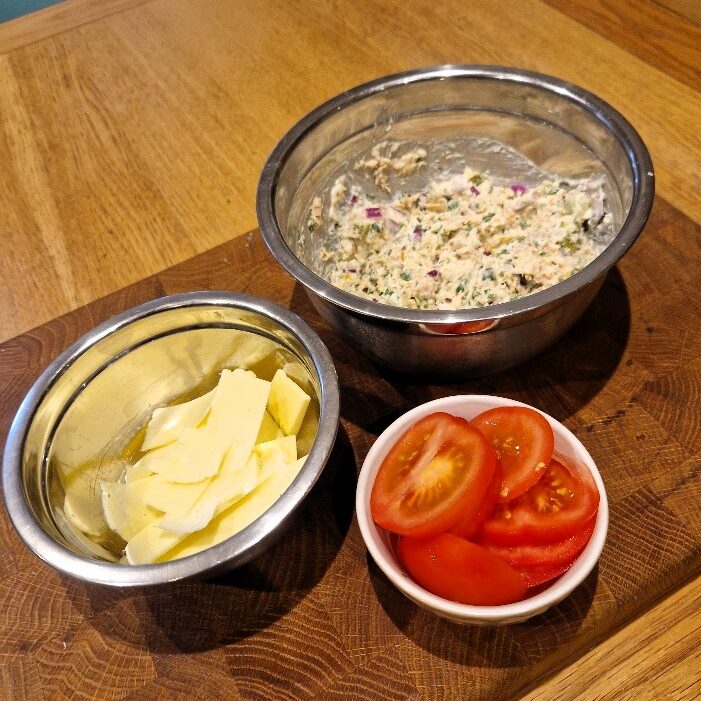
Your tuna melt filling is ready! It can be kept in the fridge, covered, until you are ready to assemble & cook – it will keep for up to two to three days, too.
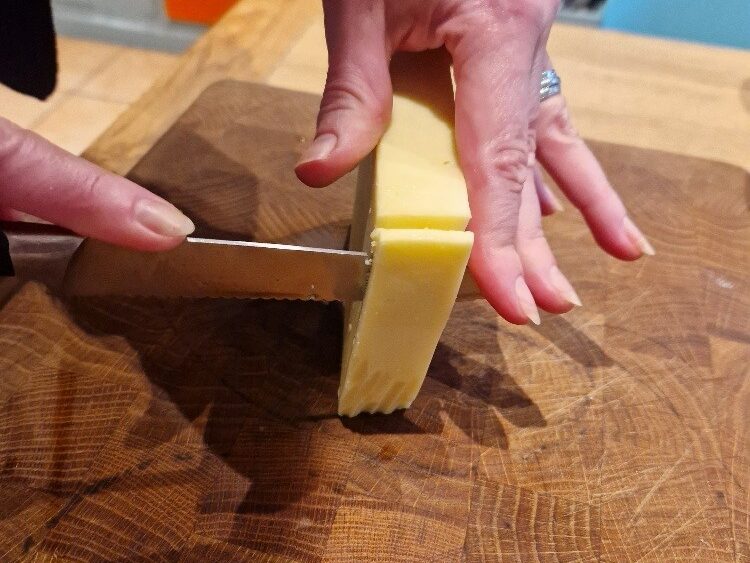
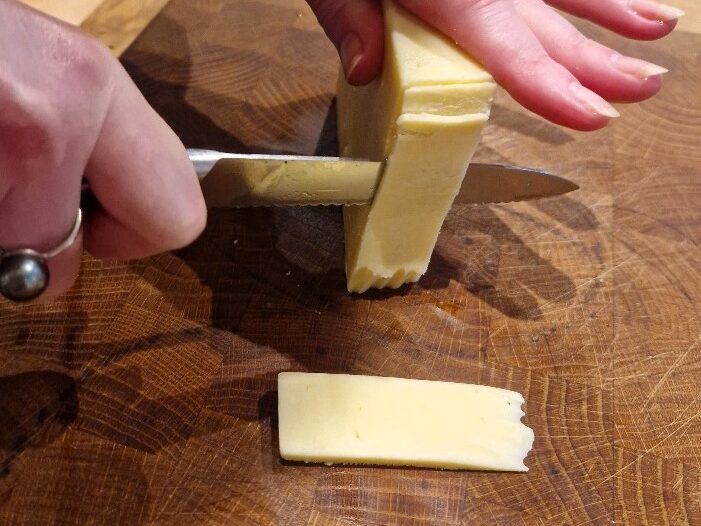
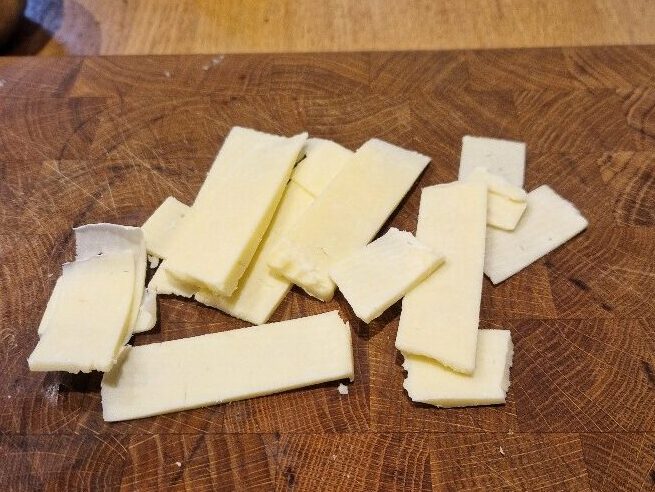
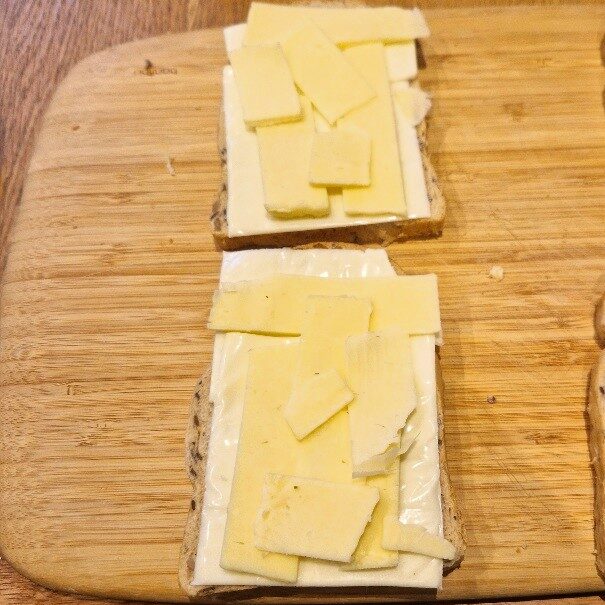
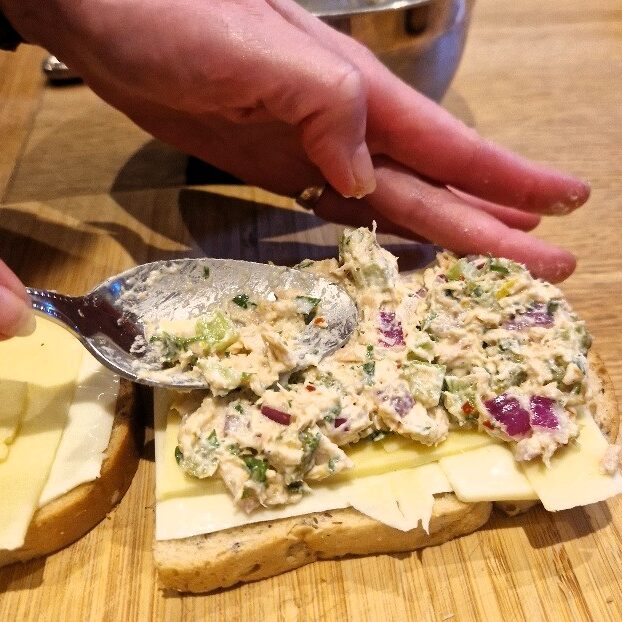
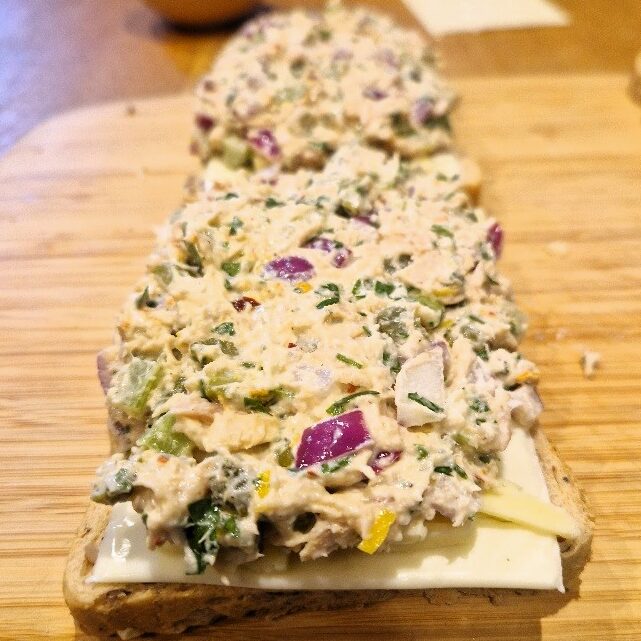
Before assembling, slice some cheddar cheese – we like mature cheddar in our tuna melt for a bit of bite. Slice enough to cover one slice of your bread, in a single layer, per sandwich.
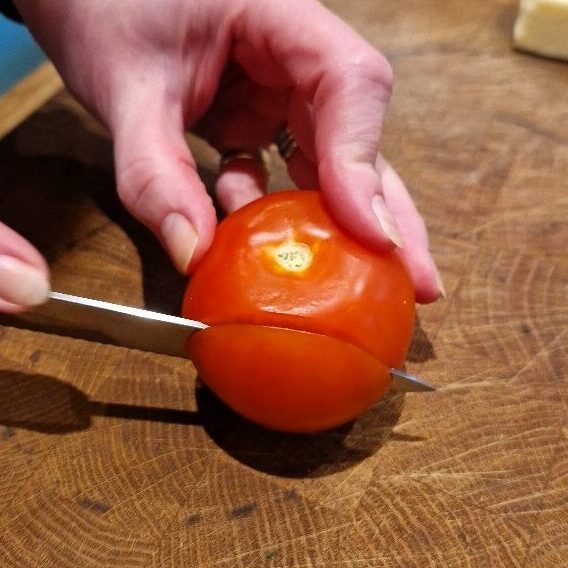
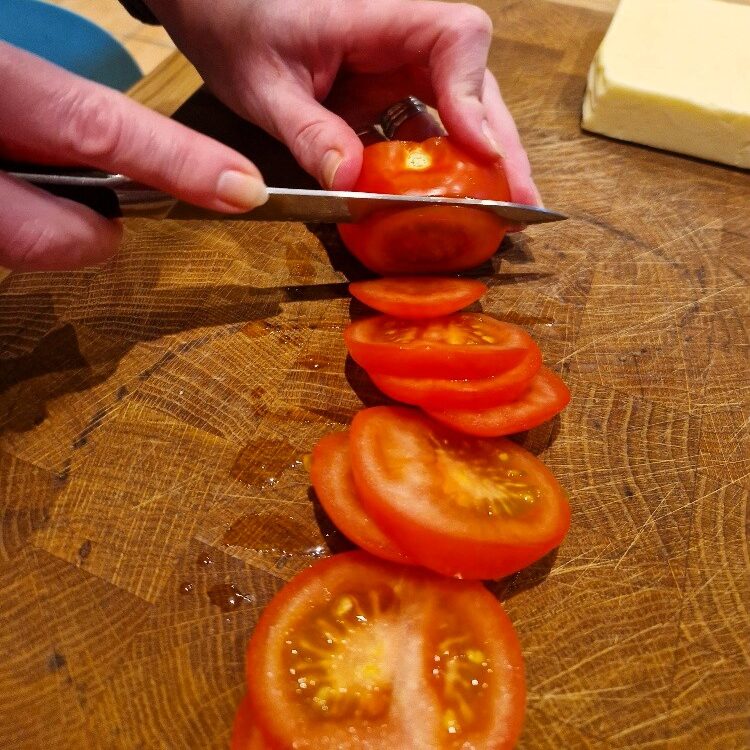
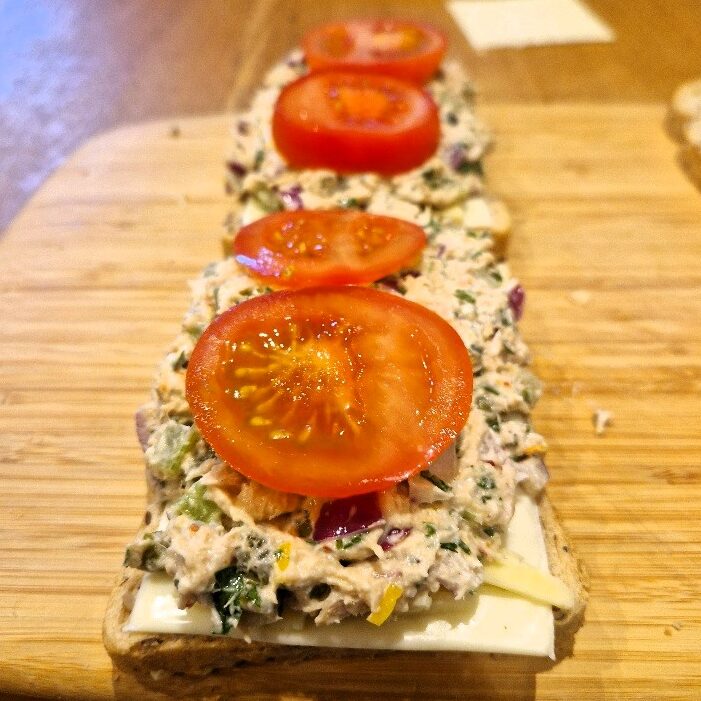
Next slice a tomato or two – you only need two to three slices per tuna melt, depending on size. You are ready to assemble your sandwich!
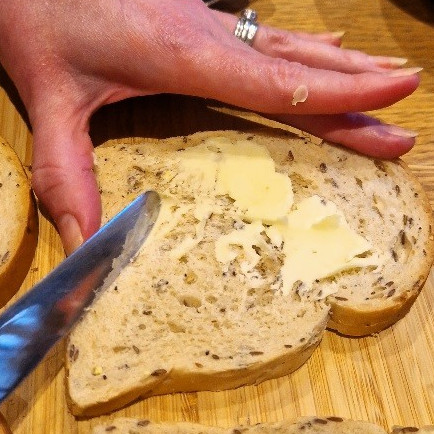
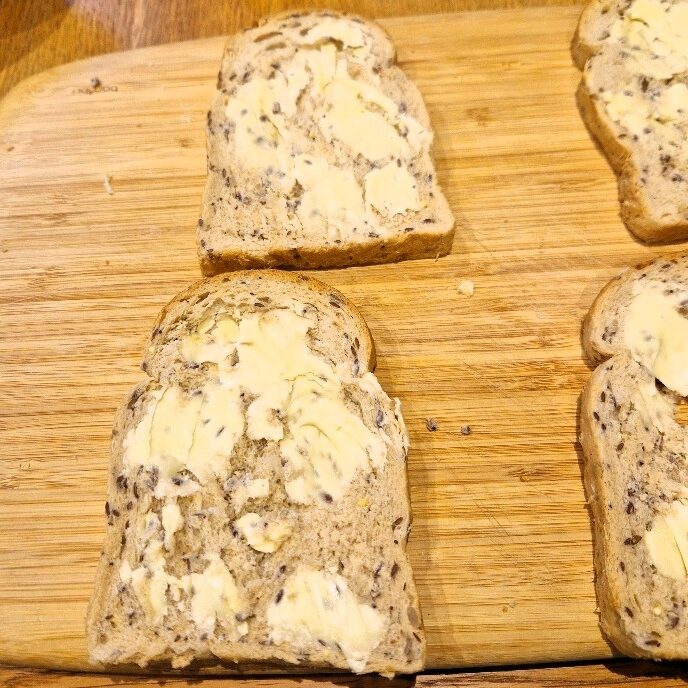
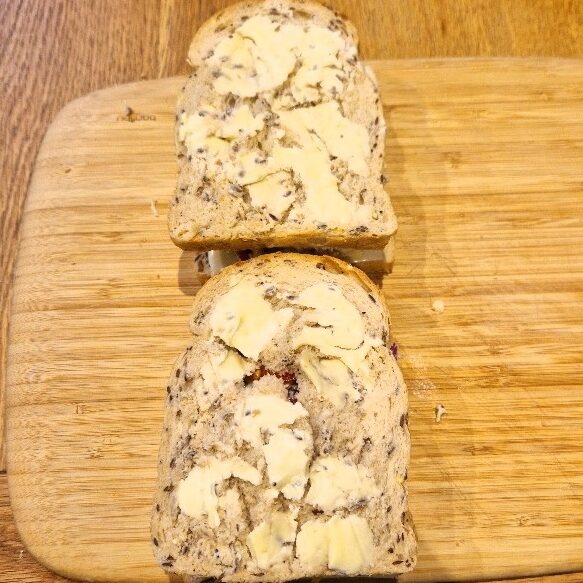
To assemble, first butter four slices of bread, quite generously. Our bread today was lovely, but a bit soft, and therefore quite hard to butter. We used a sliced seeded bread which is one of our sandwich favourites, though we wish we had very lightly toasted the slices first to make buttering easier. But it still worked out OK. You could alternatively use a firmer bread instead, like a sourdough.
Don’t worry if your buttering doesn’t look neat – as ours didn’t, due to the soft bread! – it will melt when you cook. Just try to distribute it as evenly as you can without tearing the bread.
Jake sticks his nose in
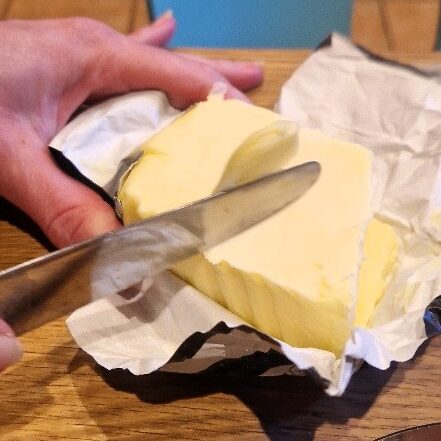
Remember to get your butter out of the fridge at least an hour (depending on your room temperature) before you want to use it so it softens. You could use spreadable butter – it will work fine, but the flavour from block butter is better.
Turn the bread butter-side down. This is important – in a tuna melt, the butter is on the outside.
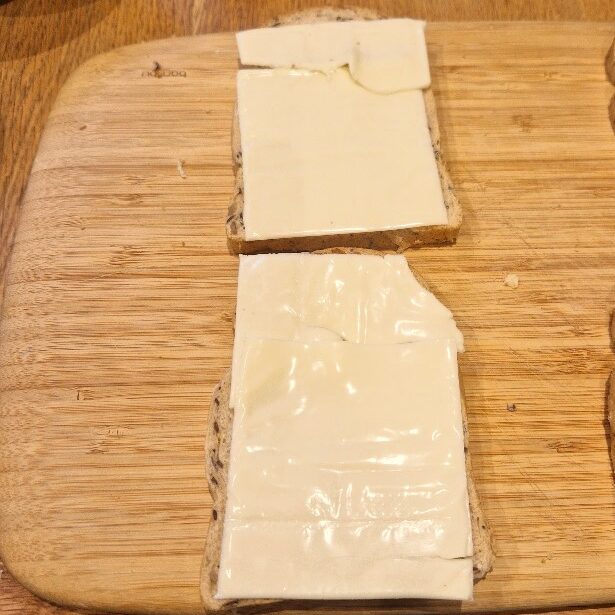
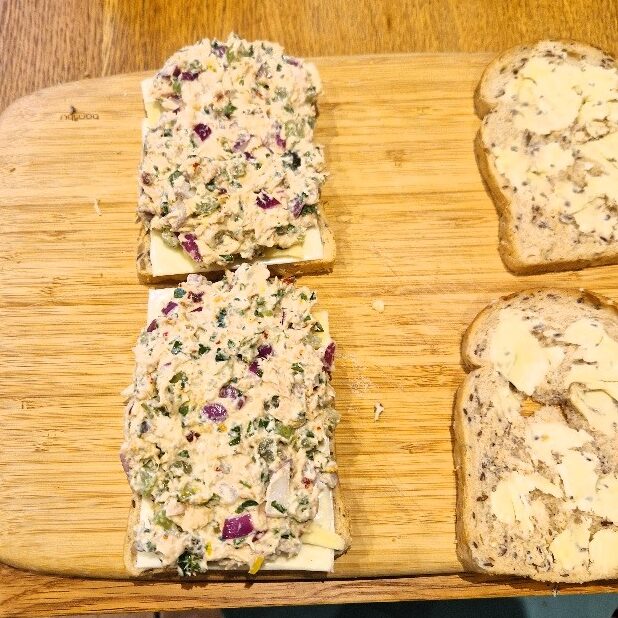
Cover each slice with a cheese melt slice – trust us, this works! You can use the really cheap & cheerful ones (as we did) which will melt almost into a bechamel. Or you can splash out on fancier burger & toastie specific cheese melts or ‘proper’ cheese slices. Personally, we think the cheaper ones work better! And remember, we add real cheddar too, so the more expensive slices are largely just duplicating. Top with the sliced cheddar, and a generous portion of the tuna mix.
Now cover the tuna with a few slices of tomato, then place the other slice of bread on top – again, butter-side out – to form your sandwich.
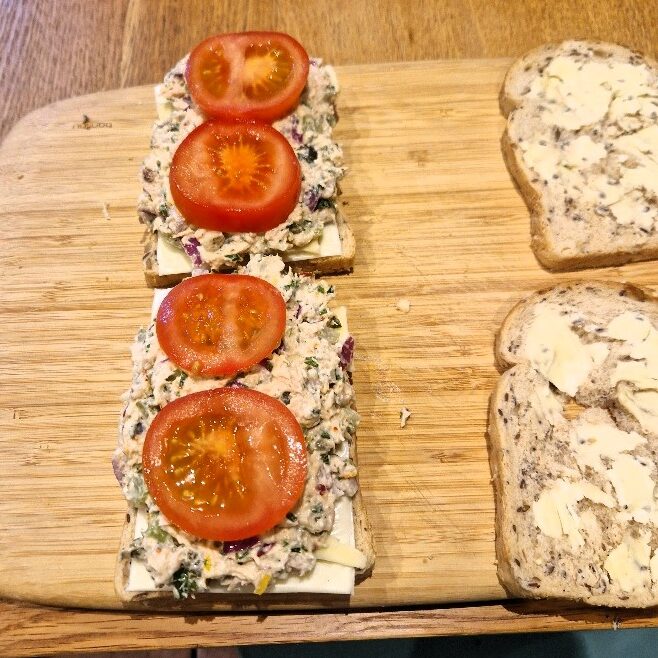
We couldn’t resist some arty shots, the tuna melts looked so good!
When you are ready to cook, carefully transfer the tuna melts to a plate – be cautious, they may be stuck slightly to whatever surface you prepared them on, due to the butter on the outside. You might want to gently use a fish slice or palate knife to lift them.
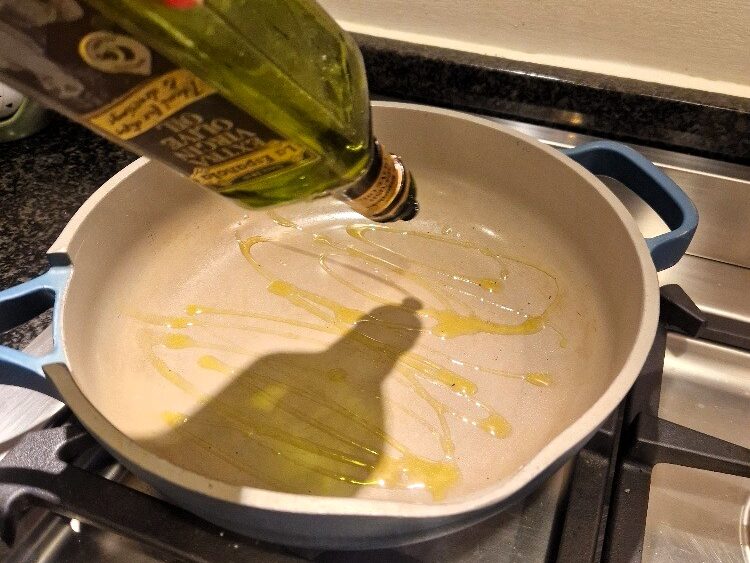
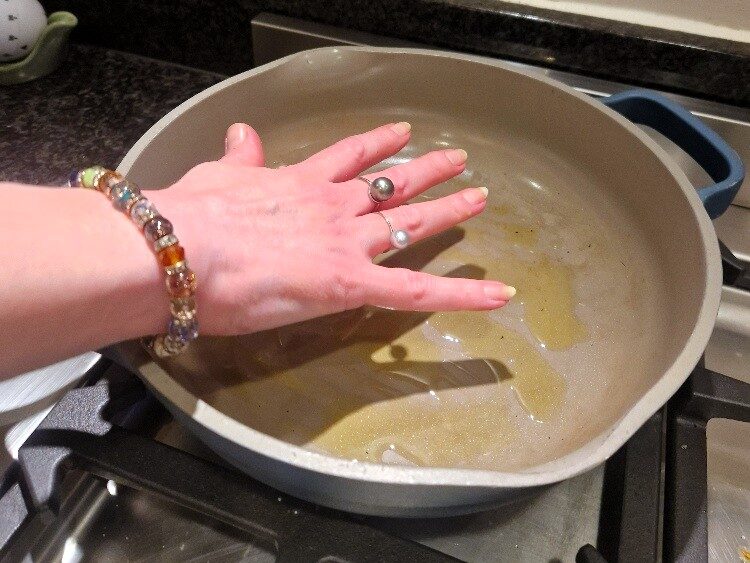
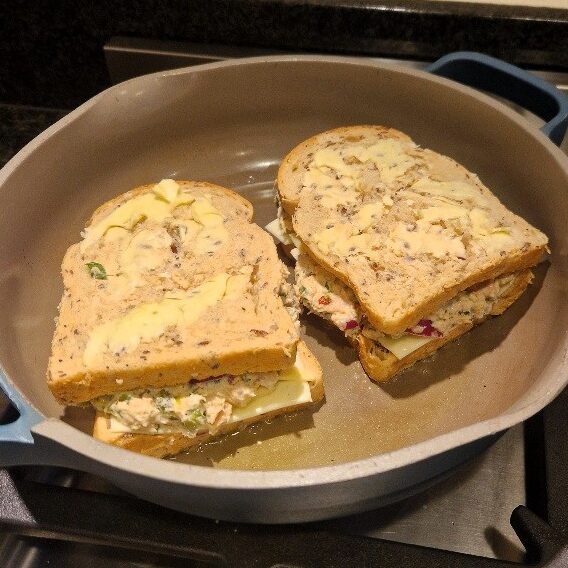
If you are pan-frying the tuna melts, heat a large, non-stick pan over a medium heat. You can dry fry, due to the butter, but we find that adding a little olive oil helps further prevent sticking/burning. If grilling, heat your grill to a high setting, and place the tuna melts under it. We like to start with the cheese side closest to the heat source to get the best melt. This means cheese side at the bottom if frying, and cheese side at the top if grilling. Today we pan fried. If frying, test the heat with your hand above the pan to make sure it is hot.
Carefully place the tuna melts into the pan and fry, moving them very gently to prevent sticking, until the bottom is golden. This will take about 2 to 3 minutes, whether frying or grilling. Your sandwich may be a bit fragile (ours were) so it is best not to keep trying to look at the bottom. You will be ready to turn the tuna melt when the sandwich moves freely on the bottom of the pan, and feels ‘crispy’ as it does. If grilling, you want the top to look golden.
When done, carefully flip the tuna melts over. Use a palate knife or fish slice and take care they don’t burst or break! Cook the other side until golden – another 2 to 3 minutes, though if pan-frying, the second side usually cooks slightly quicker than the first.
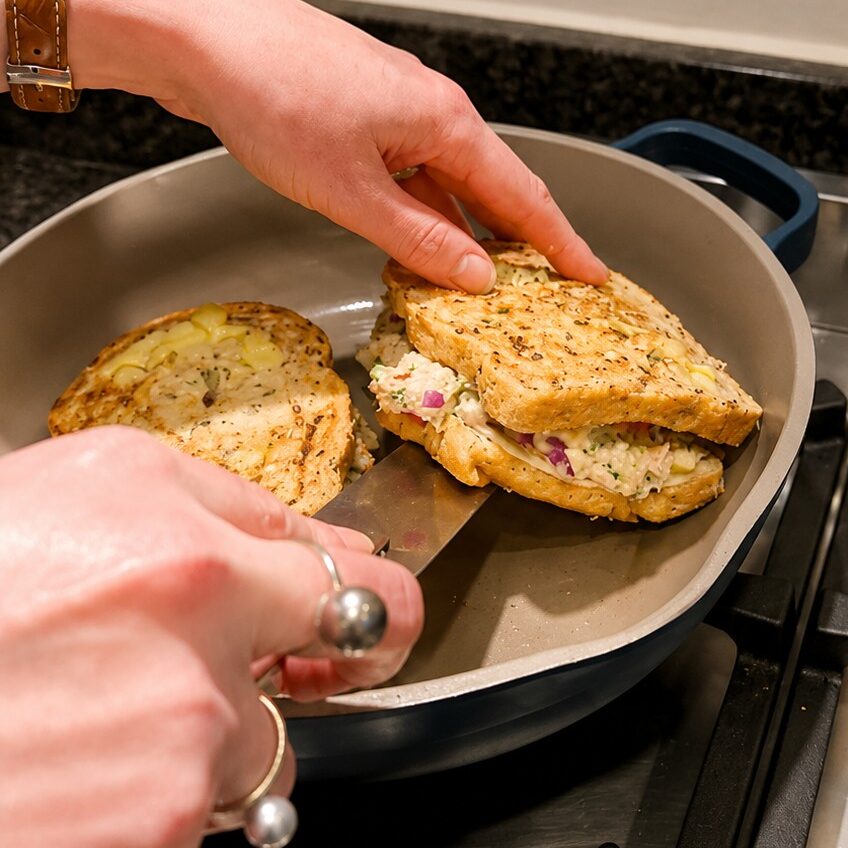
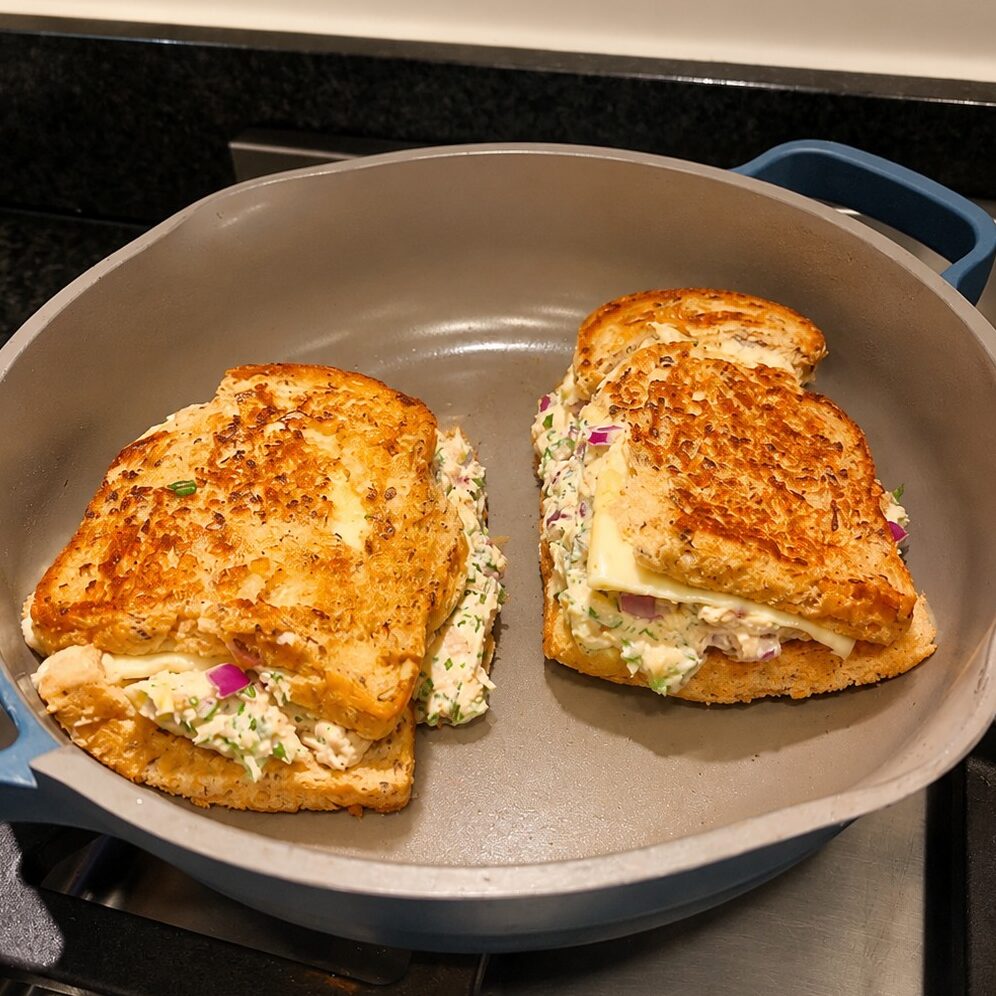
Don’t worry if your sandwiches become a bit messy – this is an occupational hazard of a well-filled tuna melt! Today, one of our sandwiches burst a bit at the edge and one lost a tiny bit of crust as we flipped it. You can normally neaten them up a bit as you serve. And in any case this is supper at home not tea at the Ritz, you want your sandwiches to look homemade. Look how yummy ours still looked!
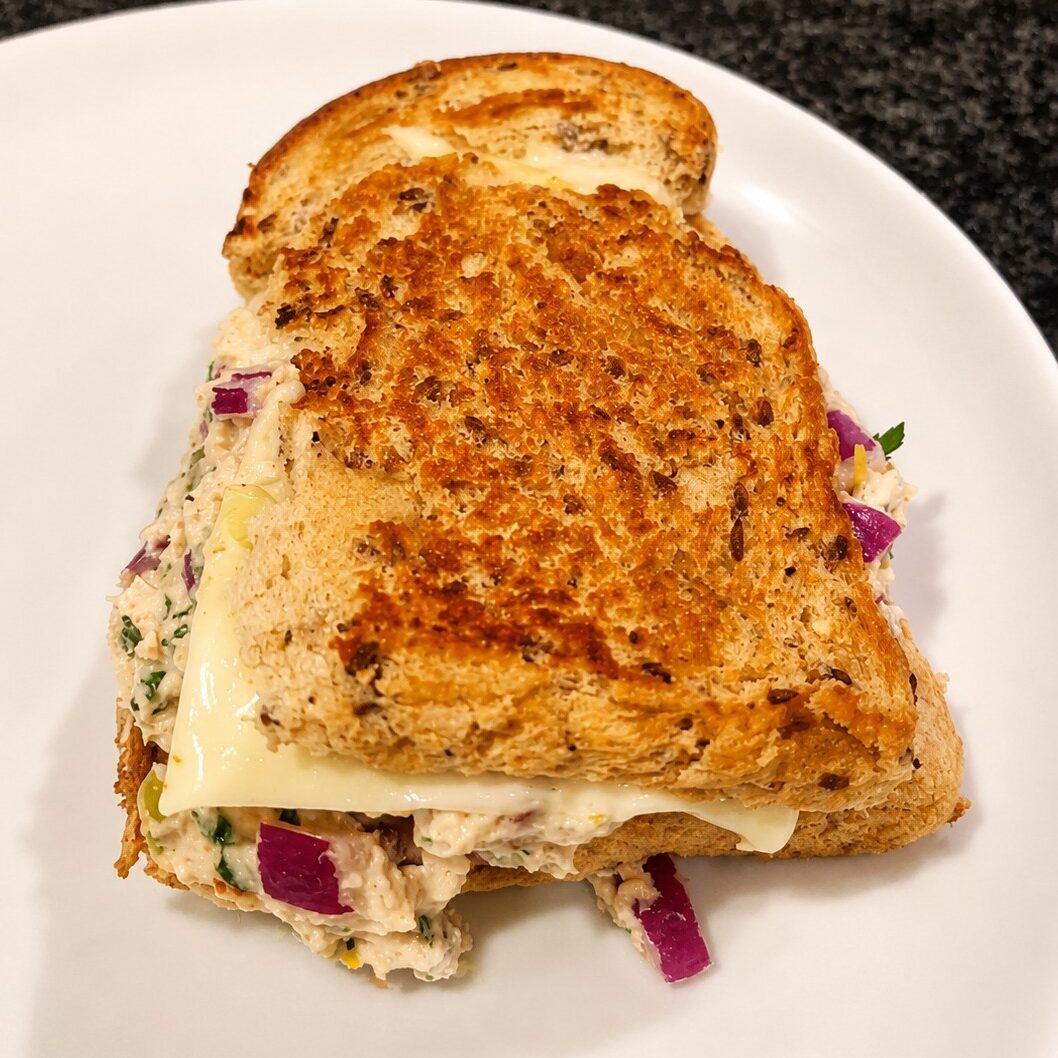
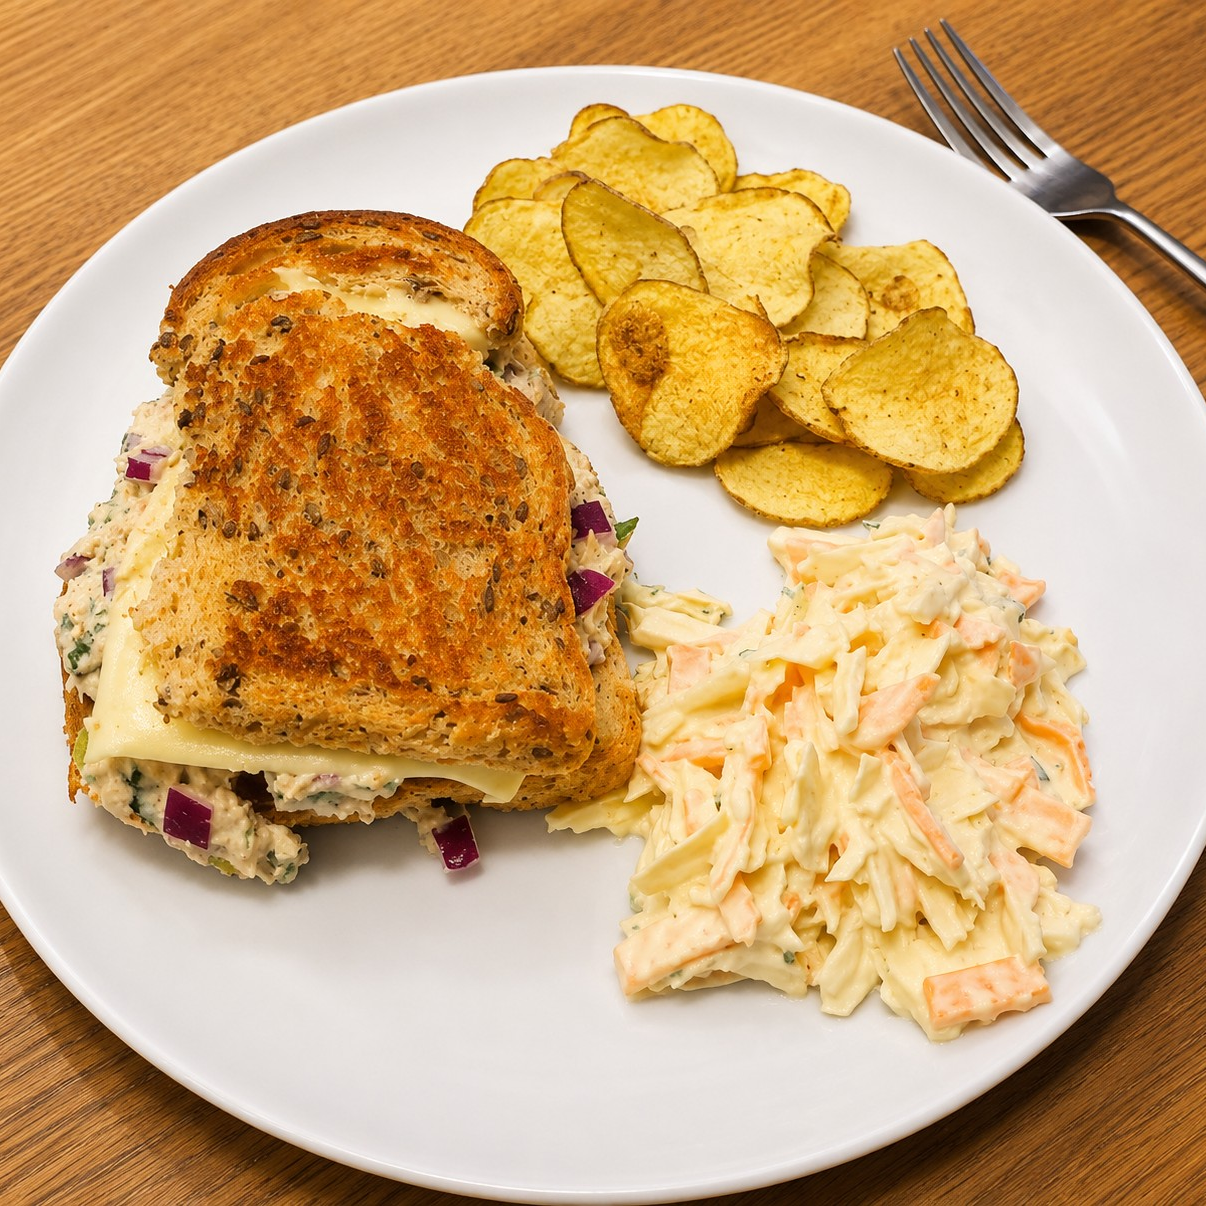
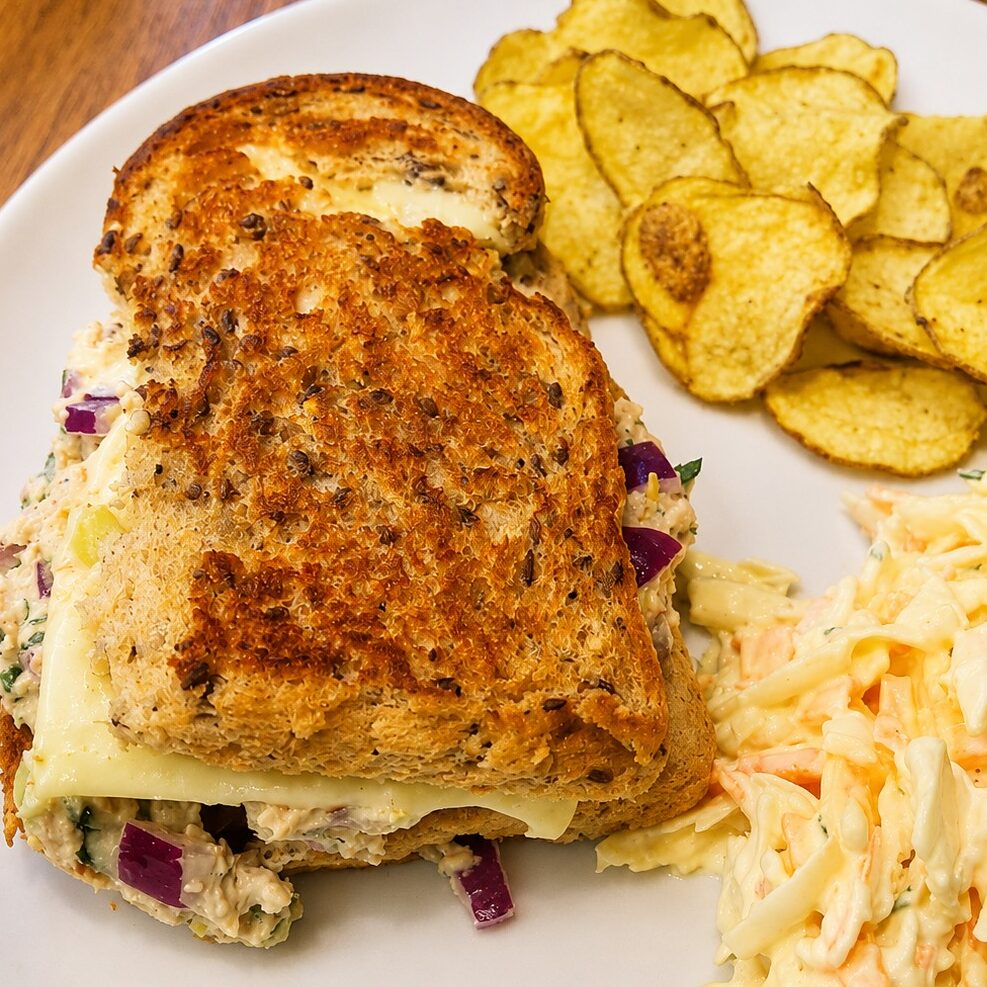
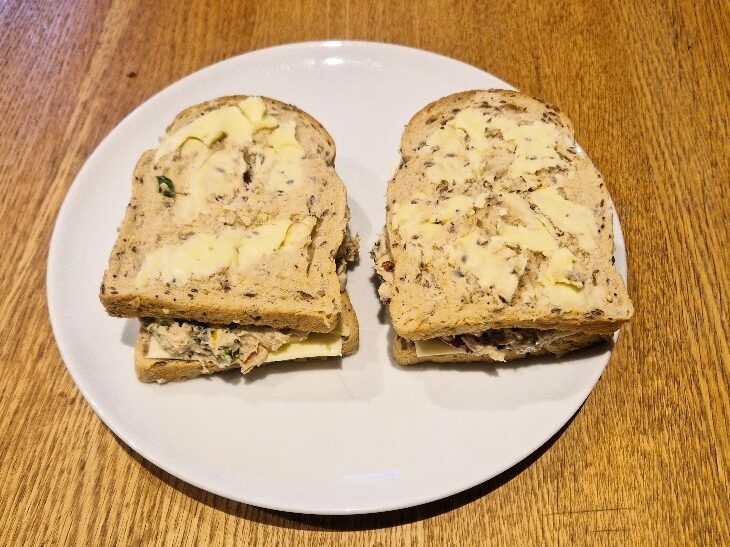
Serve your delicious, crispy, oozy tuna melt with the coleslaw and crisps on the side. Enjoy!