Skills you will learn in this recipe
Making shortcrust pastry; assembling & baking a tart; making breadcrumbs
Links to the last recipe
Making a dessert with a base & filling; flavouring with ginger & lemon
Treacle tart is a British classic, and one of the easier tarts to make when you are first starting out with baking. Emily made it with Bibi when she was little and it’s been a firm favourite ever since. She’s cooked it many times over the years, and it never fails to please. It’s one of those ‘what’s not to like?’ recipes.
As this is our first recipe featuring pastry, we are starting with the most basic (and easiest) – a simple shortcrust. Making pastry isn’t difficult, you just need to follow the proportions & steps, and get to know what looks and feels right. You also need to allow time to chill it. We have two detailed Tips on the subject to help you out!
- Pastry Tip 1: How to rub in & make pastry dough
- Pastry Tip 2: How to roll out pastry, line a tin & bake blind
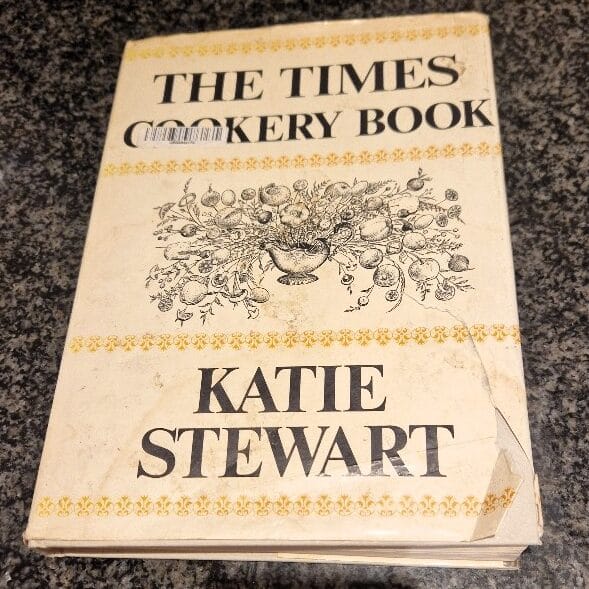
For her treacle tart, Bibi used something between her own recipe, and Katie Stewart’s excellent simple one in a book we have mentioned before, The Times Cookery Book, now sadly out of print. For our recipe we combine Katie’s recipe with that from another go-to cookery book, Beyond Nose to Tail, by Fergus Henderson & Justin Piers Gellatly.
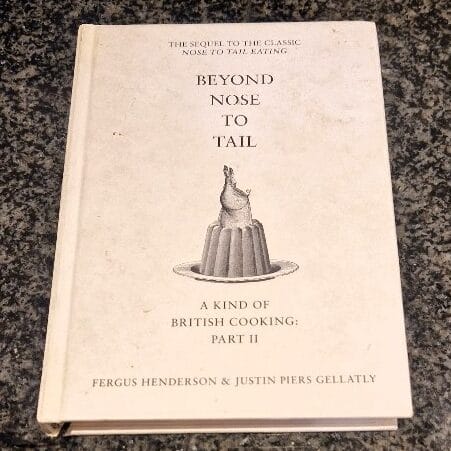

St John, the restaurant run by Henderson with Gellatly as his then brilliant pastry chef, is Emily’s favourite restaurant of all time. She has been going there since it opened in 1994 and has a meal there on or around her birthday almost every year (amongst many other visits!). The puddings there are legendary, and it’s the one place Emily will always have one. The treacle tart is a favourite, along with the Eccles cakes. Their cookbooks are also excellent.
The funny thing about treacle tart is that it isn’t made with treacle! It’s made with golden syrup. You counteract the extreme sweetness of this with lemon. Gellatly also adds ground ginger – this is optional, but a nice touch. The St John recipe features a rich pastry, but we use Katie’s classic shortcrust, made with a mixture of butter and vegetable fat. It’s both easier, and we think suits the tart better (and reminds us more of Bibi’s).
A treacle tart recipe calls for breadcrumbs. The easiest thing would be to buy them ready made, but most commercial breadcrumbs are very dry. These are great for coating things, but for treacle tart you ideally want soft breadcrumbs to really soak up the syrup. You can buy these – they will be specified on the pack as soft – but they are more difficult to come by, and also more expensive.
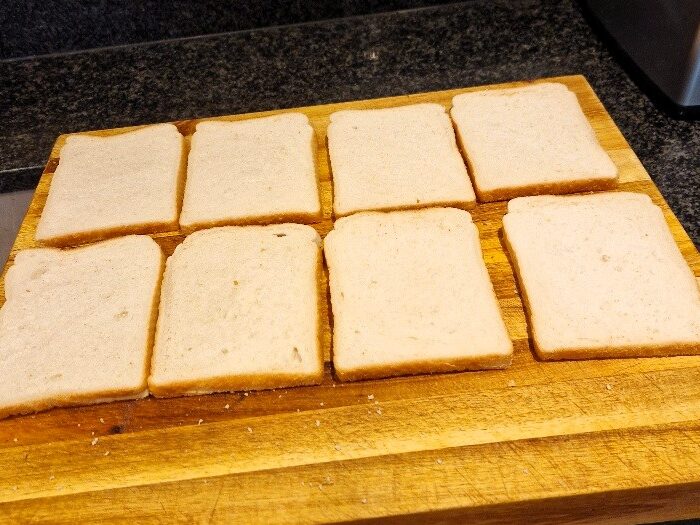
So we make ours from sliced white bread, which is also much cheaper. This is easy enough if you plan ahead and allow the bread to go stale and dry. It really needs to be left out, in separate slices, on a board or plate, for about 12 hours or more i.e. overnight. If it is dry enough, you can then just blitz it into breadcrumbs in a food processor or blender.
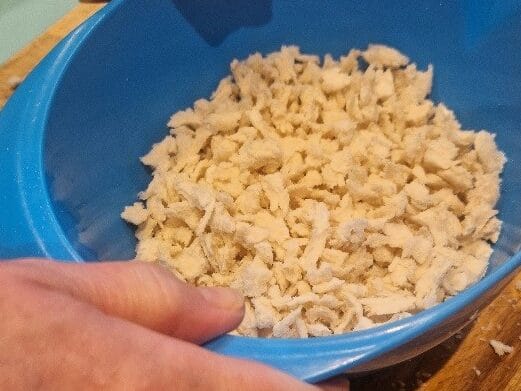
Unfortunately, today we didn’t plan ahead enough! We forgot to get the bread the day before. And though we left it out for several hours, it was still far too wet. Most commercial sliced white bread is quite spongy, and designed not to easily go stale. If it isn’t stale enough, in a food processor it will just turn into a lump of glue. So today we made the breadcrumbs by hand, which is easy but time-consuming. We’ll show the method later.
But the first job is to make the pastry, as it needs time to chill. Ideally about 2 hours in total, so plan ahead for this too.

Jake sticks his nose in
If you don’t have time to, or are just worried to, make your own pastry, you can of course get shop-bought. Choose a plain shortcrust pastry from the fresh section. But making pastry is fun, and not too hard if you follow our tips, so do give it a go!
Basic shortcrust pastry
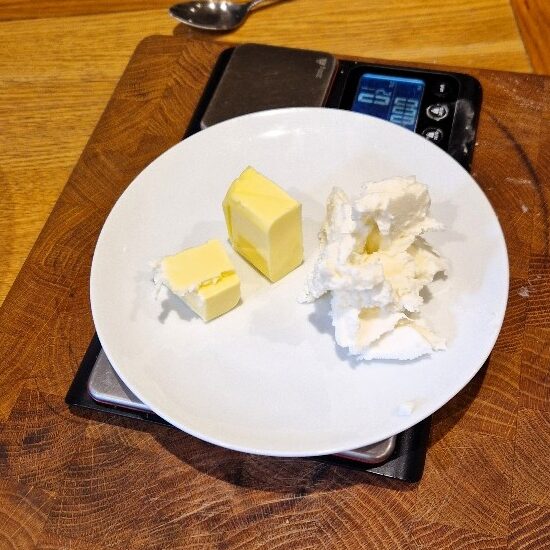
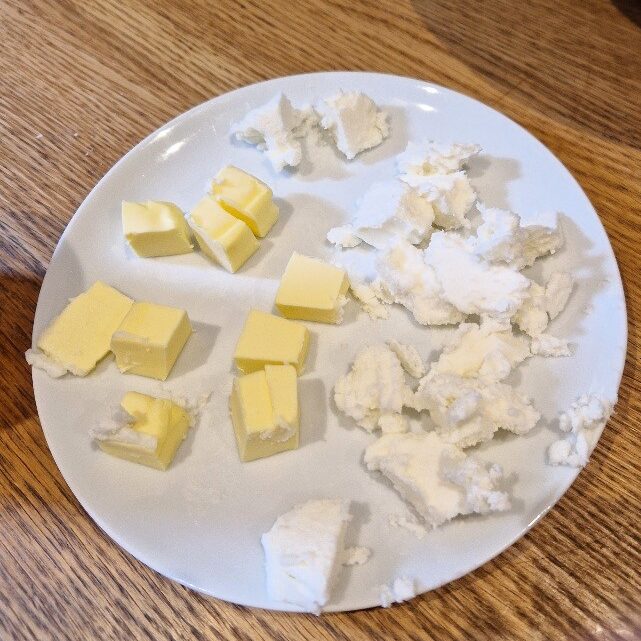
You can make shortcrust pastry with all butter. But you will get a better result, which will be both lighter and easier to handle, if you use 50/50 butter and white fat. The white fat can be lard or vegetable fat, but we prefer vegetable fat as it has a more neutral flavour, and also keeps the dish vegetarian. Both fats you use must be cold.
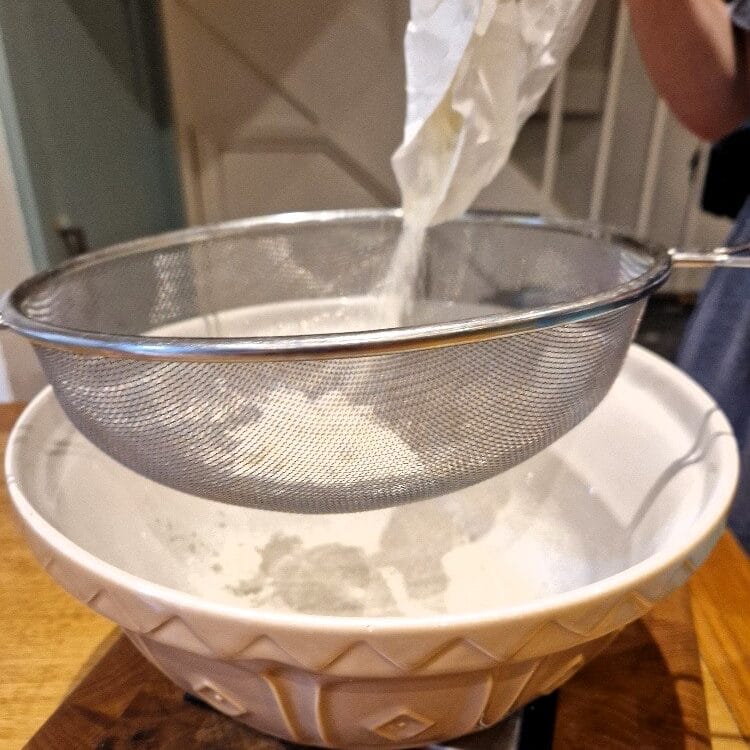
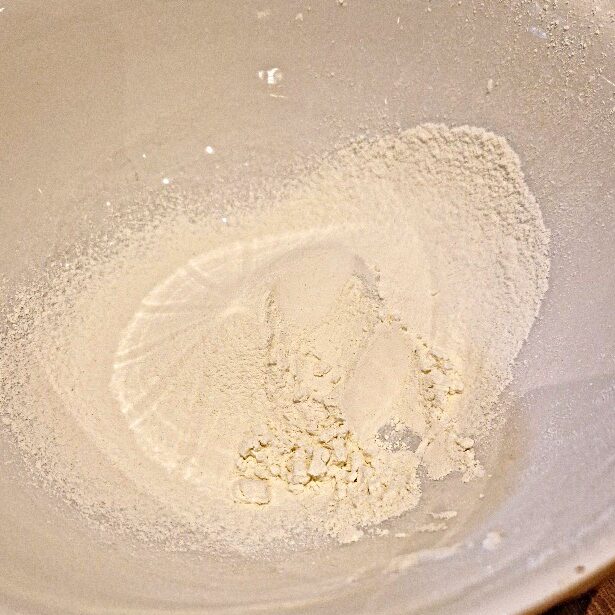
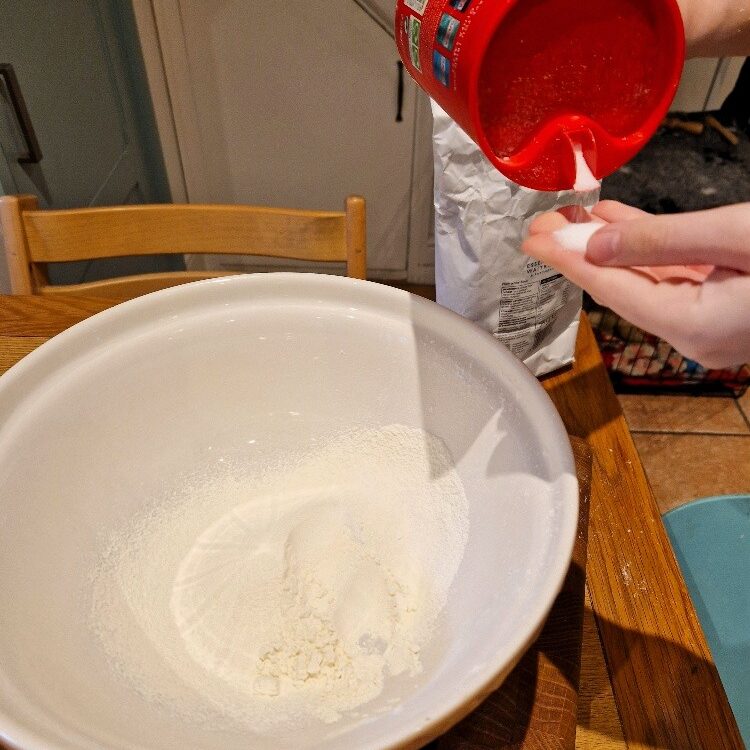
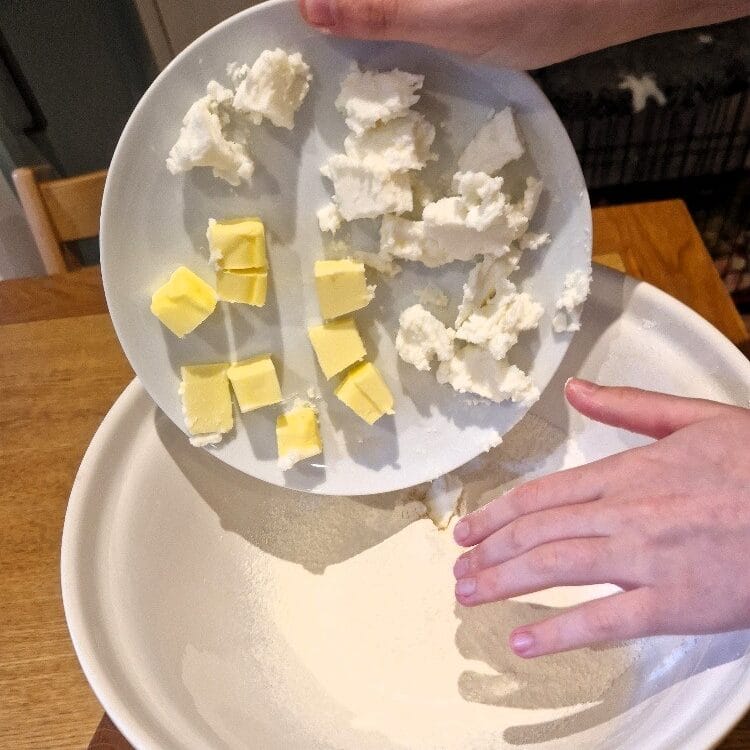
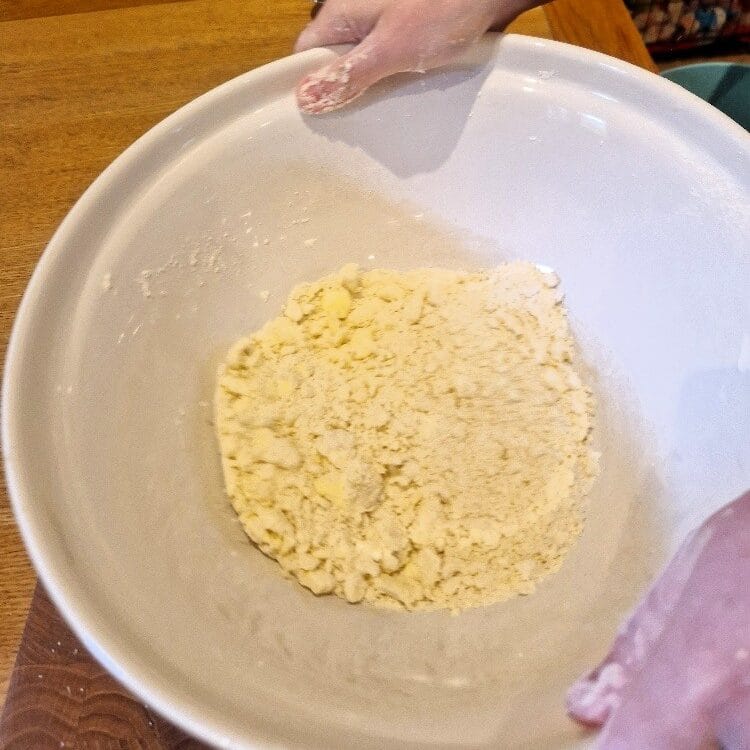
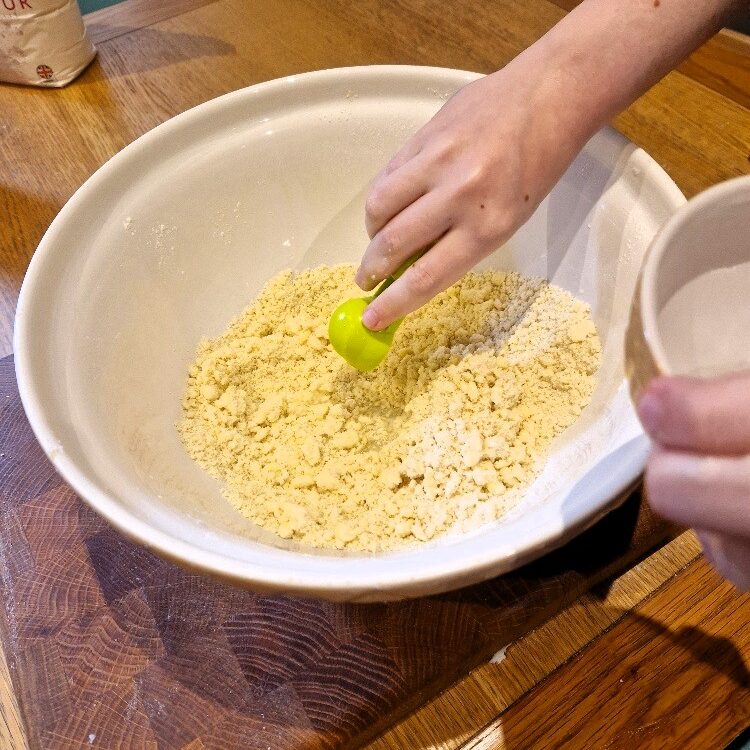
Sift the flour into a large mixing bowl, then add a large pinch of salt. We prefer to use unsalted butter and add salt ourselves, but if you use salted butter do not add more salt.
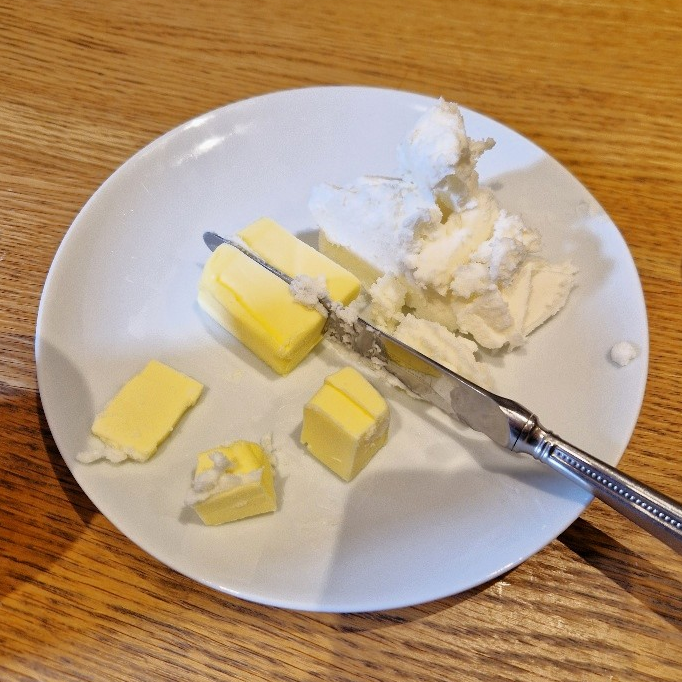
Measure both fats onto a plate, then cut into small cubes. Our white fat today was a bit crumbly, so wouldn’t cube neatly. But it was still firm enough to rub in and worked fine.
Now add the cubed fat to the flour and rub in well. For detailed instructions and more pictures, see our rubbing in Tip. Use the tips of your fingers to firmly rub the flour into the fat – lifting it up as you rub to incorporate air – until there are no lumps.
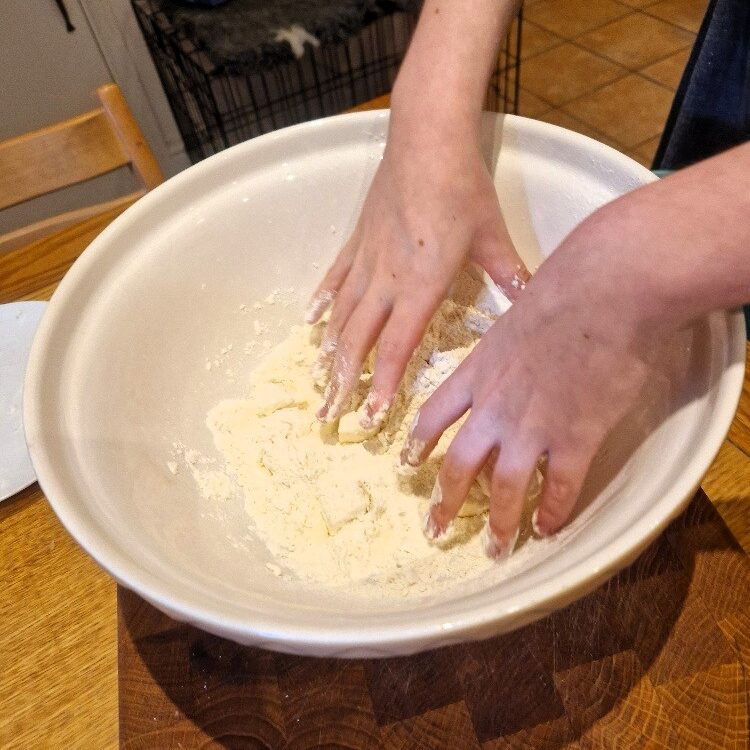

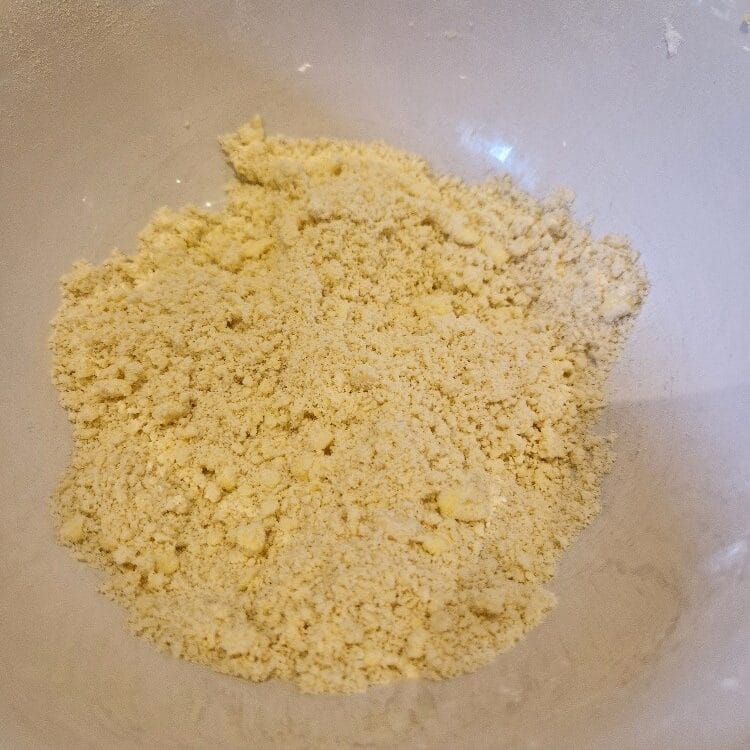
As you get towards the end of the rubbing in, shake the bowl from side to side. Any remaining larger lumps should come to the surface and you can rub these in more. Stop when there are no lumps and the mixture resembles breadcrumbs. It is time to stop if it feels like you are creating more lumps than you are rubbing in!
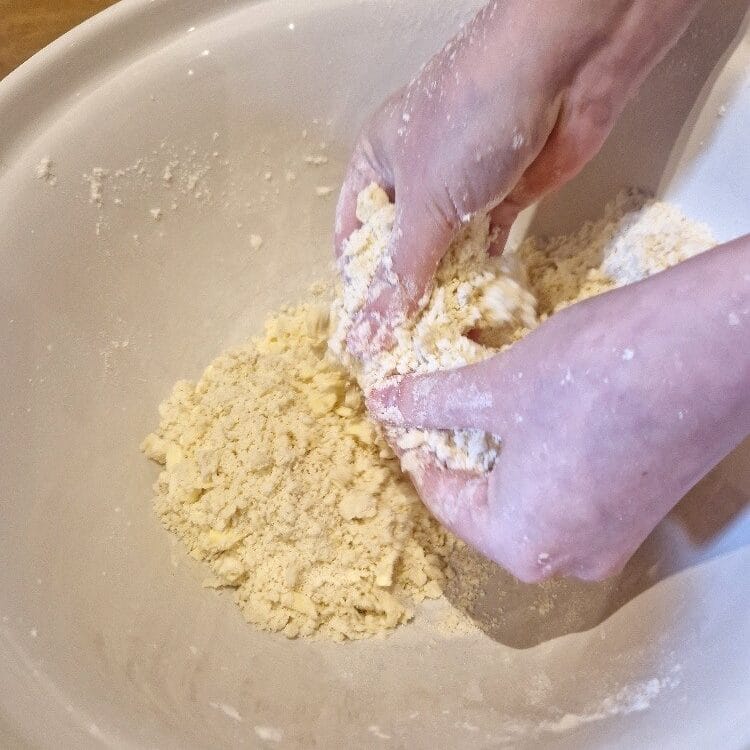
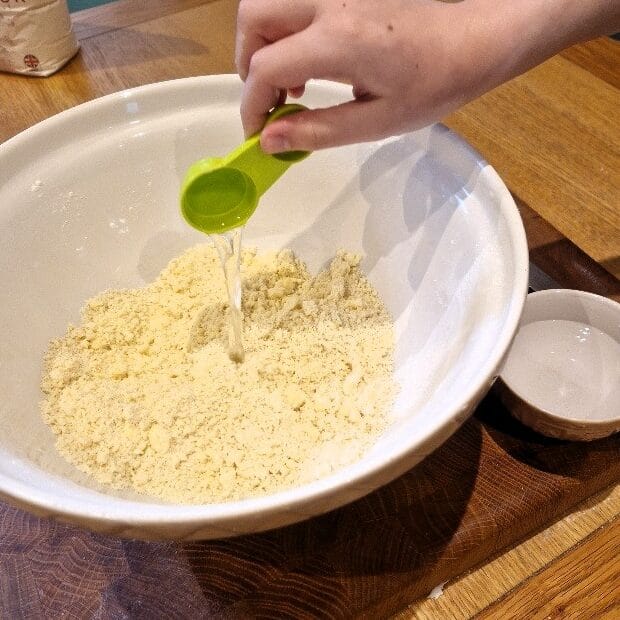
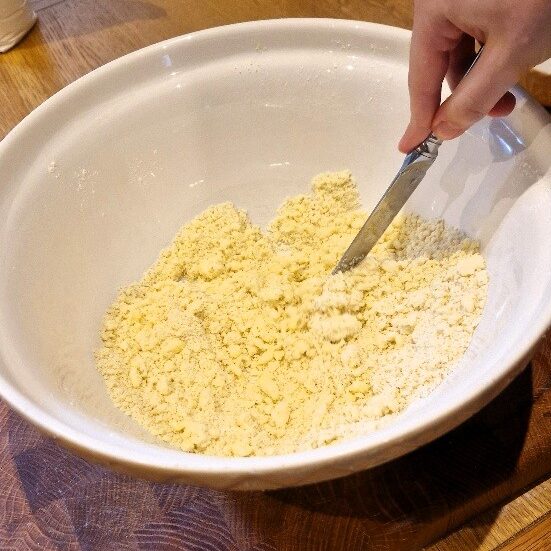
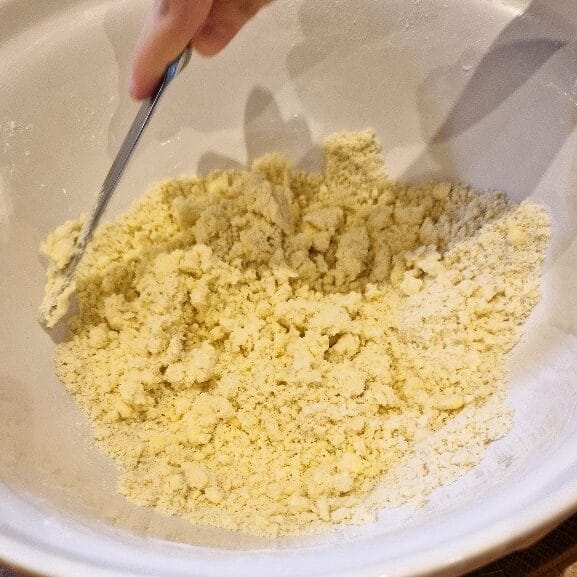
Now add some cold water. How much you need will depend on various factors, like the type of flour and the humidity in the room. For a 180g flour mix, we start with two tablespoons, then add more if needed. As we often say, it is easy to add more, but hard to take away! Use a table knife or fork to bring the mixture together – you have enough water when it starts to form some small lumps of dough in the bowl. Today we needed to add one more tablespoon of water.
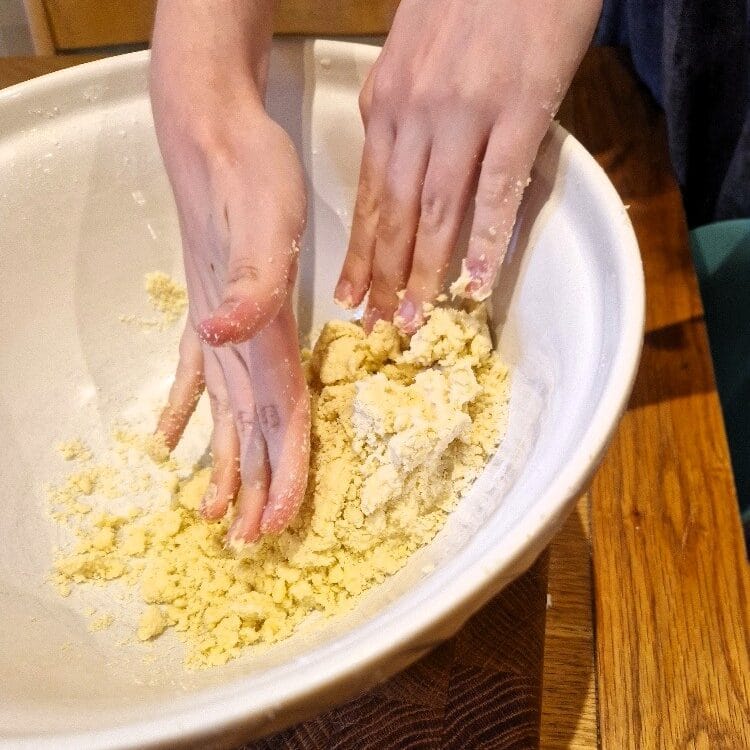
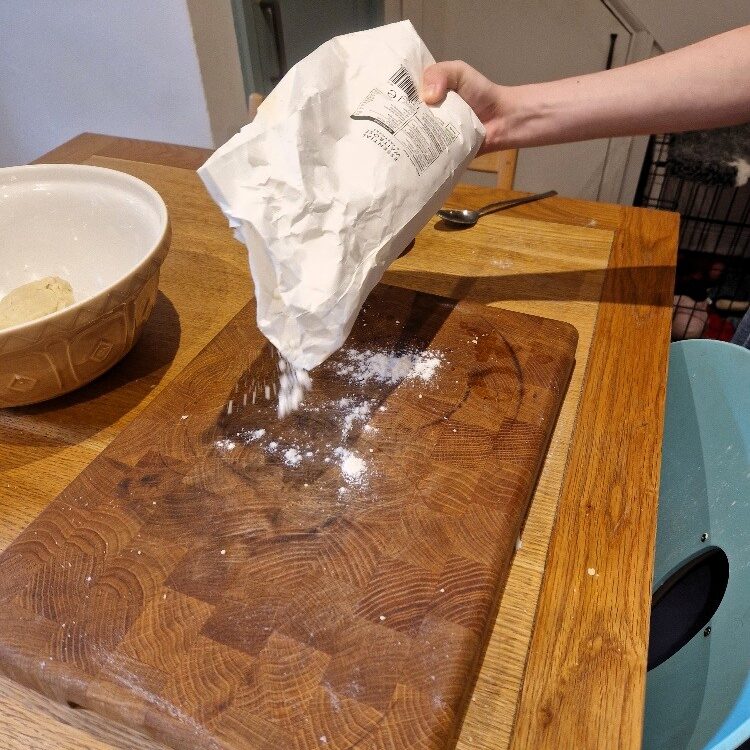
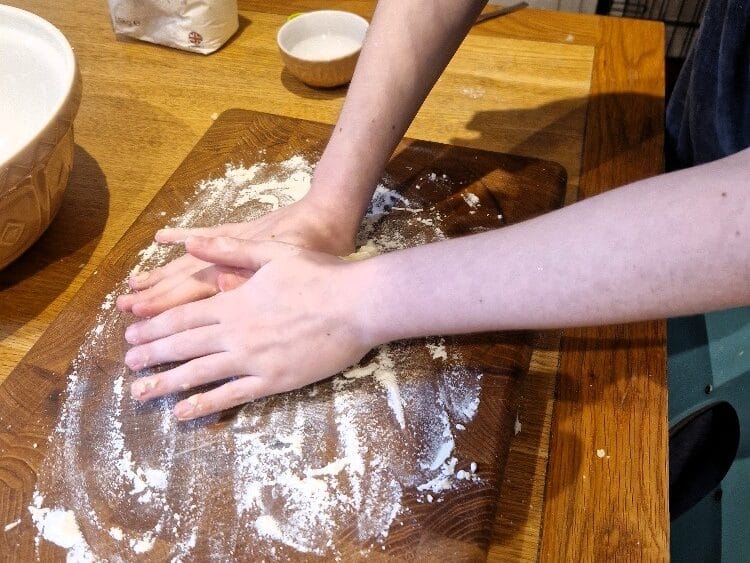
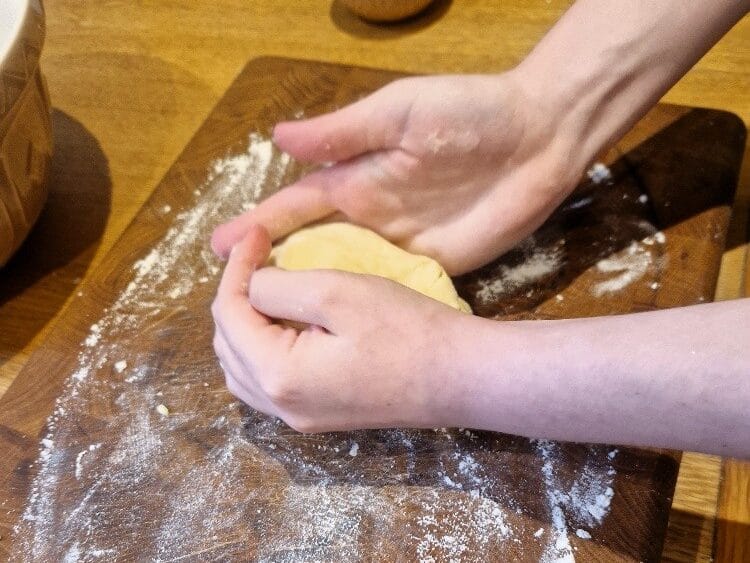
When the dough starts to form, go in with your hands. You need to press the mixture together with you hands and against the sides of the bowl to form a ball of dough. It should feel soft but not wet, and leave the bowl clean, as below. You can add a little more flour if it does get too wet. But if you go cautiously with the water in the first place you shouldn’t need to. Lightly flour a board ready to knead the dough on.
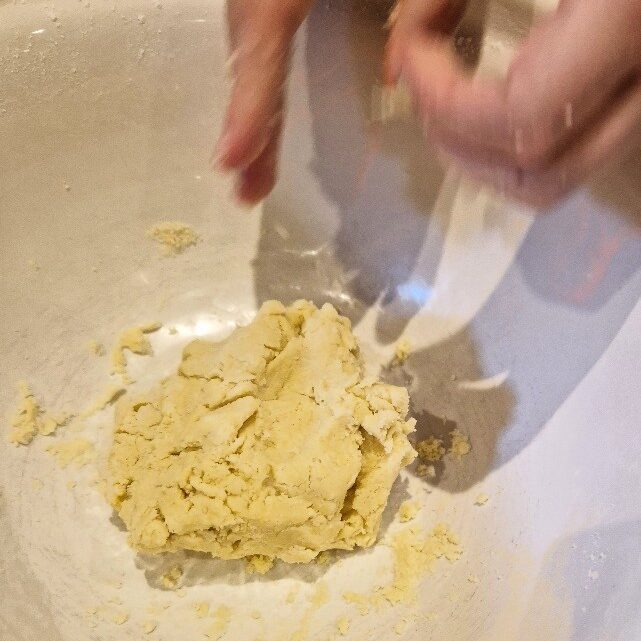
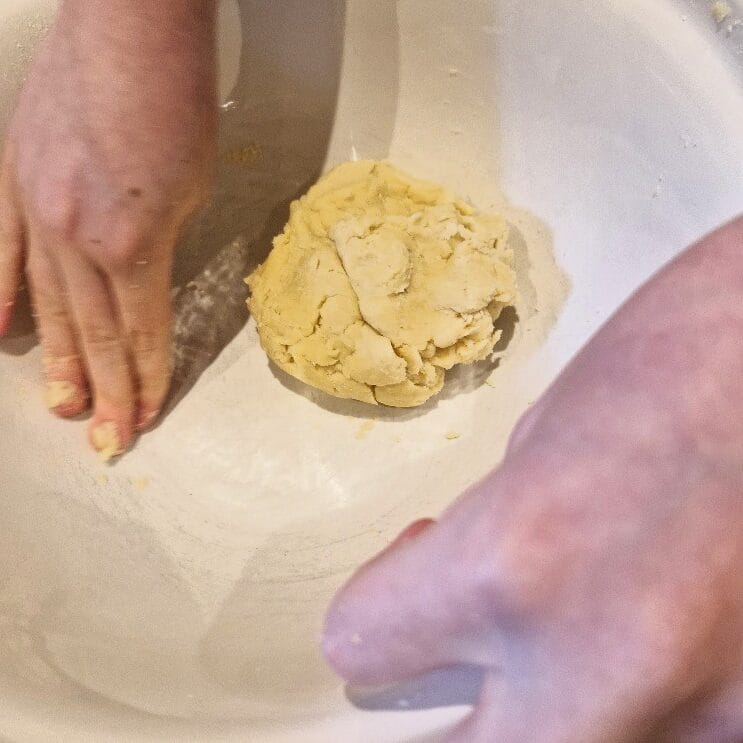

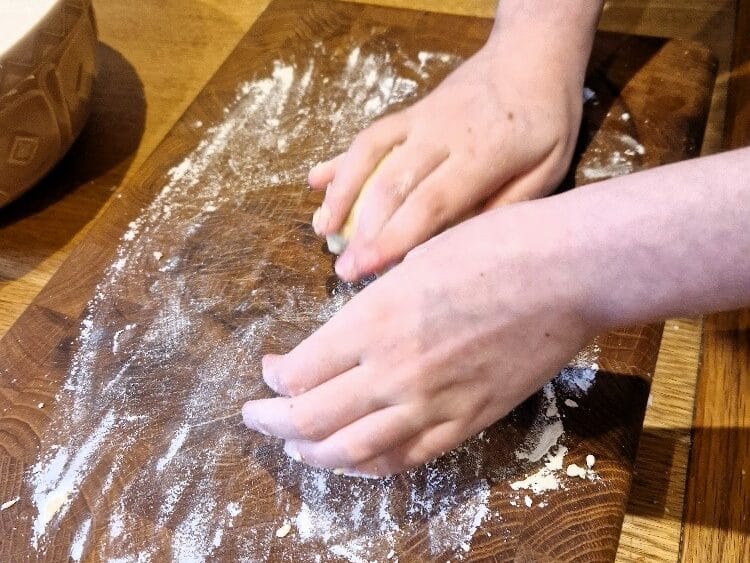
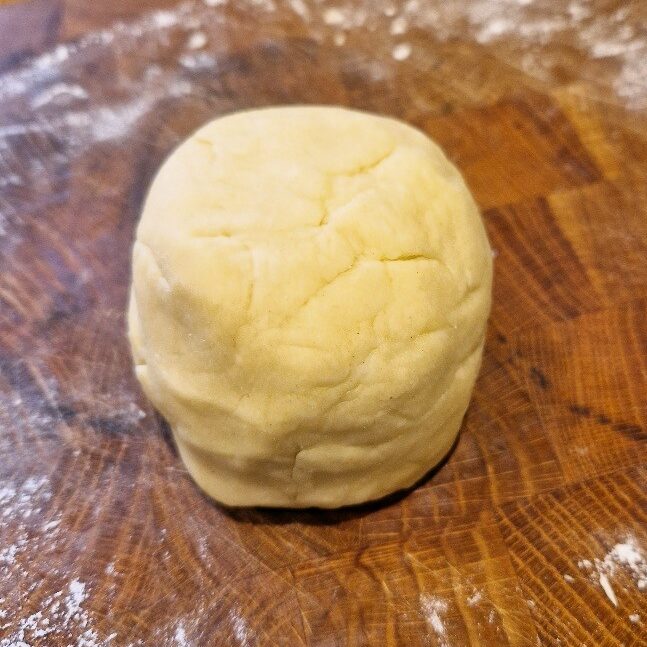
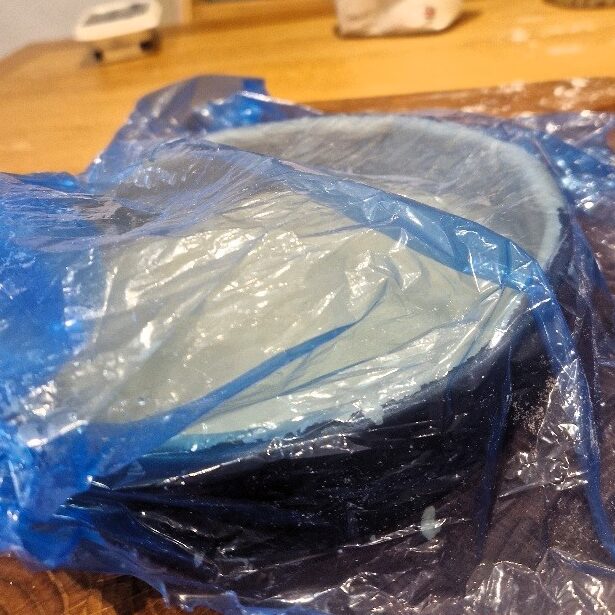
Place the ball of dough onto the board and knead well, pushing down on the dough and turning it over and around, until it forms a smooth ball. See more details in our dough Tip. Cover the dough with cling film or place in a plastic bag, and chill in the fridge for at least 10 minutes, and up to about half an hour. You want the dough chilled enough so it firms a little and is easier to handle, but not so firm that it is hard to roll out. If you need to keep it in the fridge for longer, take it out about 20 minutes or so before you start to roll.
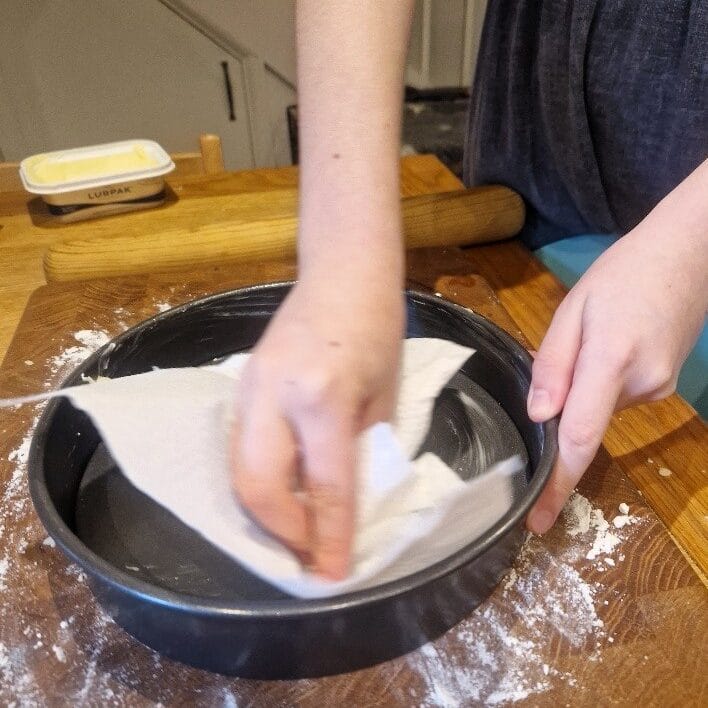
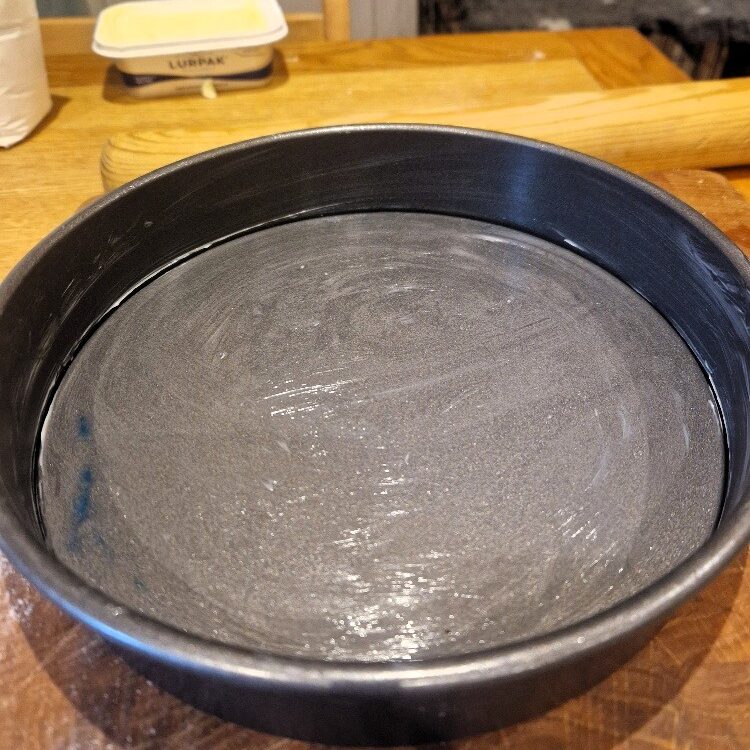
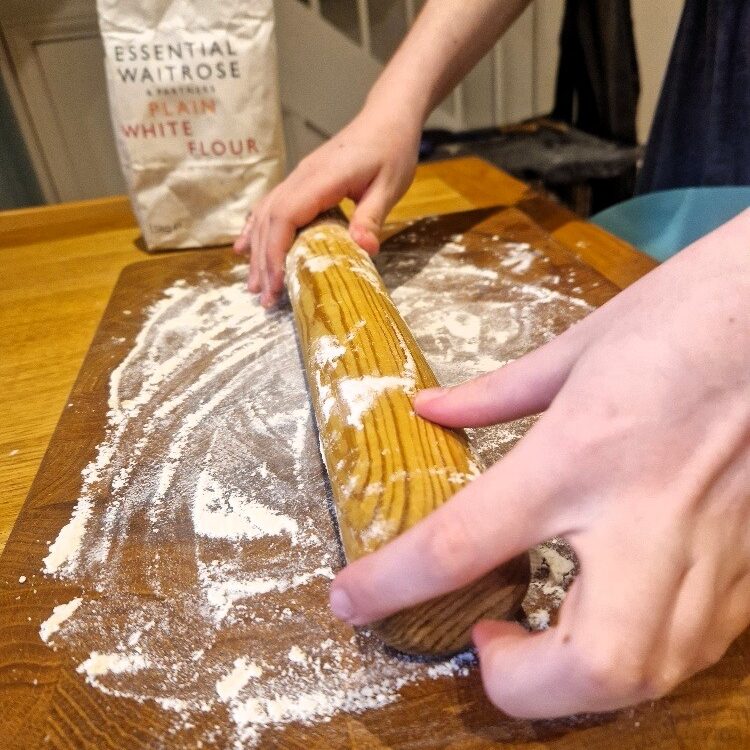
While the dough is chilling, grease your tart tin very lightly with butter or spray oil. We only grease the tin for pastry when using a filling that might bubble up and stick; most pastry recipes (even this one) will be fine without. Serving the tart will also be much easier of you use a loose-leaf or springform tin, with a loose bottom. For our size of mix, we used a 20cm (8 inch) tin. Flour the board again, plus the rolling pin. The board you roll out on must be large enough to roll the dough into a sheet larger than the size of the tin. When the dough is chilled, you are ready to roll!
Jake sticks his nose in
For pastry, never heavily grease the tin. And don’t grease at all if your filling isn’t sticky or liable to bubble up. For fillings that might bubble, you want to very slightly moisten the tin so that any filling doesn’t make the tart stick, but if you use too much fat it will leak into your pastry. If your tin is a really good non-stick one, you can line without greasing, or just lightly dust with flour instead.
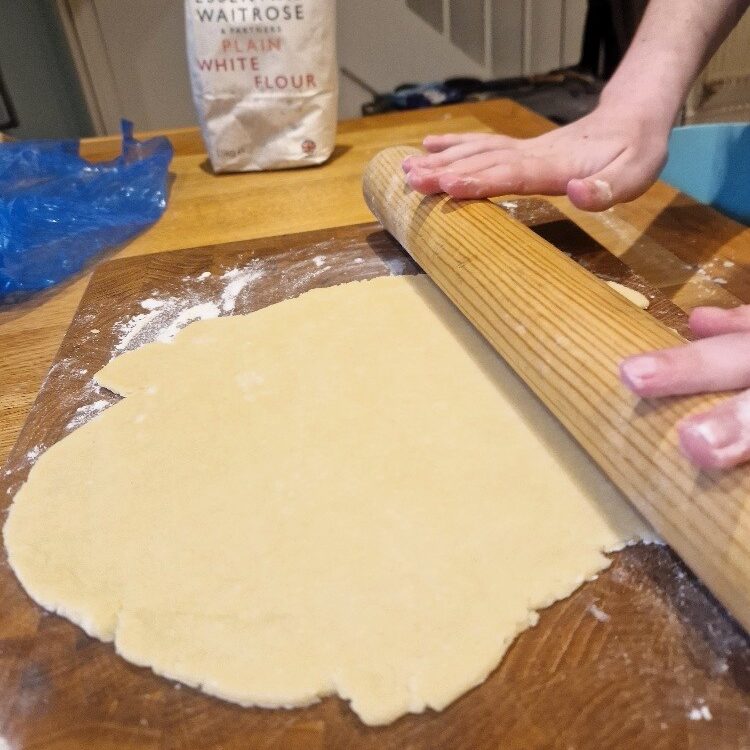
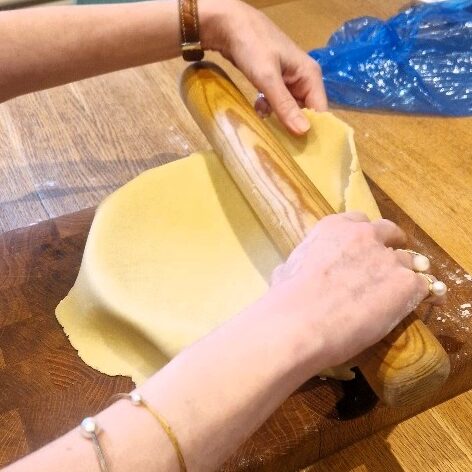
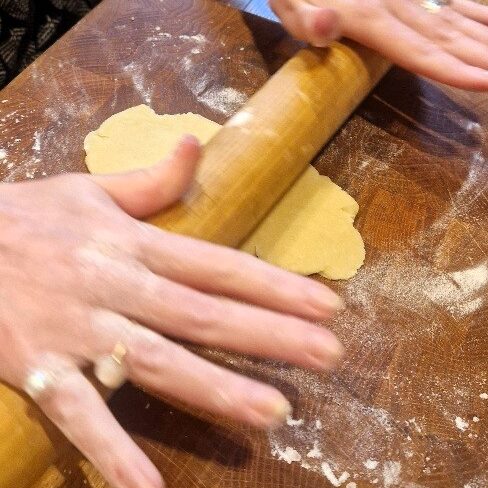
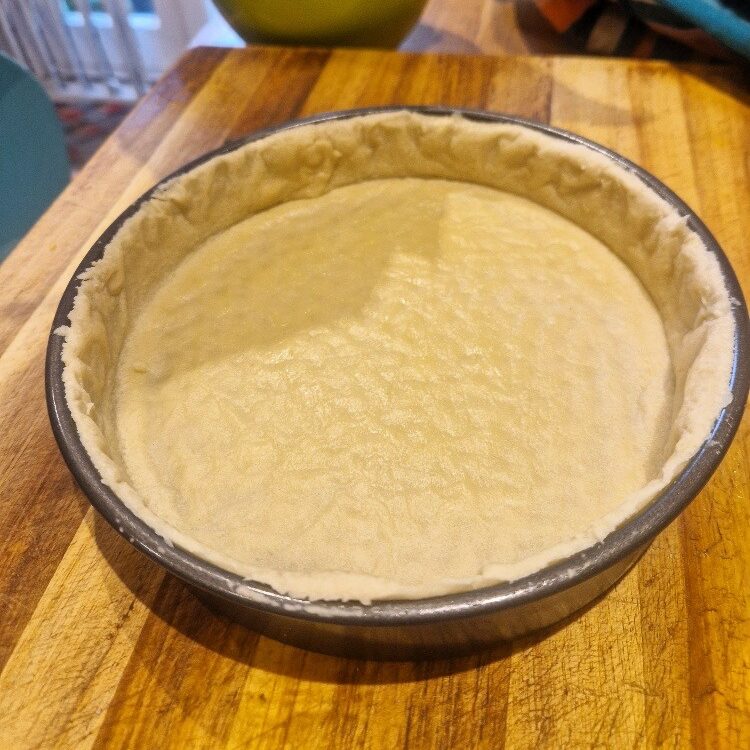
To roll out the dough, place it on the board, then flatten it by pressing down on it with your hand. Roll the dough firmly, turning it 90 or 180 degrees between every few rolls, to create a large, thin sheet. See more detail in our rolling out Tip. You can also flip the pastry over once or twice while rolling. If the pastry tears a little while rolling, don’t worry, just reform or patch it and carry on. You need the pastry to be large enough to fill the tart tin, including up the sides, with a bit of ‘safety’ overhang. Hover the tin over the pastry to help check the size.


When the pastry is large enough, you are ready to line the tin with it. For more details see our lining Tip. This is probably the trickiest part of the whole recipe. With a little practice you’ll easily get it however, and do follow our Tip. And if you go wrong, don’t worry – most mistakes can be remedied.
First, lift the pastry onto your rolling pin, then drape it gently over and into the tin. It is helpful if someone puts the tin under your pastry for you, rather than you move the pastry to it! Try to keep the pastry fairly loose, and draping into the tin. Now gently tease the sides down in to the tin to fit it, pushing it into the sides and against the base so it is shaped to the tin. See our Tip and the pictures below.
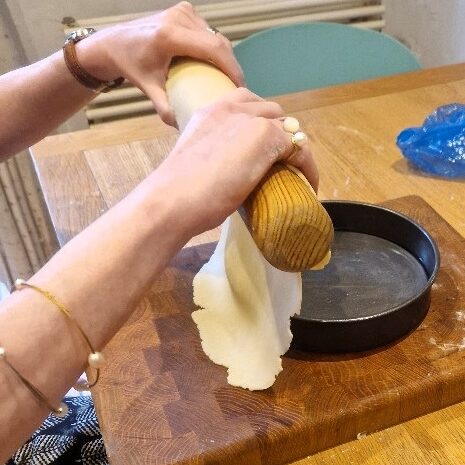
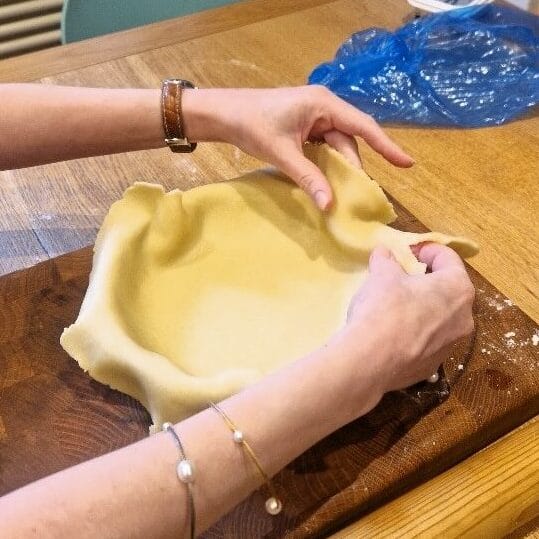
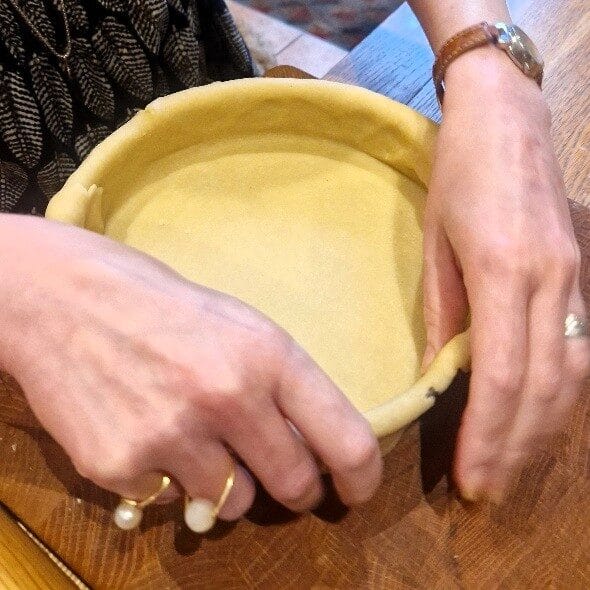
If the pastry falls short on one side, don’t worry, just tear some of the overhang off and patch it, pressing the dough well to seal it. Equally, if the pastry tears or breaks, or looks thin in certain areas, again just patch it. Remember, no one will ever see the inside of the pastry case when the treacle tart is baked!
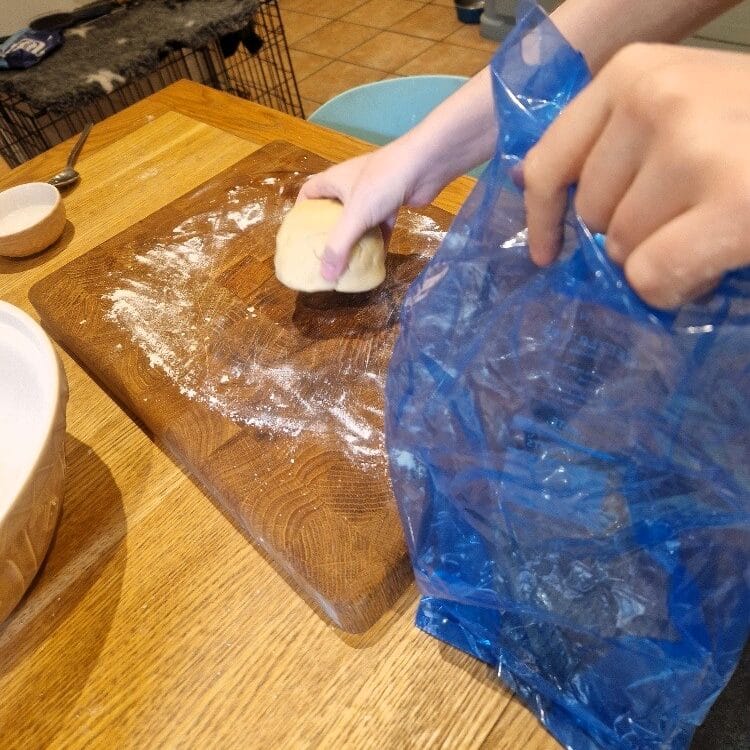
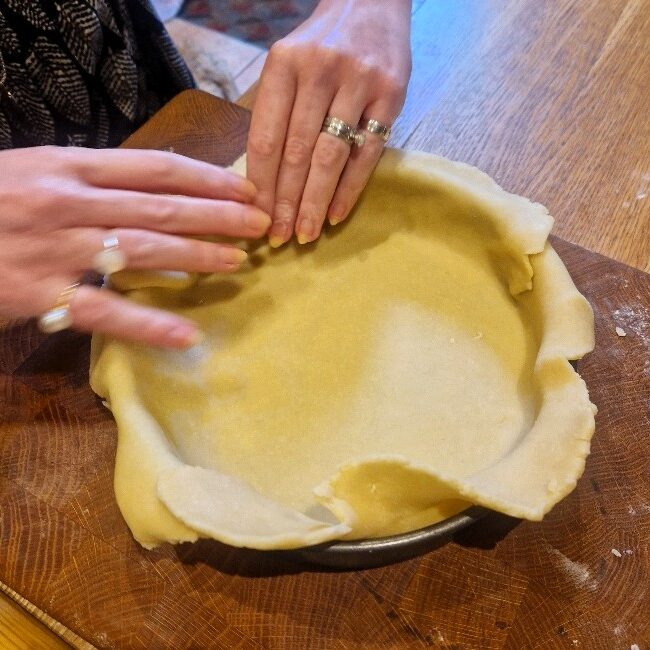
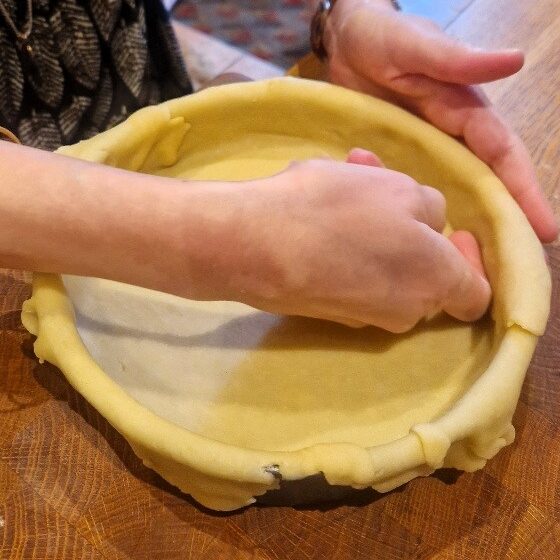
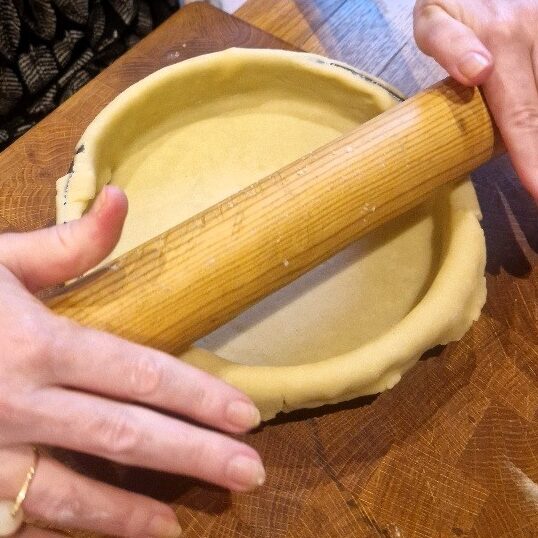
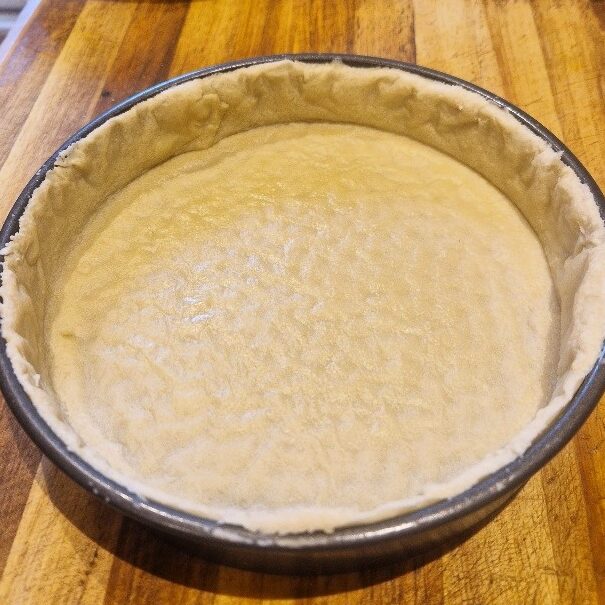
When you are done, neaten up the top. You can cut off the excess with a knife, but we like to roll the rolling pin firmly over the top of the tart tin. The extra pastry will just drop off, or come off easily if you pull it. Cover the tart case with a plastic bag or some cling film, and set in the fridge for at least an hour, or ideally about 2 hours.
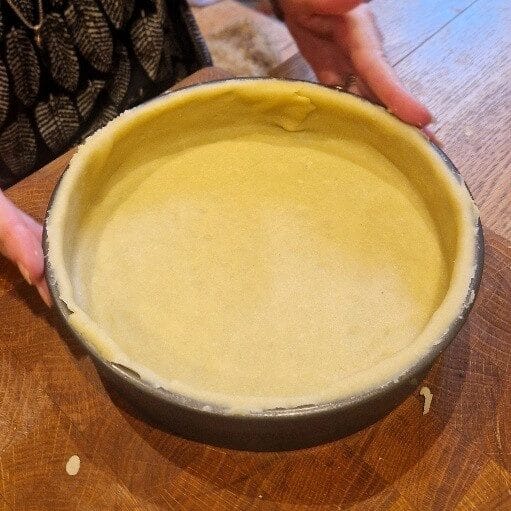
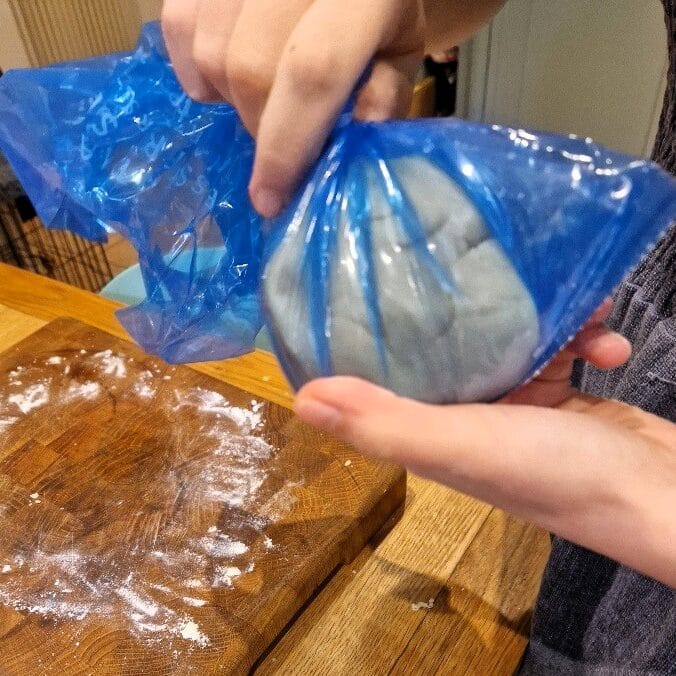
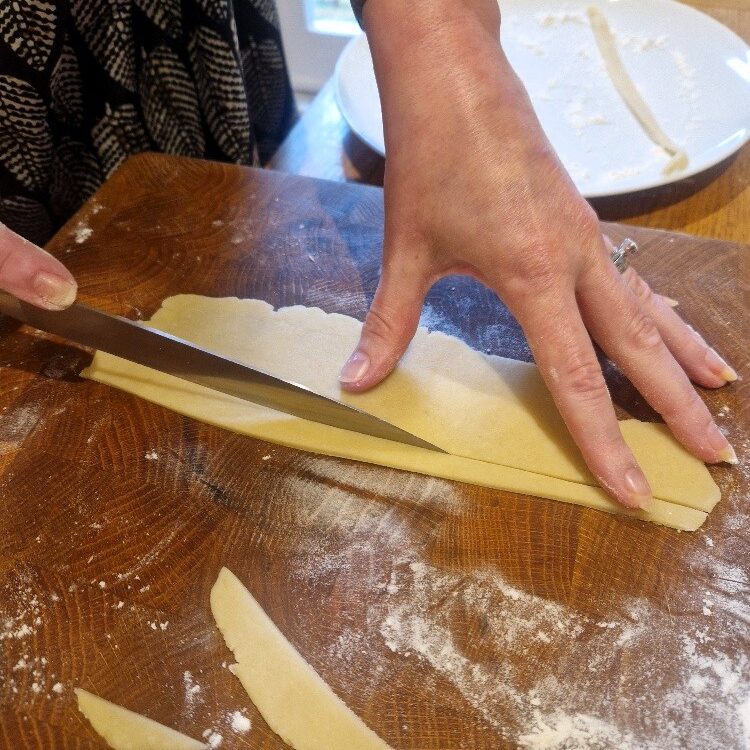
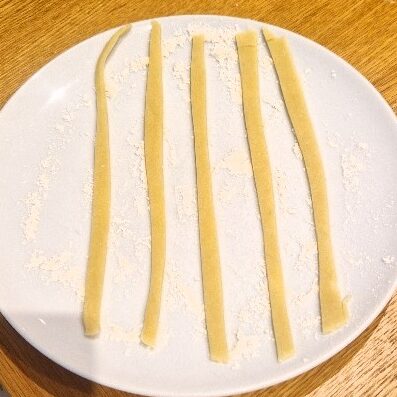
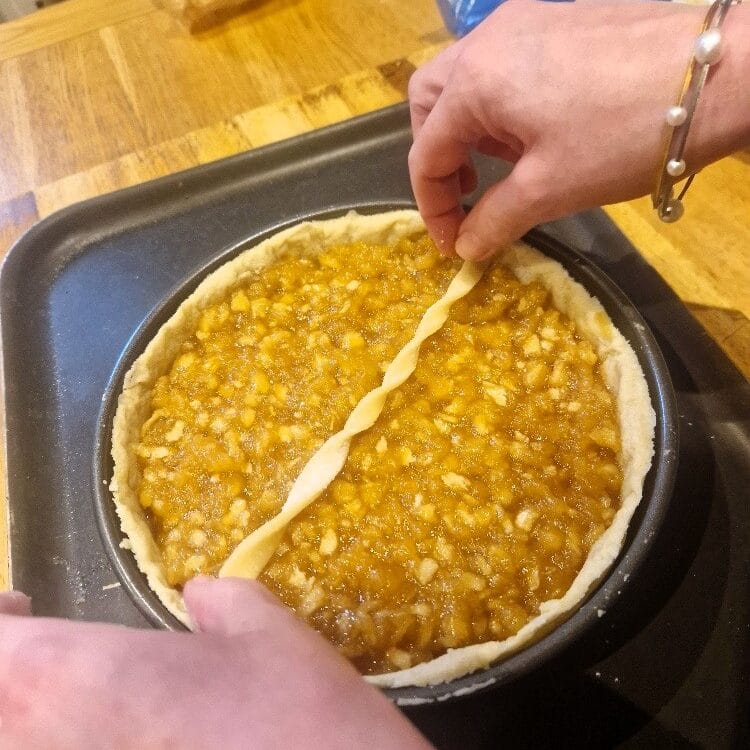
Finally, if you wish to decorate the top of the treacle tart, squash the pastry offcuts into a new ball of dough, and roll out into a long thin shape. Cut the pastry into thin strips, which are at least as long as the width of the tart tin – you need about 4 or 5. Place on a plate, cover with cling film, and set in the fridge to chill. You pastry is made!
Making breadcrumbs
If we’d properly planned ahead, and got our bread really stale, we would have just blitzed it in the food processor to form medium crumbs (don’t over process or it will go gluey). But after a few hours out, the bread was still too wet. But at least our mishap gives us the chance to tell you what to do if you don’t have time to get your bread stale!
There are two approaches you can take here. First, you could remove the crusts from the bread, tear into rough pieces and put into a low oven at about 120C to 150C (100C to 130C fan), until really dry, about 15 to 20 minutes. Remove and allow to cool. The bread is then ready to be blitzed in the food processor. This works, but does tend to give you quite dry breadcrumbs.
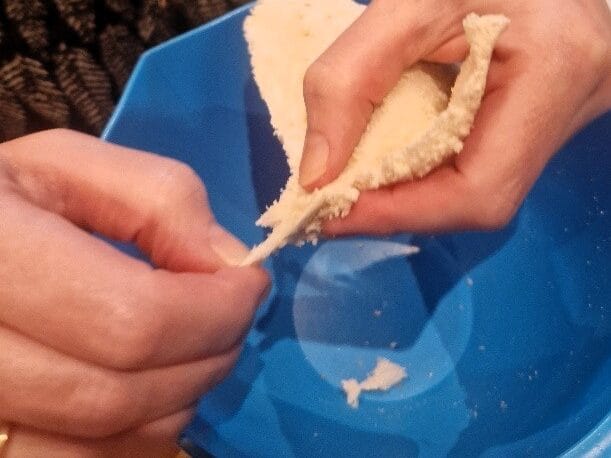
If you don’t have a food processor, or want your breadcrumbs softer (which are better for treacle tart), you can make them by hand. This is easy but time-consuming.
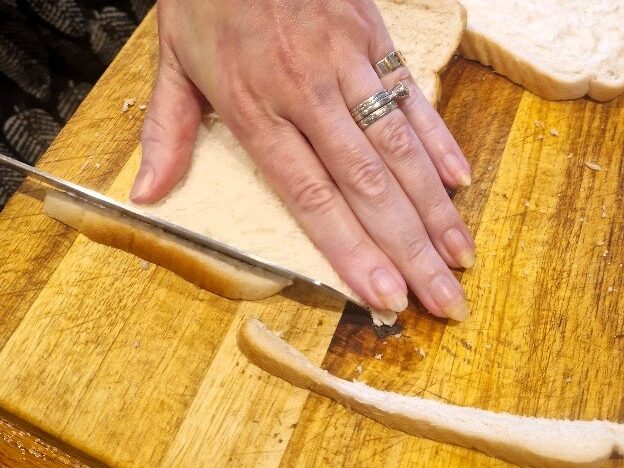
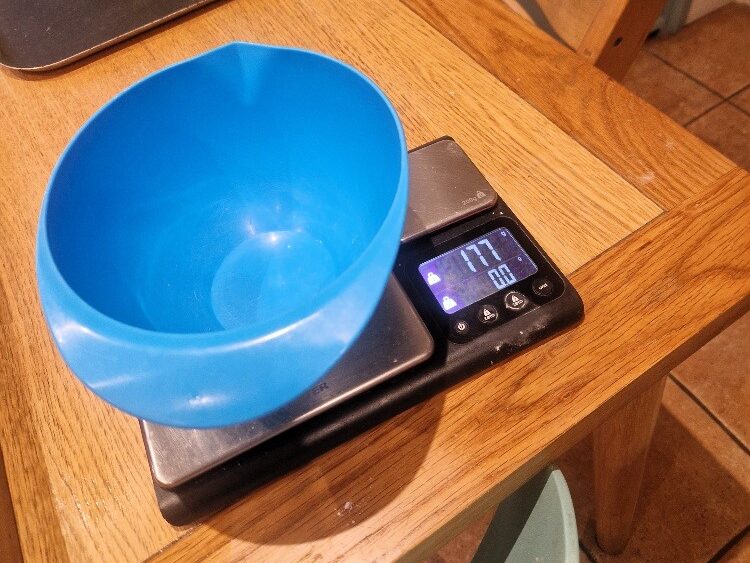
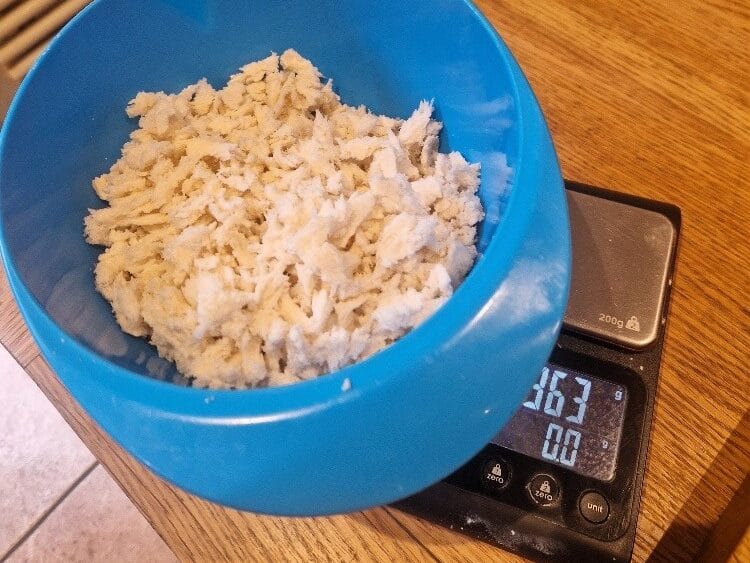
Frist, get your bread as stale as you have time to, by laying it out in pieces on a board or plate. Use more bread by weight than you need for the breadcrumbs – you will be removing the crusts. For 200g of breadcrumbs we used about 8 slices, but this will vary with the size of your bread. When you are ready to make the breadcrumbs, remove the crusts. Also weigh the bowl you will crumb the bread into.
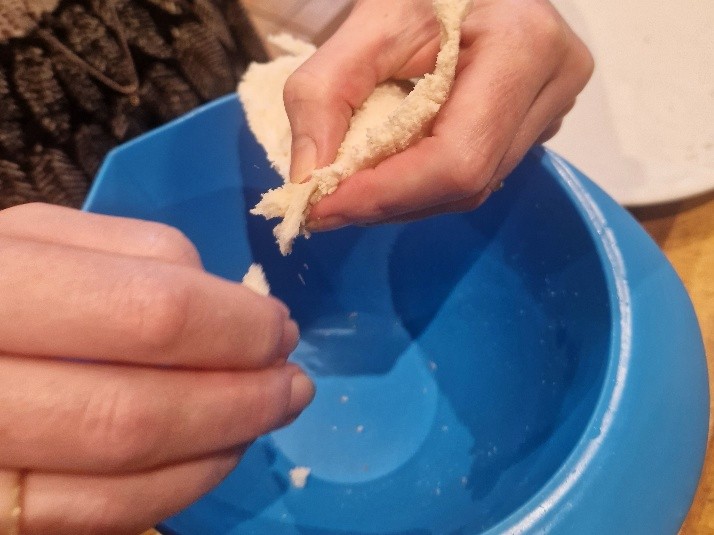
Now pinch little pieces off the bread into the bowl. Hold the bread quite lightly as gripping it too hard will make the patch you are holding gluey. Keep going until enough bread is crumbed. This is a bit tedious, but also strangely satisfying! It took us just over 20 minutes to do 8 slices of bread. Keep weighing the bowl, deducting its own weight, until you have enough crumbs for your recipe.
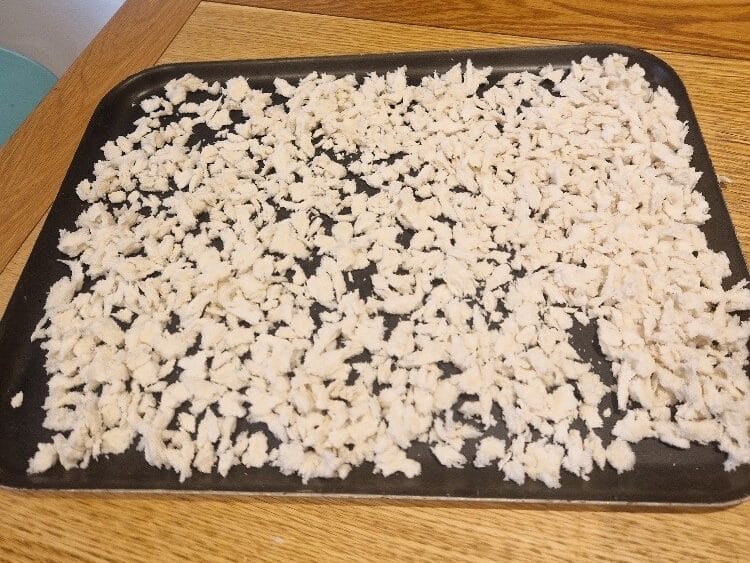
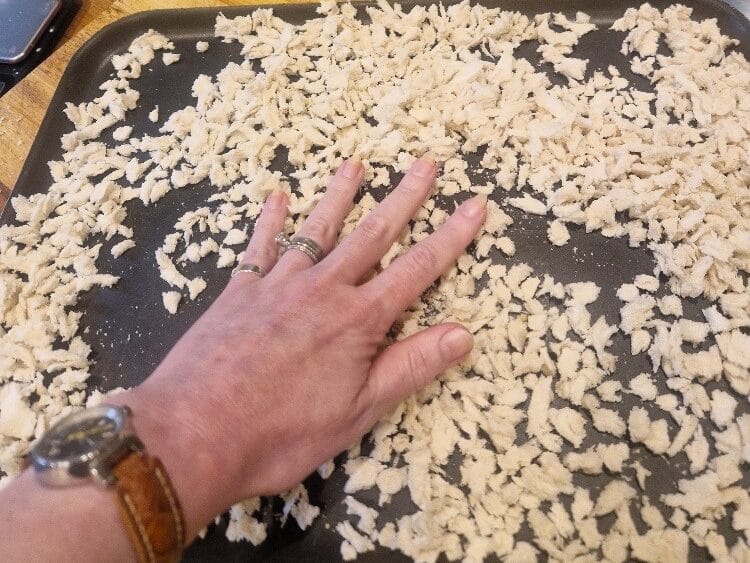
You’ll still need to dry the crumbs out a bit. Spread onto a baking tray in as close to a single layer as you can. Then put into a very low oven, about 100C to 120C (80C to 100C fan) until slightly crisped on the outside but still soft. Ours today took just over 10 minutes. Remove from the oven, then mix the breadcrumbs around a bit with your hand (this helps them crisp) and allow to cool. When cool, place back into the bowl until you need them.
Baking the treacle tart case blind
‘Baking blind‘ means to cook the tart case, weighted down, before filling. See our baking blind Tip for more details. When your tart filling will be cooked in the pastry shell, as with our treacle tart today, you only part bake blind. This helps keep the bottom of the tart dry once filled, but doesn’t cook the pastry so much that it burns when baked again with the filling.
For treacle tart, blind baking isn’t 100% essential. In fact, Katie Stewart doesn’t blind bake in her version. But Katie does a shallow tart with a very thin layer of quite a firm filling. Our tart filling is more like the St John version, and we prefer a deeper tart, as they do, so blind baking gives an overall crisper result.
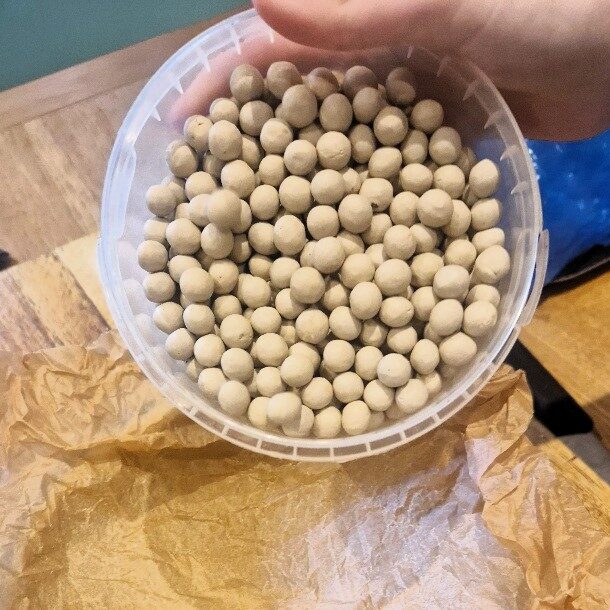
We bake blind with special ceramic baking beans. You can get these quite cheaply online, and they work very well as they both weight and retain/distribute heat. It’s worth buying a box if you plan to bake often – another benefit is that you can reuse them as often as you like. But you can bake blind with anything dry & neutral that can add weight – dried beans or rice are a good option.
Jake sticks his nose in
You can reuse beans, rice, pasta etc quite few times to bake blind. Store them in a jar after each use. But you will have to throw them away eventually, as they will get burnt.
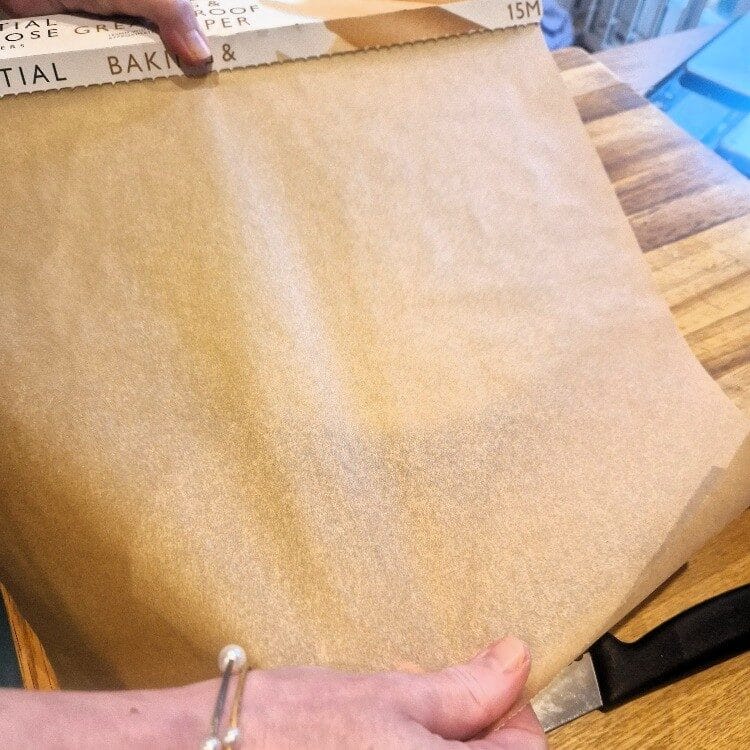
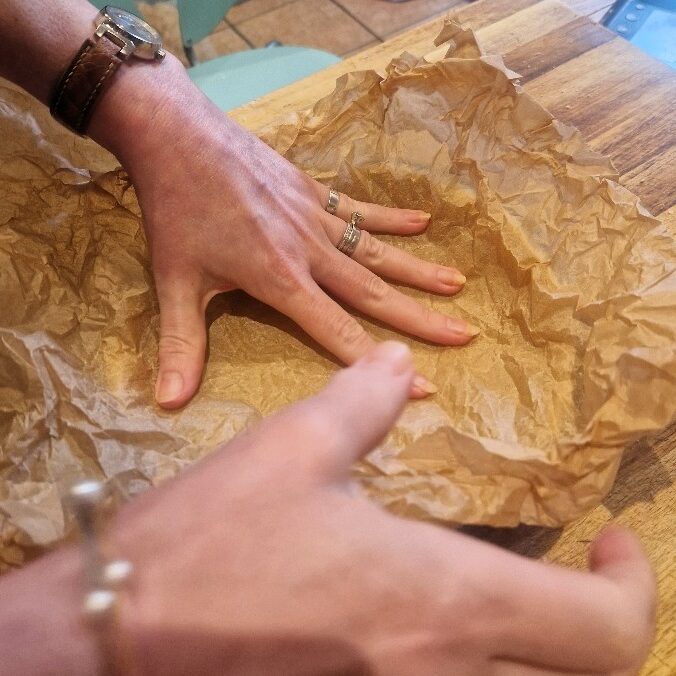
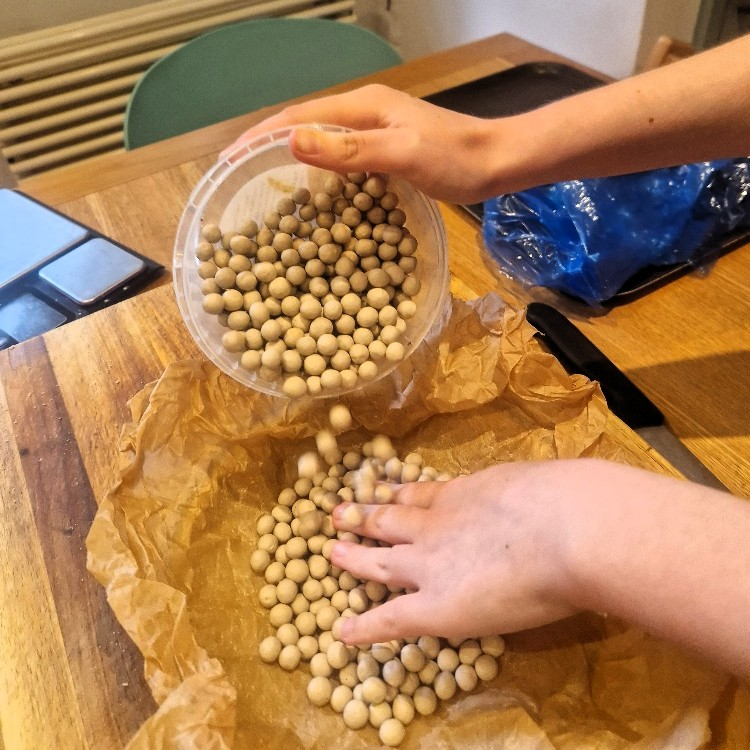
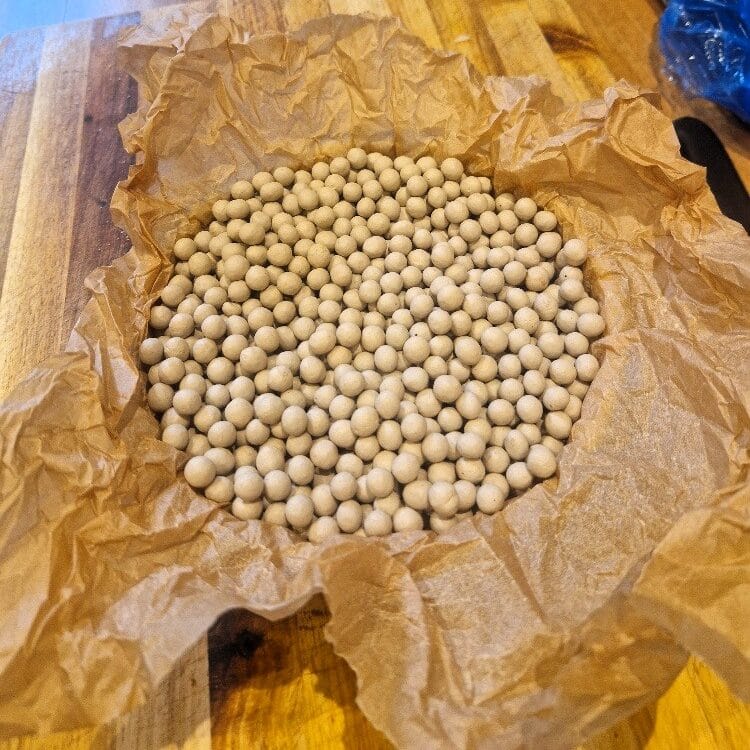
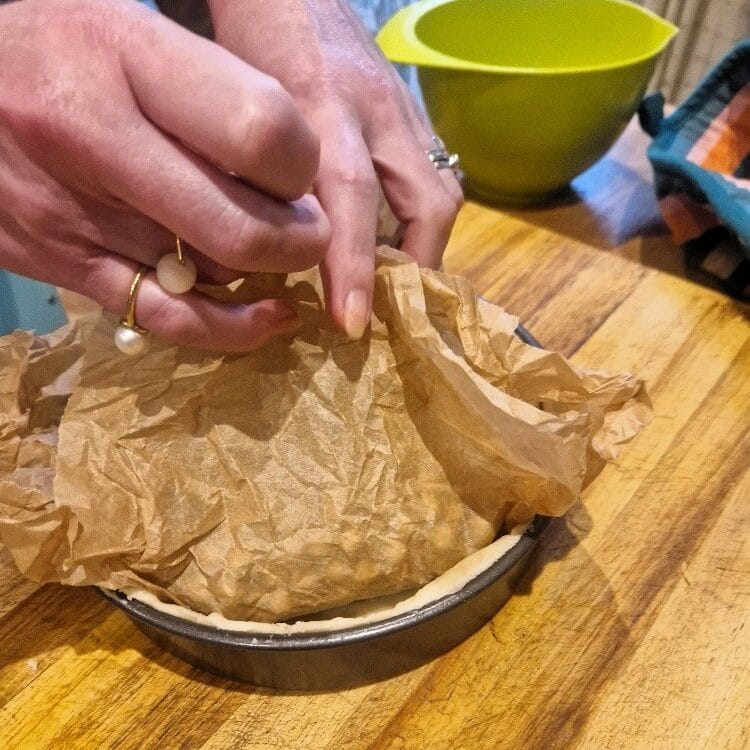
First measure out some baking or greaseproof paper. It needs to more than cover the size of the tin. Prick the base of the tart with a fork. Scrunch the paper up, and then line the pastry base with it, tucking it gently into the sides.
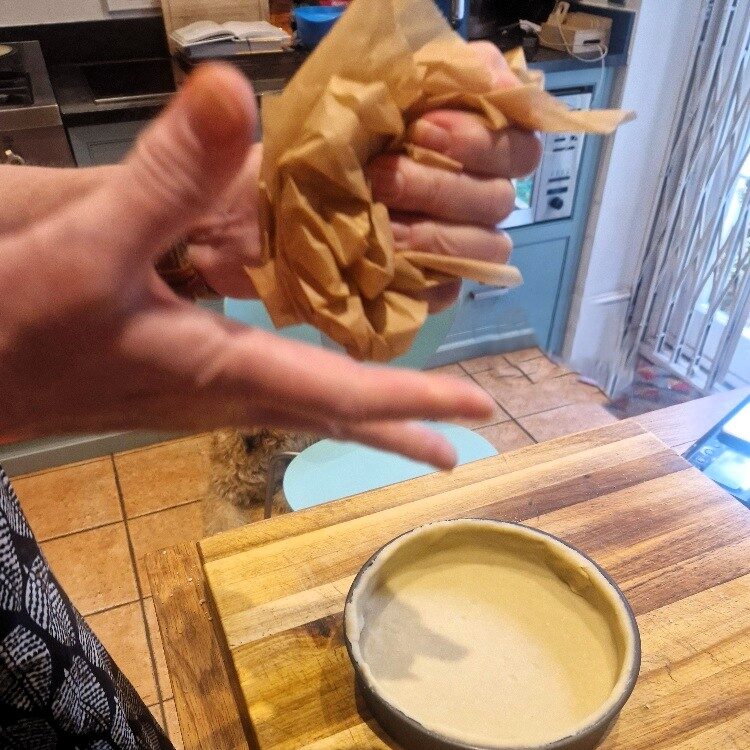
Now add the baking beans (or other weights) and distribute evenly. Place the tart into a preheated oven at 180C (160C fan) and cook for about 10 minutes.
After the first bake, remove the shell from the oven and take out the paper & baking beans, taking care as they will be hot. Replace the tart into the oven and cook for about another 5 minutes, to dry out the surface. Remove when the pastry looks dry, slightly crisp on the top edge, and partly cooked, but still quite pale. Set aside until you are ready to fill.
Jake sticks his nose in
When the tart case is part-baked it will be very fragile, especially when it first comes out of the oven, so take care. It is best to let it cool a little before filling. It will firm up more as it cools.
Making the treacle tart filling
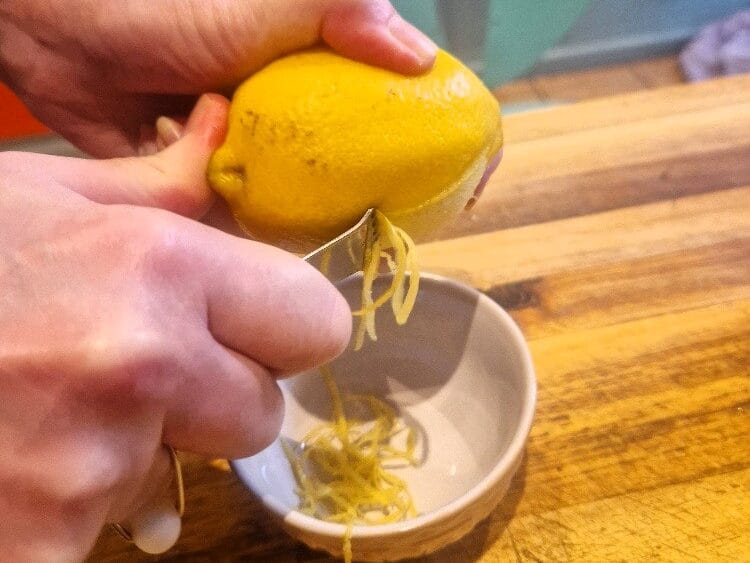
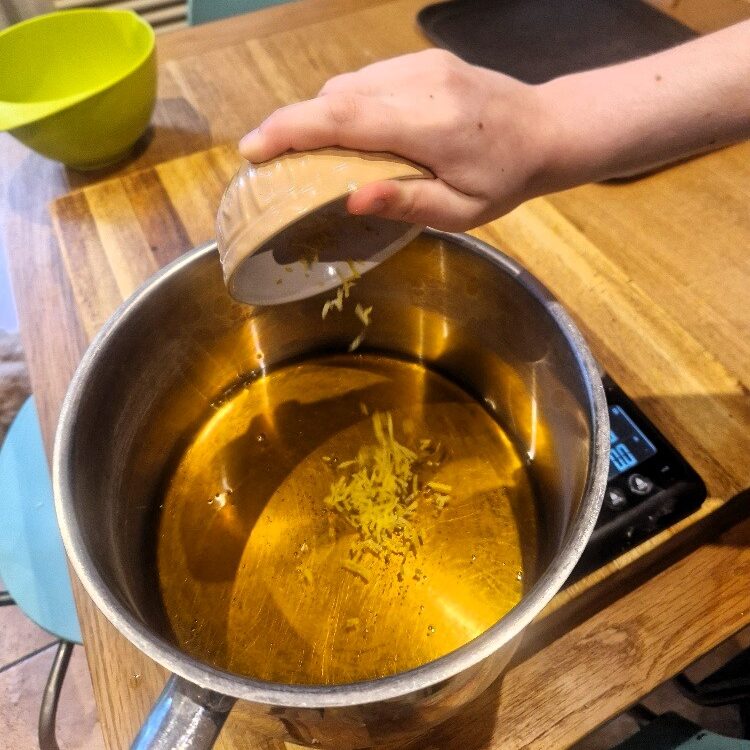
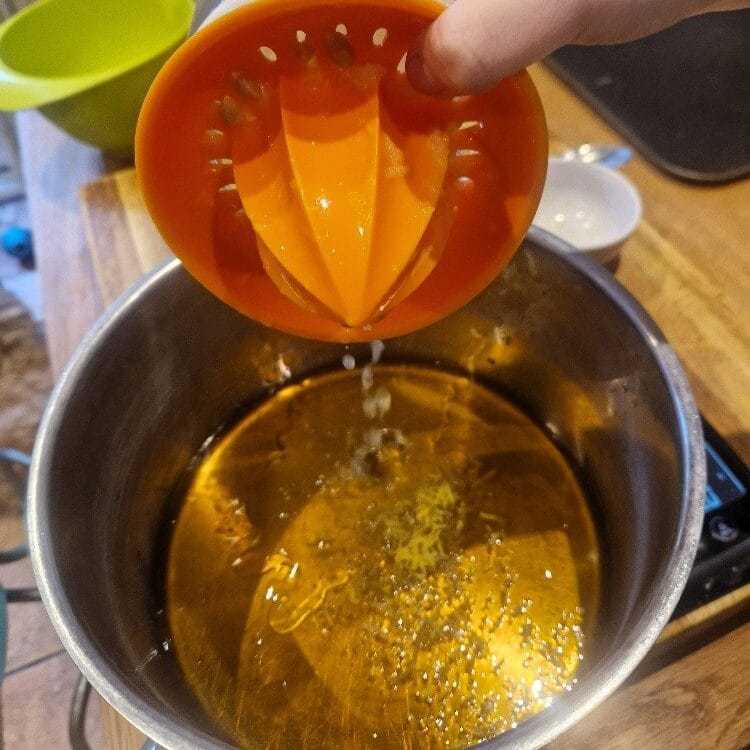
While the pastry is baking blind, prepare the treacle tart filling. First zest & juice an unwaxed lemon, then cut the zest finer. See our lemon Tip.

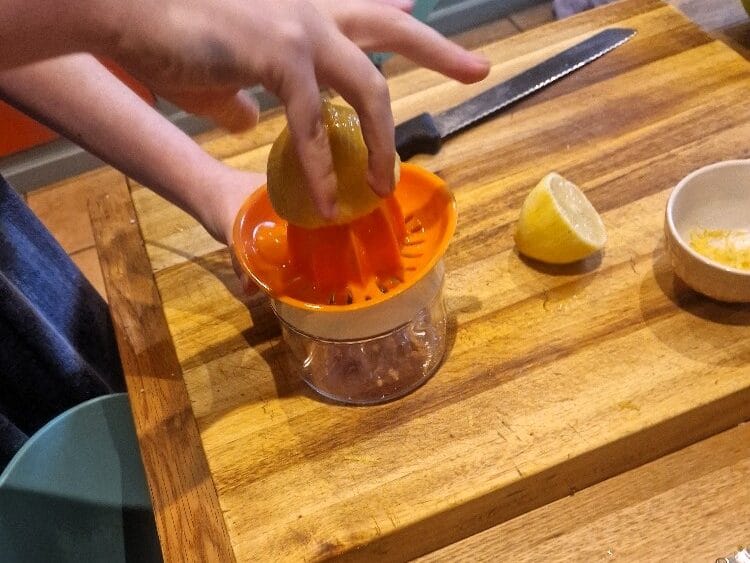
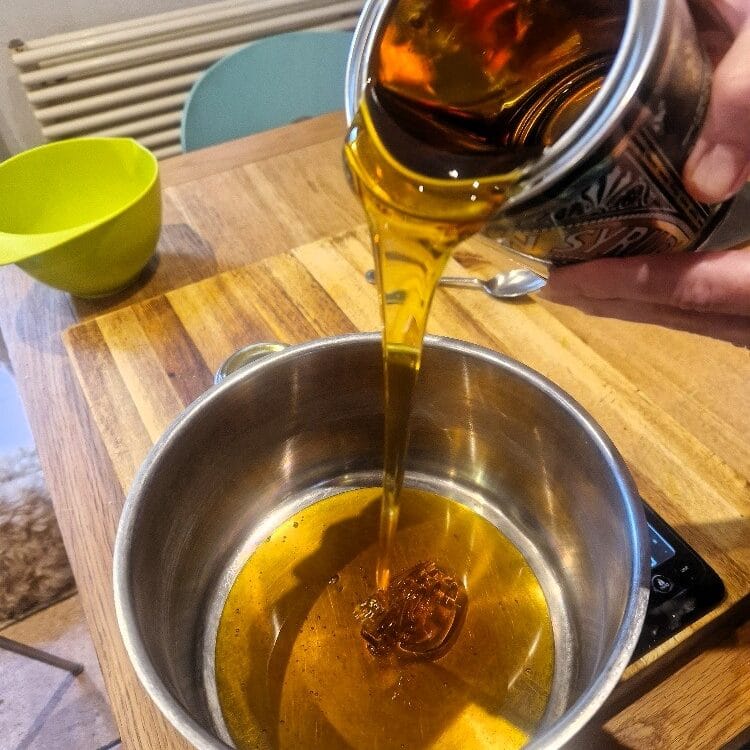
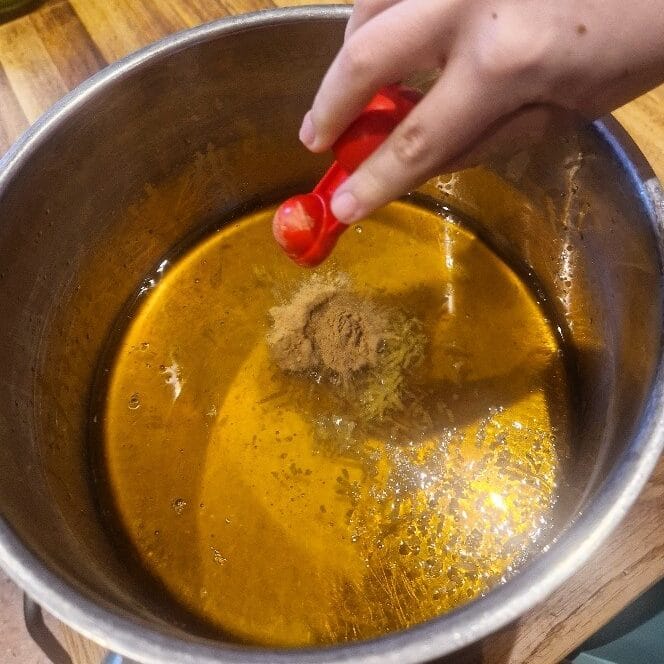
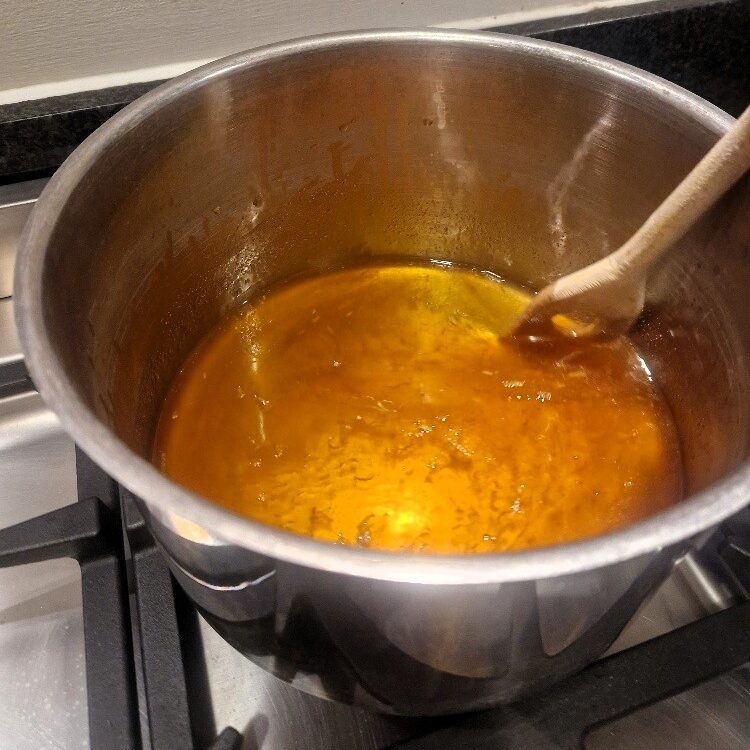
Now weigh the golden syrup directly into the pan you will make the filling in. A fairly large, heavy-bottomed saucepan is best. Add the lemon zest, juice and ground ginger, if using. We added two teaspoons. Set the pan over a medium heat, until the syrup is just hot – it will bubble slightly.
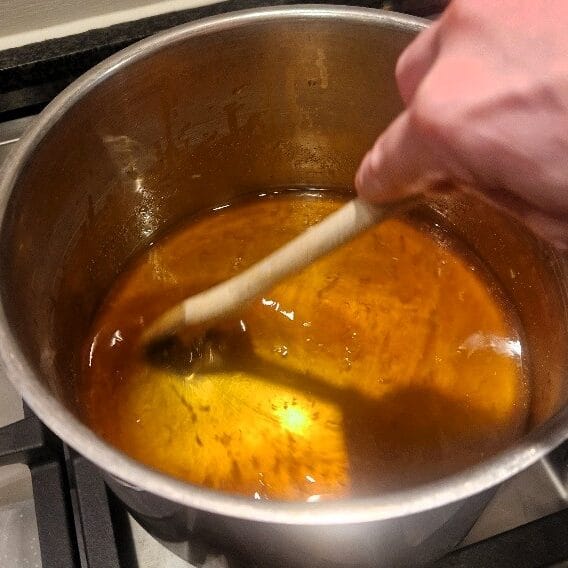
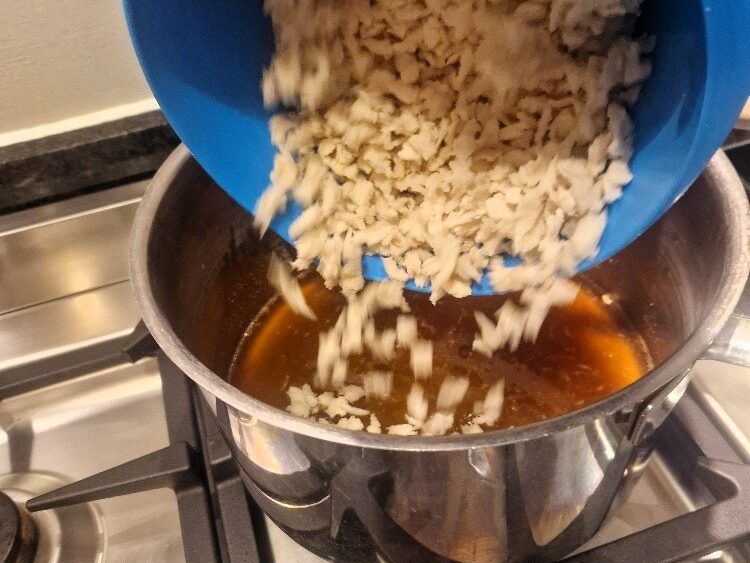
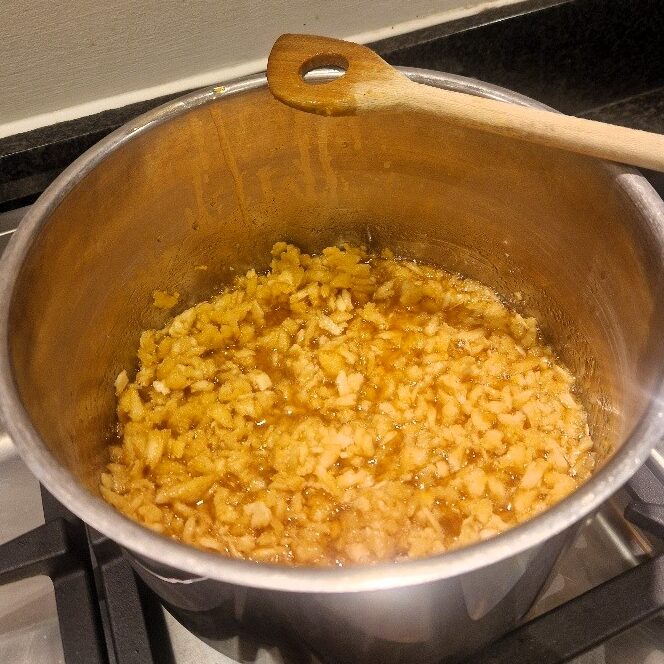
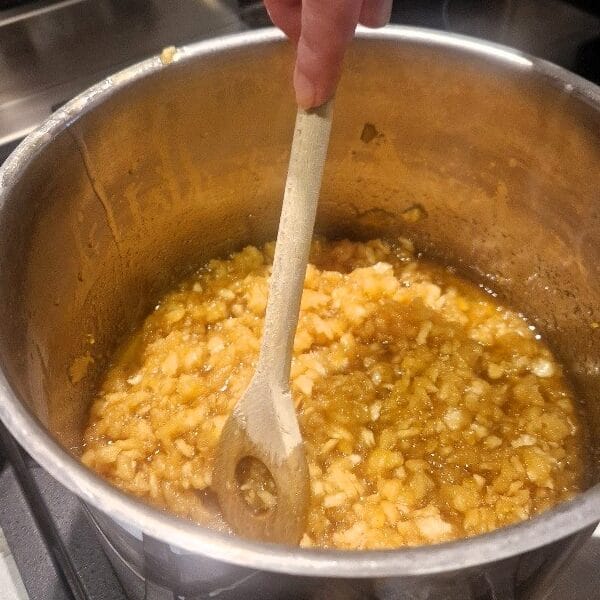
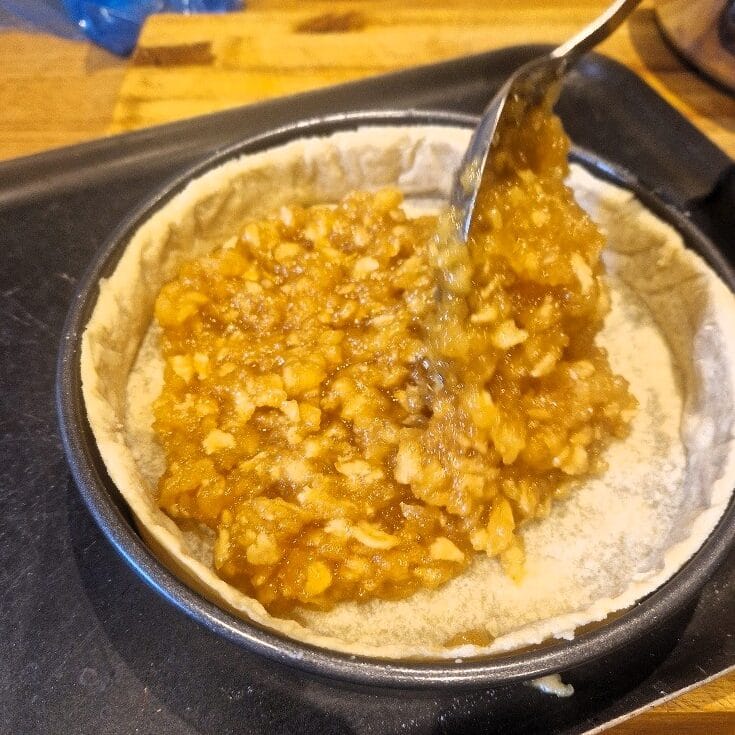
Now add the breadcrumbs, and stir well to combine. The breadcrumbs should be fully coated so they can soak up the syrup. Remove from the heat, and leave to stand for about 10 minutes.
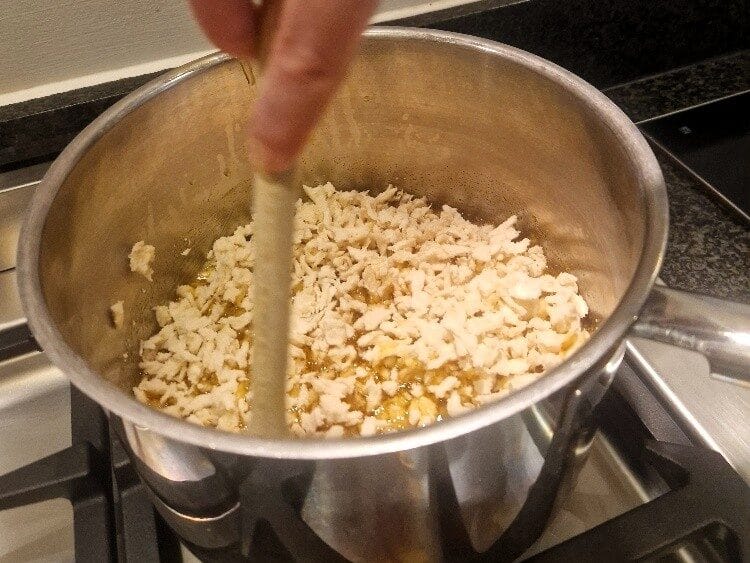
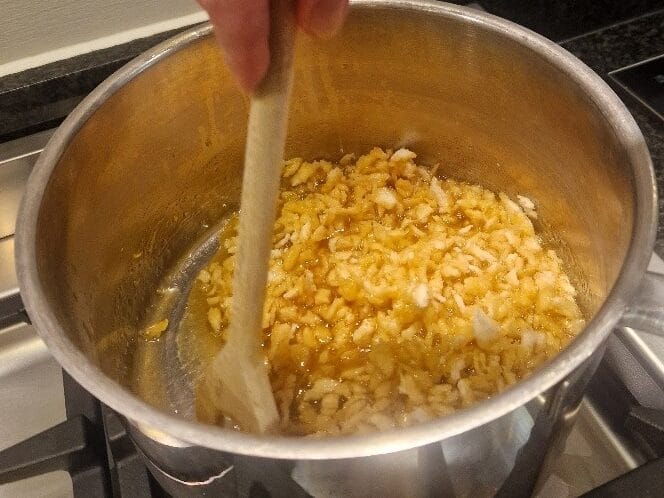
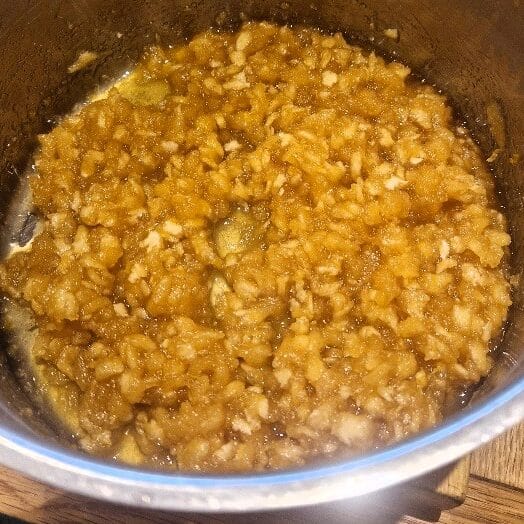
After standing, check the filling mixture. It is ready if the breadcrumbs are well-saturated in the syrup, and a little liquid syrup remains in the pan. Check this by dragging your spoon through the mixture. If syrup leaches out into the trail of your spoon, there is enough. If not, add more syrup from the tin, adding in small amounts, until the breadcrumbs release a little syrup. You may well not need to do this; we didn’t today.
Jake sticks his nose in
Emily & Estella are getting a bit ‘cheffy’ with this syrup nonsense. Yes, the filling is nicer if it oozes, but it will still be really nice if you just follow the original bread-to-syrup proportion in the recipe. Do let the mixture stand, though.
Filling, decorating & baking the treacle tart
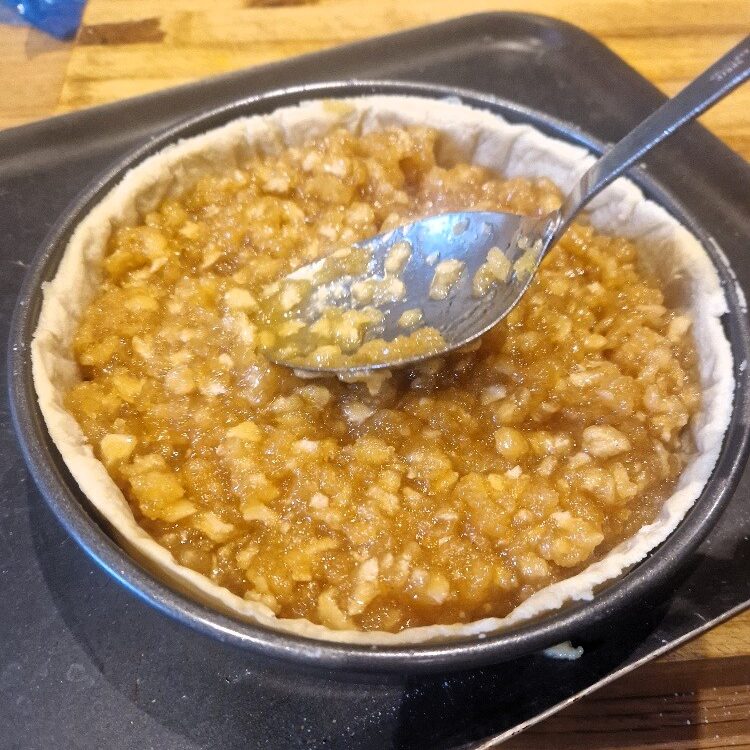
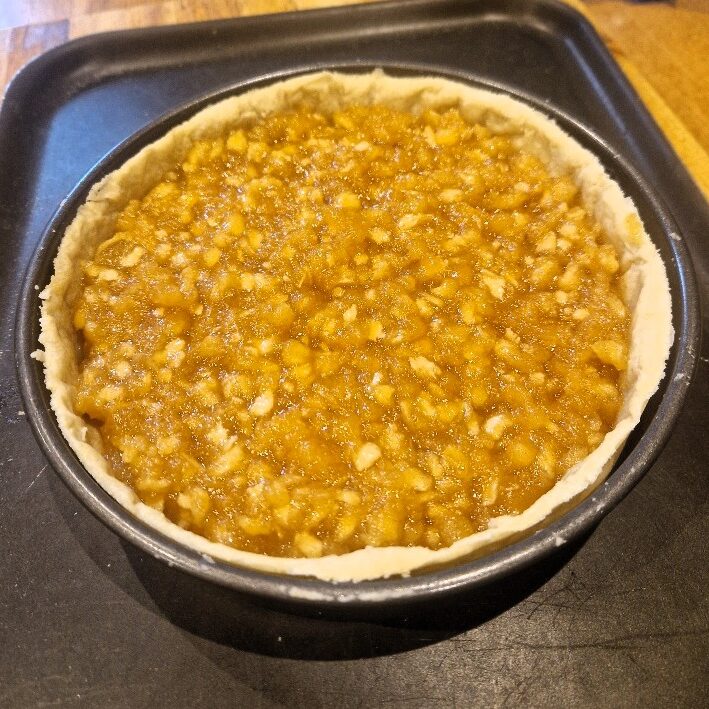
Place the tart case, still in its tin, onto a baking sheet. Now spoon in the treacle tart filling. Even it out into a well-filled, flat layer with the back of your spoon.
Jake sticks his nose in
You don’t have to place the tin on a baking tray; it can be placed straight onto an oven shelf. We use a tray, as if the tart leaks (the tin bottom is loose, and the filling can bubble, particularly if it is quite syrupy) it will make a horrible mess in your oven. Syrup, when baked on, is very hard to clean. A baking tray isn’t! Do take care when putting it in the oven however – on a tray, the tart tin can slip, so carry cautiously, holding the side of the tin.
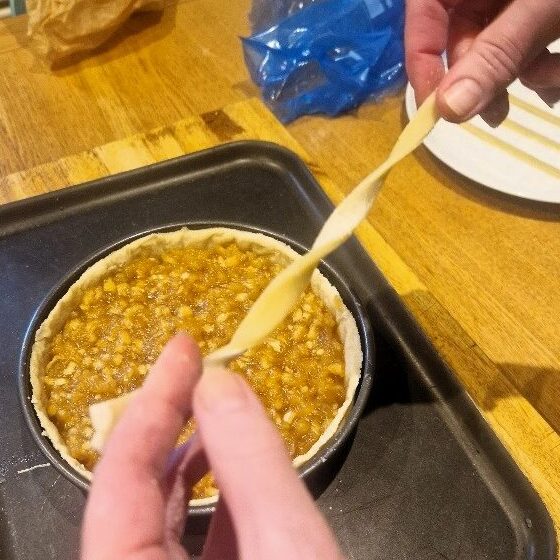
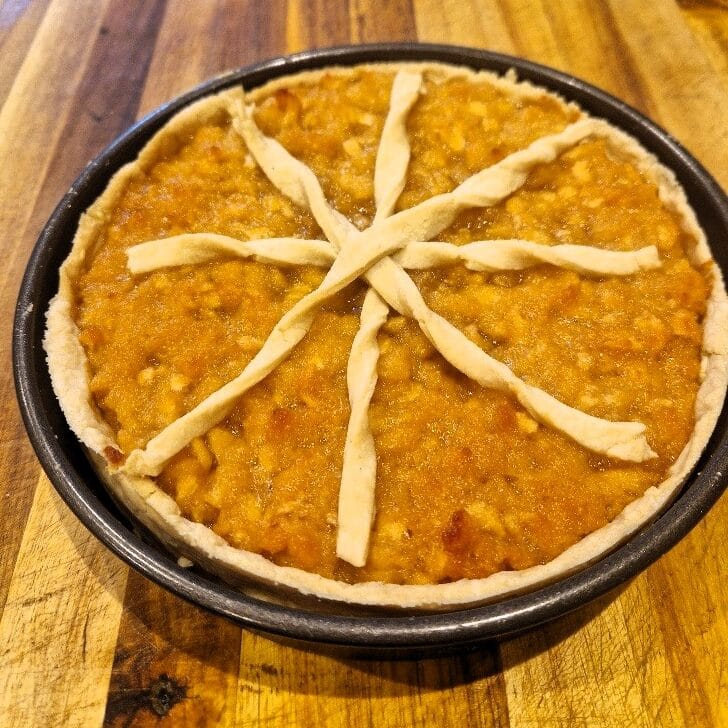
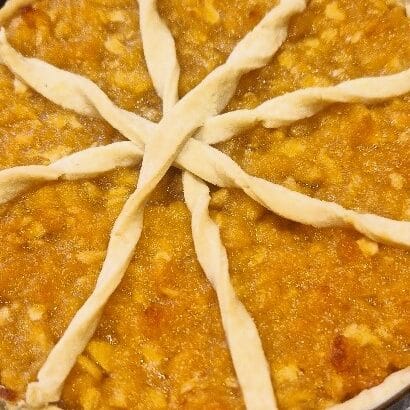
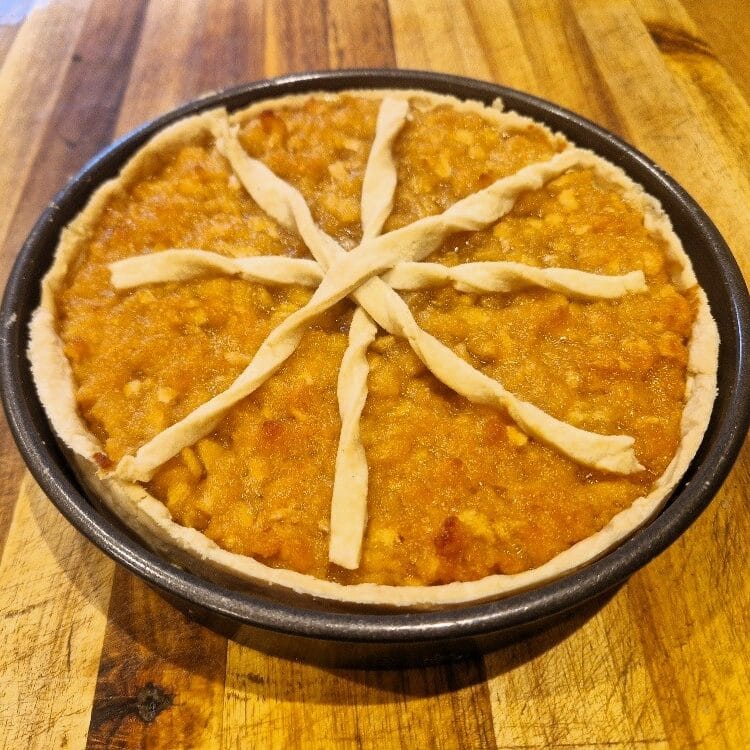
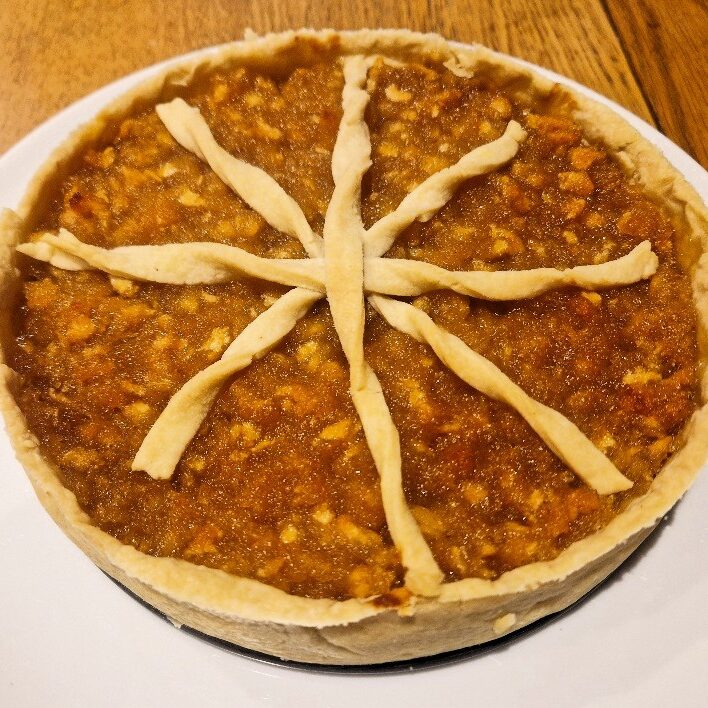
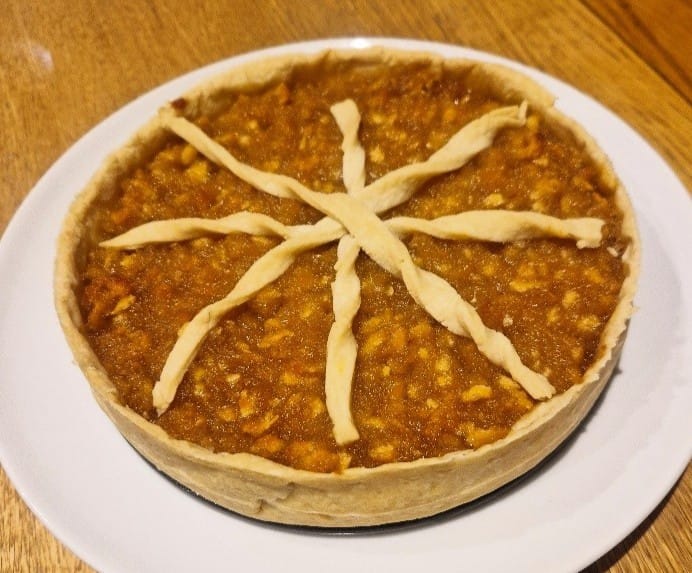
The treacle tart can be baked just as it is, with no decoration. It will still look very handsome! But we like to decorate the top. Katie suggests making a criss-cross lattice pattern by overlapping the pastry strips we made earlier, and this gives a nice effect. But we like to do as Bibi did, and decorate with a few pastry twists.
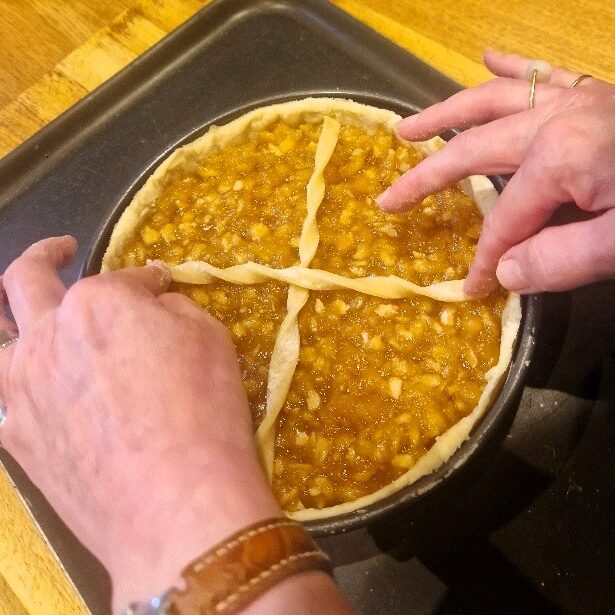
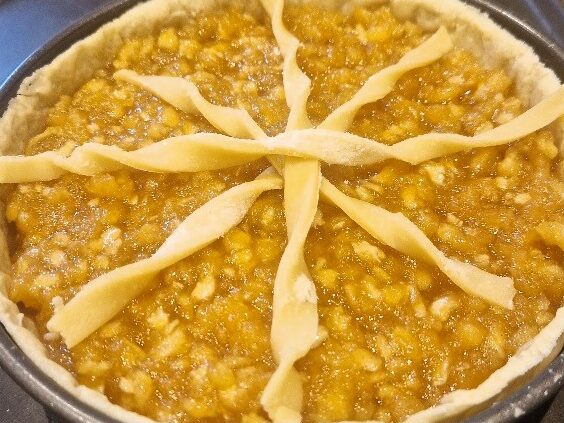
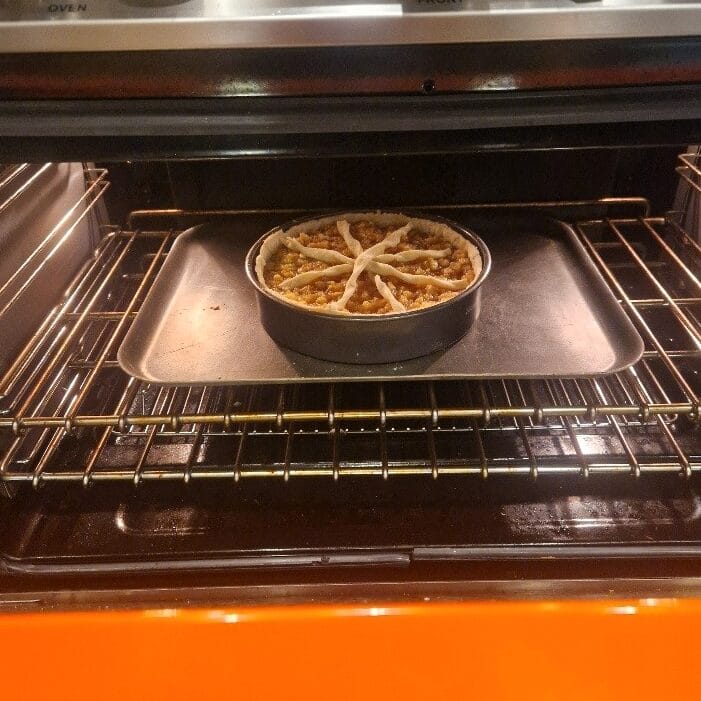
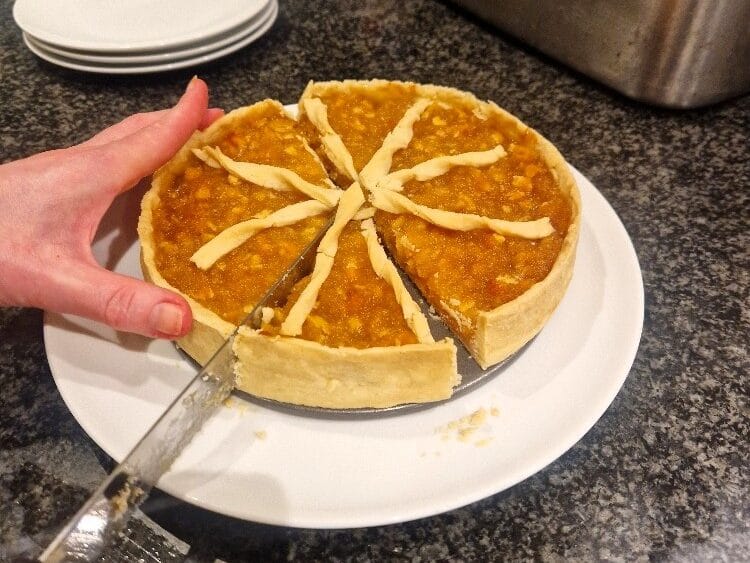
These are easy to do. Just gently twist each pastry strip a turn or two, taking care as they may be quite fragile, then place onto the tart. We like to create a sort of spoke, or wheel, patten by crossing them at the centre, as Bibi did. See below. Your treacle tart is ready for the oven.
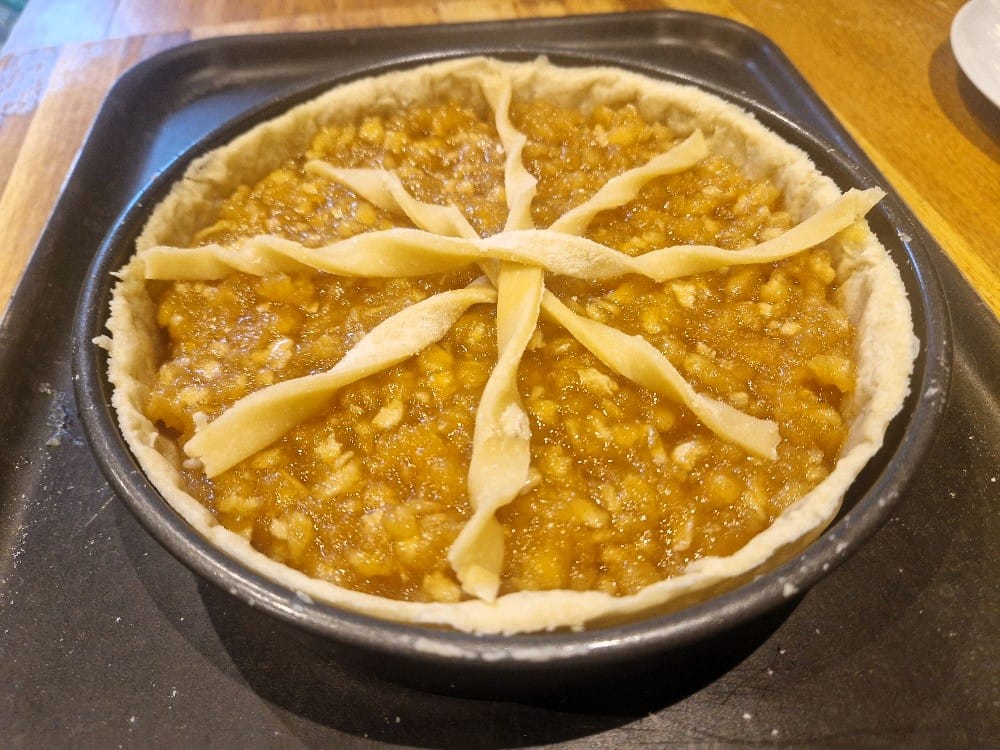
Place in a hot oven at 200C (180C fan) for 10 minutes. Then turn the temperature down to 180C (160C fan) and cook for about another 20 minutes, or until the filling is set and rich golden brown, and the pastry crisp, and slightly golden. If you have not decorated the top, you can cook at 180C (160C fan) for the full 30 minutes or so. The hotter initial oven is to ensure you fully cook the decorations.
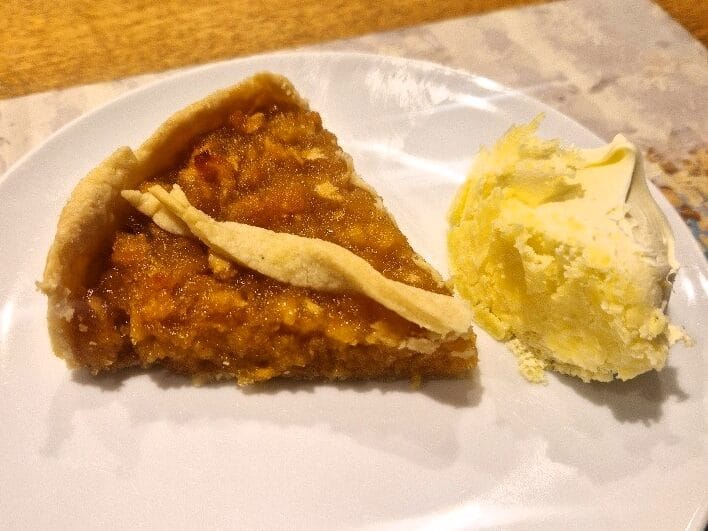
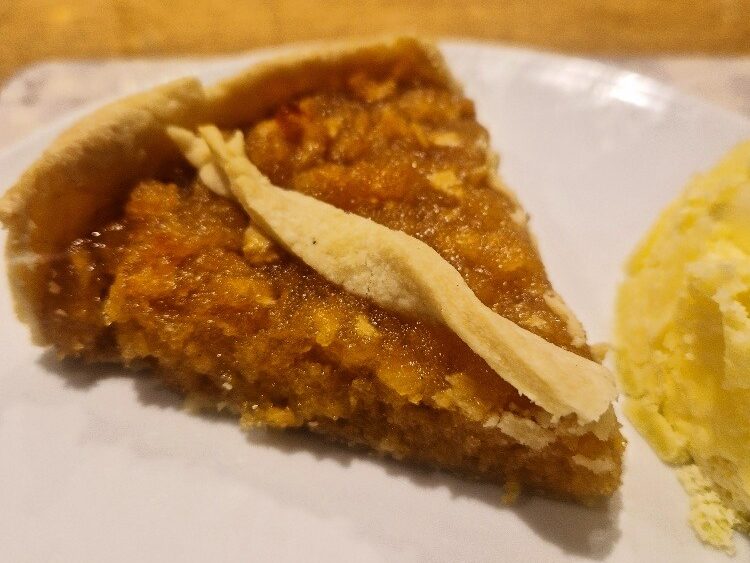
Allow the tart to cool in the tin a little before serving. Treacle tart can be served hot or cold. We like it best just slightly warm, or at room temperature.
Serving the treacle tart
The treacle tart will be much easier to serve if you remove it from the tin. As the base is loose, you just need to push this up, having first ensured there is nothing sticking at the edges. If any filling has bubbled up, you may need to knock this off the edge with a sharp knife, or run around your tart to release it, carefully, with a palate knife.
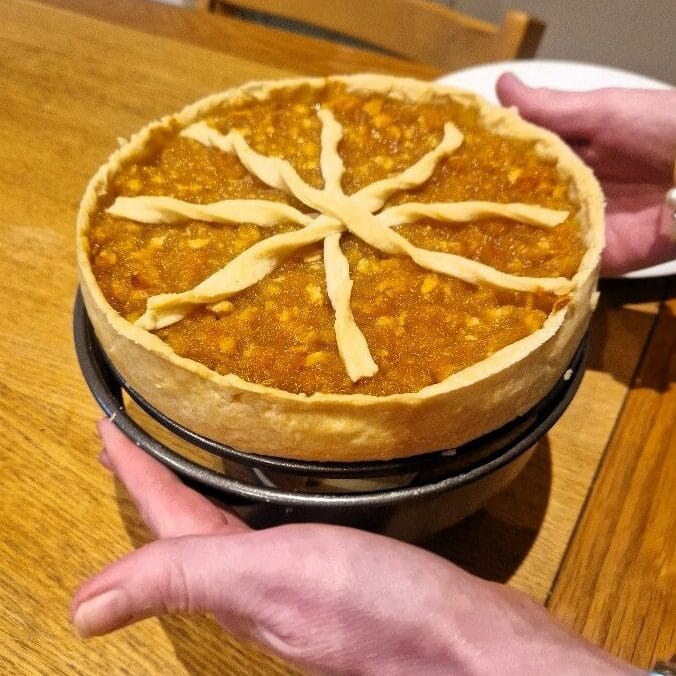
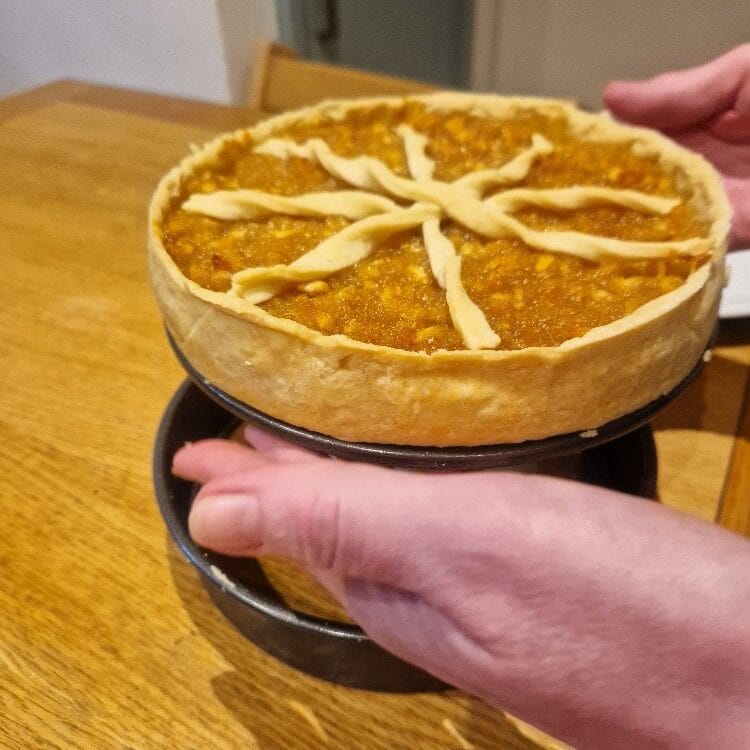
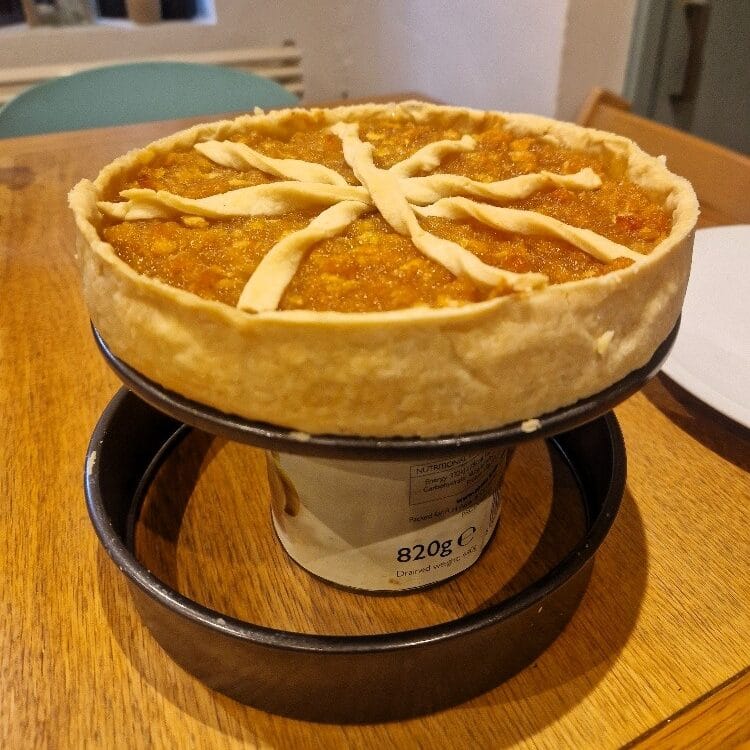
You can push the base up with your hand. But we like to do it on top of a large tin can, much as we did in our Cheesecake recipe. We find this much easier.
Once the treacle tart has cooled a little, about 10 to 15 minutes, you can remove the tin. Place the tart on top of the large can, then push the sides down, firmly but gently. As with the Cheesecake, we don’t tend to bother removing the base of the tin – this is just another point at which it the tart can break. But if it feels like it will come off easily, remove it. Either way place the tart onto a plate.
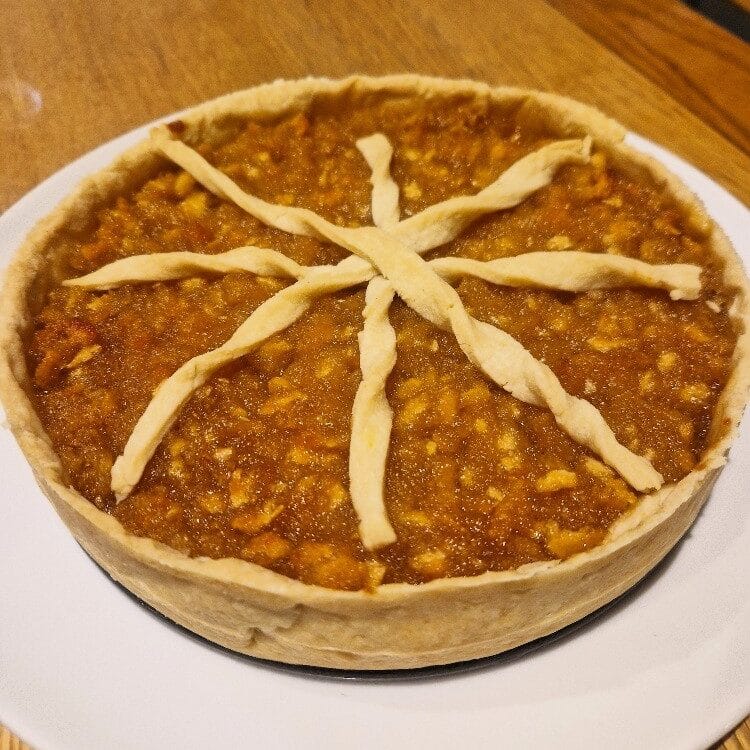
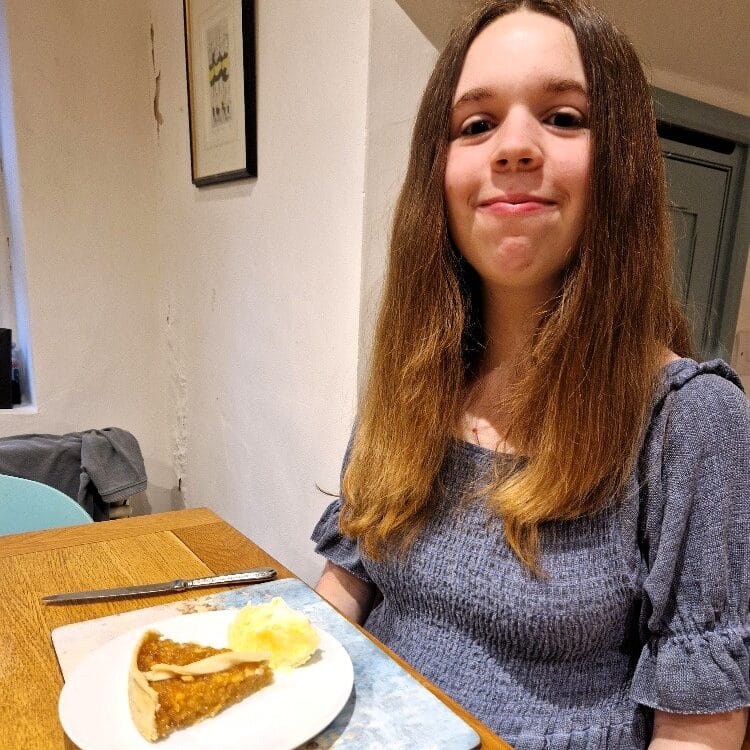
Slice and serve the treacle tart. Ours today gave 6 generous portions; it could easily have served 8. Serve with some cream. We particularly like clotted cream with our treacle tart, but thick double or jersey cream is also good.
Enjoy!
Bibi’s Tempting Treacle Tart
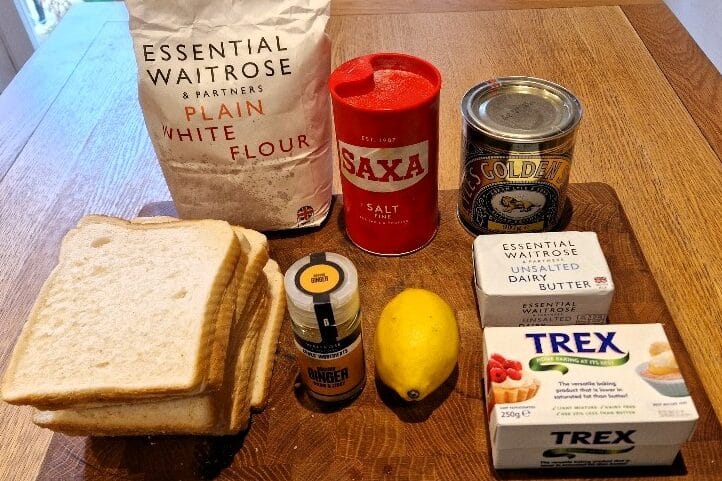
Ingredients
Equipment
Method
- For more detailed instructions see our pastry Tips – Dough Tip & Rolling Tip.
- Sift the flour into a large mixing bowl, and add a pinch of salt. Measure both fats onto a plate and cut into small cubes.
- Add some cold water. Start with 2 tablespoons, then add more if needed. Stir, using a table knife or fork, until the mixture starts to clump into doughy lumps. Then use your hands to bring it together into a ball, which should leave the sides of the bowl clean.
- Turn the dough onto a floured board, and knead well to form a smooth ball. See our dough Tip.
- Wrap the dough in cling film, or place in a plastic bag, and rest in the fridge for at least 10 minutes and up to about half an hour. If you leave it in longer, remove from the fridge about 20 minutes before rolling out.
- While the dough is resting, very lightly grease the tin. This is to prevent the filling from making the tart stick if it bubbles. (For most tarts do not grease.) Also flour the board and your rolling pin.
- Line the tin with the pastry, lifting it up on the rolling pin and draping it into the tin. Carefully fit the pastry into the tin. See our lining Tip. Trim off any excess pastry by rolling your pin over the top of the tin. Cover with cling film or a plastic bag, and rest in the fridge for at least an hour.
- If decorating the tart, collect up the dough scraps and form into a new ball. Roll out into a long, thin shape, at least the length the tart tin. Cut into strips and place on a plate. Cover with cling film or plastic and set in the fridge.
- Preheat the oven to 180C (160C fan). When the tart case has chilled, prick the bottom with a fork. Line the case with baking paper – scrunching it makes this easier – leaving some overhang. Fill with baking beans or a neutral weight like dried beans or rice. Place in the oven to bake blind for about 10 minutes. Remove from the oven and take out the paper & beans. Return the tart case to the oven for another 5 minutes or so, until the pastry looks dry, but still pale. See our blind baking Tip. Remove, and set aside to cool.
- You can buy ready-made breadcrumbs, but choose ones marked as 'soft'. To make your own, leave enough sliced white bread out overnight on a plate or board to go stale – you will need more than 200g bread as you are removing the crusts.
- When the bread is stale and dry, remove the crusts and discard. Tear the bread into pieces, and add to the bowl of a food processor or blender. Blizt into medium crumbs.
- If your bread is too wet to make crumbs in a processor, remove the crusts and rip the bread into tiny pieces. Put these on a baking tray and set in a low oven, about 120C (100C fan) until just very slightly crisp on the outside, about 10 minutes. Remove and allow to cool, mixing them up on the tray to help them crisp. See the breadcrumb section of our post above for more details.
- Zest & juice the lemon, then cut the zest finer. See our lemon Tip
- Measure the golden syrup directly into a large saucepan. Add the zest, juice and ground ginger (if using). Set over a medium heat until just hot.
- Stir in the breadcrumbs, remove from the heat and allow to stand for 10 minutes for the bread to soak up the syrup.
- The filling is ready when the breadcrumbs are well soaked, and a little syrup remains in the trail of your spoon when you drag it through the mixture, Add a little more syrup if it seems too dry, just until the breadcrumbs no longer absorb it.
- Preheat the oven to 200C (180C fan). Add the filling to the tart case, and smooth it down to form an even, flat surface.
- If decorating, twist the pastry strips once or twice and place on top of the tart to form a 'spoke' pattern, overlapping at the centre.
- Place in the oven and bake for 10 minutes. Then turn the heat down to 180C (160C fan) and bake for about another 20 minutes, or until the filling is golden brown, and the pastry is crisp.
- Allow the tart to cool for 10 minutes before removing from the tin. We do this by placing the tart on a large can, and pushing the sides of the tart tin down. See our post above. The tart can be served hot or cold; we like it just warm.
- Slice & serve with clotted or thick double cream.
- Enjoy!
Leave a Reply